
Replacing the oil seal on the front fork of your Kawasaki BN is an important maintenance task that can help improve the performance and extend the lifespan of your motorcycle. Over time, the oil seal may start to leak, causing the fork to lose its dampening capabilities and potentially leading to unsafe riding conditions. In this guide, we will walk you through the steps required to replace the oil seal on your Kawasaki BN front fork.
Step 1: Preparation and Safety
Before starting the oil seal replacement process, it is essential to ensure your safety and the safety of those around you. Make sure you have all the necessary tools and protective gear, including goggles and gloves. Additionally, always work in a clean and well-ventilated area to avoid any potential hazards.
Step 2: Removing the Front Fork
Start by removing the front wheel of your Kawasaki BN. Once the wheel is removed, you can proceed to detach the front fork from the motorcycle. To do this, locate the fork tubes at the front of the bike and loosen the triple clamp bolts that hold them in place. Carefully slide the fork tubes out of the triple clamps and lower them down, ensuring they do not come into contact with any other parts of the motorcycle.
Step 3: Removing the Old Oil Seal
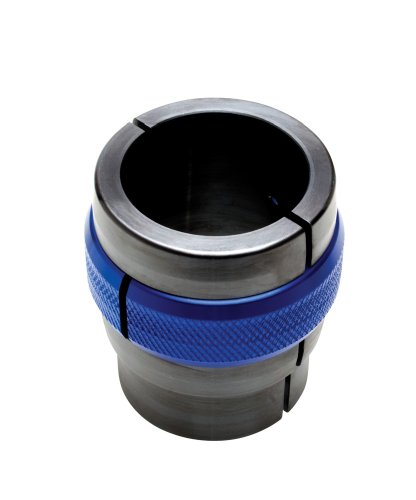
With the front fork removed from your Kawasaki BN, you can now proceed to remove the old oil seal. Using a suitable tool, carefully pry out the old oil seal from the fork tube. Take your time and make sure to avoid damaging the tube or any other surrounding components. Once the old oil seal is removed, clean the fork tube thoroughly to remove any dirt or debris.
Step 4: Installing the New Oil Seal
With the fork tube clean, you are ready to install the new oil seal. Apply a thin layer of clean fork oil or a suitable lubricant to the new oil seal to help it slide into place smoothly. Carefully press the new oil seal onto the fork tube, making sure it is seated properly and evenly. Take care not to damage the seal during this process.
Step 5: Reassembling the Front Fork
Now that the new oil seal is in place, you can start reassembling the front fork. Carefully slide the fork tubes back into the triple clamps and tighten the triple clamp bolts to the manufacturer’s specifications. Reinstall the front wheel, making sure it is properly aligned and tightened.
Step 6: Final Checks
Before calling the job complete, it is crucial to perform some final checks. Ensure that the fork tubes move smoothly, without any restrictions or wobbling. Also, check for any signs of leakage around the new oil seal. If everything looks good, take your Kawasaki BN for a test ride to ensure that the front fork performs as expected.
By following these steps, you can successfully replace the oil seal on your Kawasaki BN front fork, helping to maintain the performance and safety of your motorcycle. If you are not confident in your abilities or have any concerns, it is always recommended to consult a professional mechanic or your local Kawasaki dealer.
Step-by-step guide to replace oil seal on Kawasaki BN front fork
Replacing the oil seal on your Kawasaki BN front fork can help ensure a smooth and well-performing ride. Follow these steps to learn how to replace the oil seal on your Kawasaki BN front fork.
What you will need:
Before you get started, gather the following tools and items:
- Socket wrench
- Allen wrench set
- Fork oil
- New oil seal
- Clean cloth
- Fork seal driver or suitable substitute
- Plastic bag or container
- Fork oil level gauge or other measuring device
Step 1: Preparation
Begin by ensuring that your motorcycle is placed on a stable and level surface. Use a socket wrench to remove the front wheel and fender, allowing you to access the front fork assembly.
Step 2: Drain the fork oil
Locate the drain screw at the bottom of the front fork and loosen it carefully. Place a plastic bag or container beneath the fork to catch the draining oil. Allow the fork oil to fully drain from the fork assembly.
Step 3: Remove the front fork
Using a socket wrench or appropriate tool, loosen and remove the bolts that secure the front fork to the motorcycle frame or triple clamps. Carefully remove the front fork assembly from the motorcycle.
Step 4: Disassemble the front fork
Using an Allen wrench, carefully remove the top cap from the front fork assembly. This will allow you to access the oil seal and other components inside the fork. Take note of the order in which the components are arranged for ease of reassembly later.
Step 5: Remove the oil seal
Using a clean cloth and a suitable tool, carefully remove the old oil seal from the front fork assembly. Make sure to clean any excess oil or debris from the fork assembly before proceeding.
Step 6: Install the new oil seal
Take the new oil seal and apply a small amount of fork oil to the sealing lip. Carefully place the new oil seal onto the front fork assembly, ensuring it is aligned and seated properly in its position.
Step 7: Reassemble the front fork
Reassemble the front fork by following the reverse order of disassembly. Make sure to properly align and tighten all bolts and components. Use a fork seal driver or a suitable substitute to help seat the oil seal firmly.
Step 8: Refill fork with oil
Fill the front fork with the appropriate amount and type of fork oil using a fork oil level gauge or other measuring device. Refer to your motorcycle’s manual for the recommended oil volume and specifications.
Step 9: Reinstall front fork
Carefully reinstall the front fork assembly back onto the motorcycle, ensuring that all bolts are tightened securely. Reinstall the front wheel and fender to complete the process.
Step 10: Test and adjust
Once everything is reassembled, take your motorcycle for a short test ride to ensure the front fork is functioning properly. Adjust the fork oil level if necessary, following the manufacturer’s specifications.
Congratulations! You have successfully replaced the oil seal on your Kawasaki BN front fork. Regular maintenance and inspection of your front fork will help ensure optimal performance and safety.
Preparation for replacing oil seal
Before starting the process of replacing the oil seal on your Kawasaki BN front forke, it is important to gather all the necessary tools and materials. This will ensure that you have everything you need and can complete the task efficiently. Here are the steps you should follow:
- First, make sure you have a replacement oil seal that is compatible with your Kawasaki BN front forke. Check the owner’s manual or consult with a professional if you are unsure.
- Gather the necessary tools, which may include a socket wrench, pliers, screwdrivers, and a torque wrench. Ensure these tools are in good condition and appropriate for the job.
- Prepare a clean and well-lit workspace. It is important to have enough space to work comfortably and ensure that no dirt or debris falls into the fork assembly during the process.
- Ensure that the front end of your Kawasaki BN is securely supported. You may use a motorcycle stand or other means to hold the bike steady and prevent any accidents during the seal replacement.
- Finally, familiarize yourself with the repair instructions provided in the owner’s manual or any other reliable source. It is essential to follow the correct procedure and take necessary safety precautions.
By properly preparing for the oil seal replacement, you can ensure a smooth and successful repair process and prevent any issues or damage to your Kawasaki BN front forke.
Removing the old oil seal
To replace the oil seal on your Kawasaki BN front fork, you will need to first remove the old oil seal. Follow the steps below:
| 1. | Start by securing your motorcycle in a stable position to ensure safety during the process. |
| 2. | Loosen the front fork caps using a suitable wrench or socket. |
| 3. | Once the front fork caps are loose, remove them completely. |
| 4. | Drain the old fork oil into a suitable container by turning the front forks upside down. |
| 5. | Remove the front forks from the motorcycle using the necessary tools and techniques for your specific model. |
| 6. | With the front fork assembly removed, place it in a vice with soft jaws to secure it in place without causing any damage. |
| 7. | Locate the oil seal on the upper part of the front fork assembly. |
| 8. | Using a suitable tool, carefully pry out the old oil seal from its housing. Be cautious not to damage the surrounding areas. |
| 9. | Clean the area around the oil seal housing with a cloth or suitable cleaning solution to remove any dirt or debris. |
By following these steps, you will be able to successfully remove the old oil seal from your Kawasaki BN front fork.
Installing the new oil seal
Once you have removed the old oil seal and prepared the fork tube, it’s time to install the new oil seal. Follow the steps below to ensure proper installation:
1. Apply lubricant
Before inserting the new oil seal, it’s important to apply a thin layer of lubricant to the seal. This will help ensure smooth operation and prevent damage during installation.
2. Position the seal
Place the new oil seal onto the fork tube, making sure it is centered and aligned correctly. Take care not to damage the seal during this process.
3. Press the seal in
Using a seal driver or a suitable-sized PVC pipe, gently tap the oil seal into place. Start by applying light force and gradually increase it until the seal is fully seated. Be cautious not to use excessive force, as this can damage the seal or fork tube.
4. Check the alignment
After installing the new oil seal, inspect the alignment to ensure it is flush with the fork tube. This will help prevent leaks and maintain proper fork function. If needed, adjust the position of the seal using a soft mallet or hammer, being careful not to cause any damage.
5. Reassemble the front fork
Once the new oil seal is installed, proceed to reassemble the front fork. Follow the reverse order of disassembly steps, making sure to tighten all bolts and screws to the manufacturer’s specified torque settings.
By following these steps, you will be able to successfully install the new oil seal on your Kawasaki BN front fork. Remember to always consult the manufacturer’s instructions and use proper tools and techniques to ensure safety and optimal performance.
Final steps and testing
Once you have successfully replaced the oil seal on your Kawasaki BN front fork, it is important to follow these final steps to ensure that the replacement was done correctly and that your fork is functioning properly.
Step 1: Reassemble the front fork
Start by carefully reassembling all the components of the front fork, including the inner tube, outer tube, and dust seals. Make sure to tighten all the bolts and screws to the manufacturer’s specifications.
Step 2: Refill the fork with oil
Using the recommended type and amount of fork oil, refill the front fork to the appropriate level. This will help maintain smooth suspension action and prevent damage to the fork seals.
Step 3: Perform a visual inspection
Thoroughly inspect the front fork for any signs of leakage or misalignment. Look for any oil leaks around the oil seal, dust seals, or any other areas. Ensure that all the components are properly aligned and there are no loose or damaged parts.
Step 4: Test the fork’s performance
Take your motorcycle out for a test ride to evaluate the performance of the front fork. Pay attention to the suspension action, stability, and any abnormal noises or vibrations. If you notice any issues, such as excessive bouncing or poor handling, it may indicate a problem with the oil seal replacement.
If you are unsure about the results of your test ride or have any concerns, it is recommended to consult a professional mechanic or Kawasaki service center for further inspection and assistance.
By following these final steps and conducting proper testing, you can ensure that your oil seal replacement on the Kawasaki BN front fork has been successful and your motorcycle is safe to ride.


