

Whether you are a seasoned cyclist or a beginner who wants to make some adjustments to your bike, knowing how to take off front forks is an essential skill. Front forks are an integral part of a bicycle’s suspension system, and they may need to be removed for various reasons such as maintenance, repair, or upgrading to a different set of forks.
Before you begin, it is important to note that removing front forks requires some technical knowledge and specific tools. If you are not confident in your abilities, it is highly recommended to seek professional assistance. However, if you are up for the challenge and want to save some money, we will guide you through the process step by step.
The first step is to gather the necessary tools:
- A set of Allen wrenches or a socket set
- A torque wrench
- A bike stand or a stable work surface
- Grease
Once you have the tools ready, it’s time to start the removal process. Follow these steps:
- Find a stable work surface or use a bike stand to secure your bike. Ensuring its stability is crucial for safety and efficiency.
- Use the appropriate Allen wrench or socket to remove the bolts that hold the front wheel in place. Set the wheel aside and make sure to keep all the small parts in a safe place.
- Now, it’s time to focus on removing the front forks. Locate the headset cap on the top of the fork steerer tube. Loosen the headset cap with an Allen wrench or the appropriate tool, but make sure not to remove it completely.
- Once the headset cap is loose, you can now loosen the stem bolts. These bolts secure the stem to the steerer tube. Typically, there are two bolts that need to be loosened evenly.
- Now that the stem bolts are loose, gently tap the top of the bolt with a rubber mallet or a block of wood to loosen the stem from the steerer tube. The stem should come off easily.
- With the stem removed, you can now slide the front forks out of the bike frame. Be cautious as the forks might be heavy and require some maneuvering to get them out.
- Once the forks are out, take some time to inspect them for any signs of damage or wear. If necessary, this is a good opportunity to clean and grease the forks before reinstalling them or replacing them with new ones.
Remember, when reassembling the front forks, it is crucial to follow the manufacturer’s instructions and use the correct torque settings for all the bolts. Proper maintenance and care of your bike’s front forks are essential for optimal performance and safety during your rides.
Step-by-step guide to removing front forks on a bike
Removing front forks on a bike can be a necessary task when performing maintenance or repairs. Whether you need to replace them or simply want to clean and lubricate the fork seals, this step-by-step guide will walk you through the process.
|
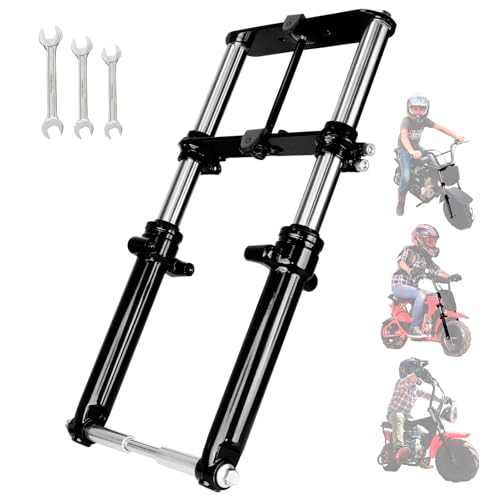
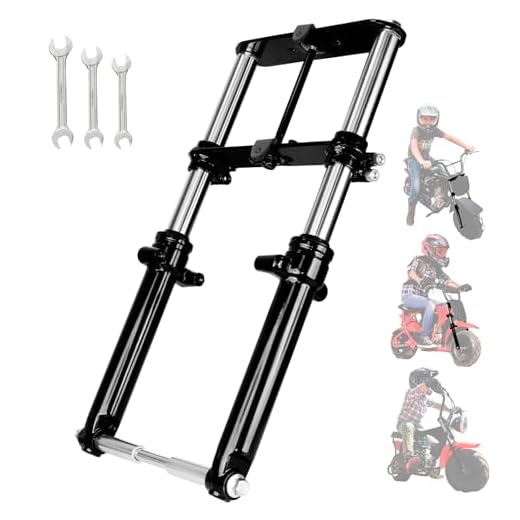
Tools and materials you will need: Must-Have
41mm Ringer Fork Seal Driver Tool Designed for easier, safer use
This innovative fork seal driver features a durable aluminum locking ring and is perfectly weighted for driving seals with ease. It prevents accidents by ensuring secure operation and reducing the risk of damage.
|
Step 1: Prepare your workspace Find a clean and well-lit area to work on your bike. Make sure you have enough space to maneuver and lay out your tools. |
|
Step 2: Loosen the axle pinch bolts Using a suitable wrench or Allen key, loosen the axle pinch bolts on both sides of the front wheel. This will allow you to remove the front wheel later on. |
Step 3: Remove the front wheel Once the axle pinch bolts are loosened, carefully lift the front wheel off the ground and slide it out of the fork dropouts. Set it aside in a safe place. |
|
Step 4: Remove the brake caliper Depending on your bike’s setup, you may need to remove the brake caliper before taking off the front forks. Use the appropriate tool to detach the caliper from the fork or fork brace. |
Step 5: Loosen the fork clamp bolts Look for the fork clamp bolts located at the top of the fork tubes. Loosen them using a socket wrench or an Allen key, depending on your bike’s configuration. |
|
Step 6: Slide the forks out Gently slide the front forks out of the fork clamps. Hold on to the lower part of the fork legs to prevent them from falling out abruptly. Keep in mind that the forks may still contain residual oil, so be prepared for some leaking. |
Step 7: Clean and inspect With the front forks removed, inspect them for any damage or wear. Clean them thoroughly using a rag or towel and remove any dirt or debris. Take this opportunity to check the fork seals and replace them if necessary. |
By following these steps, you should be able to successfully remove the front forks from your bike. Remember to exercise caution and take your time to ensure a safe and successful procedure.
Preparation
Before removing the front forks from your bike, it’s important to gather all the necessary tools and materials. Here’s what you’ll need:
- A bike stand or a sturdy support to keep your bike stable
- A set of allen wrenches or socket wrenches, depending on your bike’s specifications
- A torque wrench to properly tighten the bolts when reassembling
- A clean cloth or rag to wipe off any dirt or debris
- Grease or lubricant for the fork’s moving parts
- A clean and well-lit workspace
Once you have all the necessary tools and materials, make sure to clean your bike’s front end and remove any accessories or cables that might interfere with the fork removal process. It’s also a good idea to consult your bike’s user manual or look for specific guidelines and recommendations for your bike’s model and brand. Following these steps will help ensure a smooth and efficient front fork removal process.
Tools needed
Before you begin taking off the front forks on your bike, make sure you have the following tools:
1. Allen wrench set
You will need an Allen wrench set to loosen and remove the bolts that hold the front forks in place. Different sizes of Allen wrenches may be required depending on the specific bike model, so it’s a good idea to have a set with various sizes on hand.
2. Adjustable wrench
An adjustable wrench will be useful for removing the wheel axle nuts, as well as any other bolts or nuts that may need to be loosened during the fork removal process.
These are the basic tools you will need to take off the front forks on your bike. Depending on your bike’s specific design, you may also need additional tools such as a socket wrench, pliers, or a bike-specific fork removal tool. Refer to your bike’s owner’s manual or consult with a professional if you are unsure about the required tools for your particular bike model.
Loosening the stem
Before removing the front forks, you need to loosen the stem. The stem is the part of the bike that connects the handlebars to the forks and allows you to steer. Loosening the stem will make it easier to remove the forks later on.
Step 1: Gather the necessary tools
To loosen the stem, you will need a few tools:
| 1. | Allen key set |
| 2. | Adjustable wrench |
Step 2: Locate the bolts
Look for the bolts on the top of the stem. They are usually located near the handlebars.
Step 3: Loosen the bolts
Insert an appropriate-sized Allen key into the bolts and turn counterclockwise to loosen them. Loosen both bolts equally to ensure even pressure distribution.
Step 4: Tap the stem
Once the bolts are sufficiently loosened, gently tap the stem with a rubber mallet or a block of wood. This will help break any remaining bond between the stem and the forks.
With the stem loosened, you are now ready to proceed with removing the front forks from your bike.
Removing the front wheel
Before removing the front forks on a bike, you need to remove the front wheel. Here are the steps to follow:
Step 1: Gather necessary tools
Make sure you have the following tools ready:
- Adjustable wrench or a crescent wrench
- 5mm or 6mm Allen wrench, depending on your bike
- Work stand or a stable surface to support the bike
- Plastic bag or old cloth to protect the bike frame
Step 2: Shift gears
Before removing the front wheel, shift the gears to the smallest chainring and the smallest rear cog. This will relieve tension from the chain and make it easier to remove the wheel.
Step 3: Loosen the quick release skewer
Locate the quick release skewer on the front wheel hub. Use the 5mm or 6mm Allen wrench to loosen the skewer by turning it counterclockwise.
Step 4: Remove the wheel
Once the skewer is loose, you can now remove the wheel. Hold onto the wheel and lift it slightly off the ground. Pull the wheel straight out of the front fork dropouts.
Note: Some bikes may have a secondary attachment to secure the front wheel, such as a safety tab or a through-axle. Make sure to check your bike’s manual or consult a professional if you’re unsure about any additional steps.
Now that the front wheel has been removed, you can proceed with removing the front forks if needed.
Removing the Brake Caliper
To remove the front forks on your bike, you will first need to remove the brake caliper. The brake caliper is responsible for stopping the bike when the brake lever is pulled.
To remove the brake caliper, follow these steps:
- Start by loosening the brake cable tension. This can be done by loosening the bolt that attaches the cable to the brake caliper using a 5mm Allen wrench.
- Once the tension is released, you can locate the mounting bolts that attach the brake caliper to the fork. There are typically two bolts, one on the top and one on the bottom of the caliper.
- Using a 5mm Allen wrench, loosen and remove these mounting bolts. Make sure to keep track of the bolts so you don’t lose them.
- Once the bolts are removed, the brake caliper should be loose and able to be removed from the fork. Carefully slide the caliper off the fork and set it aside.
With the brake caliper removed, you can now proceed to remove the front forks from your bike. Make sure to follow the appropriate steps and take caution when handling the forks to prevent any damage.
Removing the front forks
Removing the front forks of a bike is a straightforward process that can be done with basic tools and a little patience. Whether you’re replacing worn-out forks or performing maintenance, here’s a step-by-step guide on how to remove the front forks:
1. Prepare your workspace
Start by finding a flat and stable surface to work on. Make sure you have enough space to maneuver the bike comfortably. Gather the necessary tools, including a wrench or socket set, pliers, and a torque wrench if available.
2. Loosen the front wheel
Using the appropriate size wrench or socket, loosen and remove the axle nuts or quick-release lever on both sides of the front wheel. Carefully slide the wheel out of the fork dropouts and set it aside.
3. Disconnect the brake caliper
If your bike has rim brakes, use a 5mm Allen wrench to loosen the bolt securing the brake caliper to the fork. Slide the brake caliper off the fork and set it aside. If your bike has disc brakes, you may need to refer to the specific brake manufacturer’s instructions.
4. Remove the headset cap and stem
Use the appropriate size wrench or Allen key to remove the bolts securing the stem to the fork steerer tube. Once the bolts are removed, gently tap the top of the stem to loosen it from the fork steerer tube. Slide the stem off the tube and set it aside. Remove the headset cap by loosening the bolt on the top.
5. Loosen the fork steerer tube
There is usually a bolt on the side of the fork steerer tube that holds it tightly in place. Use an appropriate size wrench to loosen this bolt. Once loosened, pull the fork tubes out of the bike frame carefully. If the fork tubes are stuck, you may need to gently apply some force or use a rubber mallet to loosen them.
6. Remove the front forks
With the fork tubes free from the bike frame, you can now remove the front forks completely. Carefully slide the fork tubes out, making sure not to scratch or damage the bike frame or other components.
Remember to keep all the removed parts organized and clean. When reinstalling the front forks, make sure to follow the reverse order of these steps and tighten all bolts and nuts to the manufacturer’s recommended torque specifications.


