If you love cycling and often embark on long rides, you might find yourself in need of more storage space on your bike. Adding a rack to your bike fork is a practical solution that allows you to carry essential items and equipment with ease. However, working out how to install a rack on your bike fork can be a bit daunting if you have never done it before. In this article, we will guide you through the process step by step, so you can confidently install a rack and enjoy the convenience it offers.
Step 1: Choose the Right Rack
Before you can install a rack on your bike fork, you need to choose the right rack for your needs. Consider factors such as weight capacity, compatibility with your bike’s fork, and the type of gear or bags you plan to carry. It is essential to select a rack that can support the weight you intend to carry without compromising the stability and performance of your bike.
Step 2: Gather the Necessary Tools
Once you have chosen the rack, gather the necessary tools to install it. You will typically need a set of hex keys, an adjustable wrench, and a screwdriver. Make sure you have these tools readily available before you begin the installation process.
Step 3: Remove the Front Wheel
To install a rack on your bike fork, you first need to remove the front wheel. This will provide you with easy access to the fork and the necessary mounting points. Use your tools to loosen the bolts or quick-release mechanism that holds the front wheel in place, and gently slide the wheel out of the fork.
Step 4: Attach the Rack to the Fork
With the front wheel removed, you can now attach the rack to the fork. Most racks come with detailed instructions that show you how to align and fasten the rack securely. Use your tools to tighten the bolts or screws that secure the rack to the fork, ensuring a firm and stable connection.
Step 5: Reattach the Front Wheel and Test
After securely attaching the rack to the fork, reattach the front wheel to its original position. Use your tools to tighten the bolts or quick-release mechanism, ensuring that the wheel is properly secured. Give the wheel a gentle spin and check for any wobbling or misalignment. If everything looks good, you can proceed to load your gear onto the rack and enjoy your next cycling adventure with added convenience.
Follow these steps carefully, and you’ll be able to work out a rack on your bike fork with ease. By installing a rack, you’ll have the freedom to carry all the necessary gear for your cycling journeys without compromising your comfort or performance.
What is a rack on bike fork?
A rack on a bike fork is a type of bike accessory that is used to carry additional cargo or equipment while riding. It is positioned on the front fork of the bike, near the front wheel, and provides a platform or frame to attach bags, panniers, or other storage containers.
The rack on bike fork is typically made of lightweight and durable materials such as aluminum or steel, which are able to withstand the weight of the cargo without compromising the stability or handling of the bike. It is designed to attach securely to the front fork of the bike, using mounting points or clamps that are specifically designed to fit the fork’s structure.
The main purpose of a rack on bike fork is to provide additional storage space for riders who need to carry extra gear, whether it’s for commuting, touring, or bikepacking. It allows cyclists to distribute the weight more evenly and improve the overall handling of the bike, compared to carrying everything on the rear rack or in a backpack.
| Advantages of using a rack on bike fork: |
|---|
| – Increased carrying capacity for extra gear |
| – Improved weight distribution and bike handling |
| – Allows for easy access to stored items while riding |
| – Reduces strain on the rear rack or backpack |
| – Keeps the cargo lower to the ground, improving stability |
Overall, a rack on bike fork is a valuable accessory for cyclists who want to expand their carrying capacity and improve the functionality of their bike. It offers a convenient and secure solution for transporting gear and enables riders to embark on longer trips or daily commuting with ease.
Benefits of using a rack on bike fork
A rack on the bike fork can provide numerous benefits for cyclists. Whether you are a casual rider or a seasoned adventurer, installing a rack on your bike fork can greatly enhance your cycling experience.
1. Increased carrying capacity
One of the main advantages of using a rack on your bike fork is the increased carrying capacity it provides. With a rack, you can easily attach panniers, baskets, or other storage solutions to your bike, allowing you to carry more gear, groceries, or other essentials. This is especially useful for commuters or bike tourists who need to transport their belongings with ease.
2. Balanced weight distribution
By attaching a rack to your bike fork, you can achieve a better weight distribution on your bicycle. This is important for maintaining stability and control, especially when riding with a heavy load. When the weight is evenly distributed between the front and rear of the bike, you’ll experience better handling and a smoother ride.
Furthermore, the rack on the bike fork helps to keep the weight low and centered, which is ideal for maintaining stability on uneven terrain or during challenging maneuvers.
3. Versatility
A rack on the bike fork adds versatility to your cycling setup. You can customize it to fit your specific needs and preferences. Some racks come with adjustable or interchangeable components, allowing you to easily switch between different storage options or configurations. This versatility ensures that you can adapt your bike to various situations, whether it’s a daily commute, a weekend adventure, or a long-distance tour.
Moreover, the ability to attach a rack on the bike fork doesn’t limit the use of other racks on the rear of your bike, thereby providing even more storage options.
4. Improved aerodynamics
Using a rack on the bike fork can also improve your aerodynamics. By keeping your gear or cargo on the front of the bike, you can reduce wind resistance and create a more streamlined profile. This can result in less energy expenditure and a faster, more efficient ride.
Overall, a rack on the bike fork is a valuable accessory that offers increased carrying capacity, better weight distribution, versatility, and improved aerodynamics. Whether you are commuting, touring, or running errands around town, a rack on your bike fork can greatly enhance your cycling experience.
Step-by-step guide on how to work out rack on bike fork
Adding a rack to your bike fork can greatly increase its carrying capacity and allow you to transport more gear on your rides. Follow these simple steps to work out a rack on your bike fork:
1. Choose the right rack: Start by selecting a rack that is specifically designed to be installed on your bike fork. Look for a rack that is compatible with the diameter and mounting style of your fork.
2. Gather the necessary tools: Before you begin, make sure you have all the tools you will need for the installation. This may include Allen wrenches, a screwdriver, and any specific tools required for your particular rack.
3. Remove the front wheel: To install the rack, you will need to remove the front wheel of your bike. Use the quick release or loosening mechanism on your wheel to detach it from the fork. Set the wheel aside in a safe place.
4. Prepare the fork: Clean the fork and inspect it for any damage or debris that could affect the installation. Clear away any dirt or grime that may interfere with the rack’s mounting points.
5. Attach the rack: Position the rack on the fork in the desired location. Align the mounting holes on the rack with the corresponding holes on the fork. Use the provided bolts or screws to secure the rack to the fork. Tighten them securely, but be careful not to overtighten and damage the fork or rack.
6. Test the stability: After attaching the rack, give it a gentle tug to ensure it is securely fastened. Make sure there is no wobbling or shifting that could affect the stability of the rack while riding.
7. Reinstall the front wheel: Once the rack is securely attached, reinstall the front wheel onto the fork. Use the quick release or tightening mechanism to tighten the wheel back onto the fork. Make sure it is centered and secure.
8. Adjust and load the rack: Depending on the type of rack you have installed, you may need to make any necessary adjustments to ensure it is level and balanced. Once the rack is adjusted, load your gear onto it carefully, distributing the weight evenly on both sides of the bike.
9. Test the bike: Take a short test ride to ensure the rack is properly installed and stable. Pay attention to any unusual noises or vibrations that could indicate a problem with the rack or its attachment to the fork.
10. Enjoy your enhanced carrying capacity: Now that you have successfully worked out a rack on your bike fork, you can take advantage of the extra storage space it provides. Whether you’re commuting, touring, or running errands, your bike will be ready to carry all your gear with ease!
Step 1: Choose the right rack for your bike fork
When it comes to working out a rack on your bike fork, the first step is to choose the right rack that is compatible with your specific bike fork. Not all racks are designed to fit every type of fork, so it’s important to do some research and find one that is suitable for your bike.
Considerations when choosing a rack
Before making a final decision, there are several factors to consider:
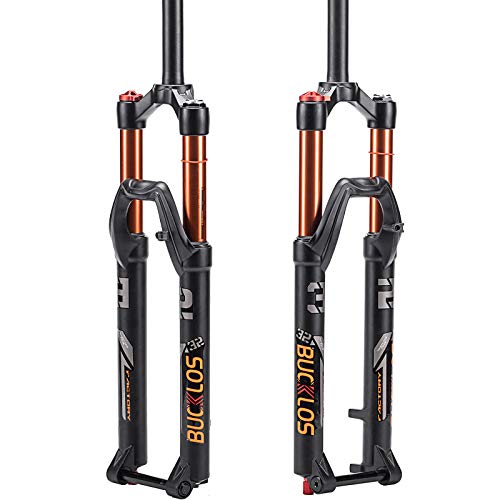
- Type of fork: Determine whether your bike has a suspension fork or a rigid fork. Suspension forks have different mounting options and weight limits compared to rigid forks, so make sure to choose a rack that is compatible with your specific fork type.
- Weight capacity: Take into account the weight capacity of the rack. Consider the weight of the items you plan to carry and make sure the rack can safely support them. Overloading the rack can lead to instability and potential damage to your bike or gear.
- Mounting system: Check the mounting system of the rack and ensure it is compatible with your fork. Common mounting systems include quick-release skewers, eyelets, and through-axles. Choose a rack that can be securely attached to your fork without any compatibility issues.
- Rack style: Decide on the style of rack that suits your needs. There are various types of racks available, including front-mounted racks, rear-mounted racks, and low-rider racks. Consider your bike’s geometry, the type of riding you’ll be doing, and the gear you plan to carry when choosing a rack style.
By carefully considering these factors and choosing the right rack for your bike fork, you’ll ensure a secure and reliable setup for carrying gear on your cycling adventures.
Step 2: Prepare your bike fork for installation
Before you can install a rack on your bike fork, you need to make sure it is properly prepared. Follow these steps to prepare your bike fork for the installation:
1. Remove any existing accessories
Start by removing any existing accessories from your bike fork, such as fenders or front lights. These accessories may interfere with the installation process or limit the rack’s functionality.
2. Clean the fork
Take a clean cloth or rag and wipe down the fork to remove any dirt, dust, or debris. It’s essential to have a clean surface for attaching the rack securely.
3. Inspect the fork
Examine your bike fork for any signs of damage or wear. Look for cracks, dents, or bent areas that could affect the stability of the rack. If you notice any issues, it’s best to replace the fork before installing a rack.
4. Check compatibility
Make sure that the rack you have is compatible with your bike fork. Check the specifications and guidelines provided by the rack manufacturer to ensure a proper fit. Some racks may only work with specific fork types or sizes, so double-check before proceeding.
5. Gather necessary tools
Before installing the rack, gather all the necessary tools you’ll need, such as allen wrenches, screwdrivers, or any other tools mentioned in the installation instructions provided with the rack.
Step 3: Install the rack on your bike fork
Once you have chosen the right rack for your bike fork, it’s time to install it. Follow these steps to properly install the rack:
Step 1: Prepare the rack
Start by making sure the rack is clean and free from any dirt or debris. This will ensure a secure and stable installation.
Step 2: Align the mounting brackets
Take the rack and align the mounting brackets with the holes on the bike fork. Make sure they are centered and positioned correctly.
Step 3: Secure the rack
Once the mounting brackets are aligned, use the included screws or bolts to secure the rack to the bike fork. Make sure to tighten them securely, but avoid over-tightening to prevent damage to the fork.
Note: The required screw or bolt size may vary depending on the rack and the specific bike fork. Refer to the rack’s instructions for the recommended size and torque specifications.
Step 4: Test the stability
After securing the rack, give it a gentle shake to test its stability. It should be firmly attached to the bike fork without any noticeable movement or wobbling.
By following these steps, you will be able to successfully install a rack on your bike fork. This will provide you with a convenient and secure way to carry additional items during your rides.