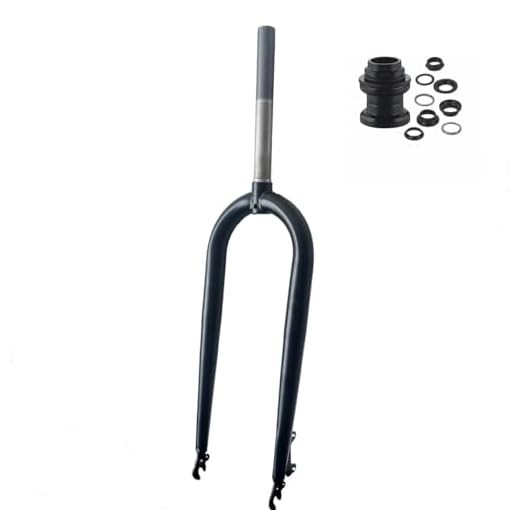
Knowing the correct length to cut your fork steerer is essential for a smooth and comfortable ride. The steerer tube is the part of the fork that extends upward and connects to the handlebars, allowing you to steer the bike. Cutting the steerer tube to the correct length is a crucial step in the assembly process, as it affects the bike’s handling, stability, and overall performance.
When determining the correct length to cut your fork steerer, there are a few factors to consider. First and foremost, it is important to choose a length that allows for proper adjustment of the stem and spacers. The steerer tube should be long enough to accommodate the stem height you desire, while still leaving ample room for the necessary spacers to achieve the desired handlebar height.
It is also important to consider your riding style and preferences. A shorter steerer tube will result in a lower handlebar position, which can enhance aerodynamics and provide a more aggressive riding position. On the other hand, a longer steerer tube will result in a higher handlebar position, which can be more comfortable for casual riding or riders who prefer a more upright position.

To determine the correct length to cut your fork steerer, it is recommended to consult with a professional bike mechanic or refer to the manufacturer’s guidelines. They will be able to take into account your specific bike setup, riding style, and preferences to provide you with the most accurate recommendation. By cutting your fork steerer to the correct length, you can optimize your bike’s performance and ensure a comfortable ride.
How to Determine the Correct Length for Cutting a Fork Steerer
When it comes to cutting a fork steerer, it is important to determine the correct length to ensure the safety and performance of your bike. Here are some steps to help you determine the correct length:
1. Measure the Head Tube: Start by measuring the head tube of your bike. This is the part of the frame where the fork steerer will be inserted. Measure the length of the head tube from the bottom to the top.
2. Determine Stem Height: Next, determine the height of the stem you will be using. The stem is the part that connects the fork steerer to the handlebars. Measure the height of the stem from the bottom to the top.
3. Subtract Stem Height from Head Tube Length: Subtract the height of the stem from the length of the head tube. This will give you the maximum length of the fork steerer that you can cut.
4. Consider Spacers: If you plan on using spacers between the stem and the headset, make sure to account for their height as well. Measure the height of the spacers and subtract it from the maximum length of the fork steerer calculated in the previous step.
5. Cut with Caution: Once you have determined the correct length for cutting the fork steerer, make sure to double-check your measurements and mark the cutting point on the steerer tube. Use a proper cutting tool, such as a hack saw or a pipe cutter, and cut the steerer tube in a straight line.
6. Install Headset and Stem: After cutting the fork steerer to the desired length, install the headset and stem according to the manufacturer’s instructions. Ensure that everything is securely tightened and properly aligned.
Remember, if you are unsure about cutting the fork steerer yourself, it is always best to consult a professional bike mechanic to ensure the job is done correctly. Cutting the fork steerer too short can lead to unsafe riding conditions, while leaving it too long can affect the bike’s handling and performance.
Importance of Proper Fork Steerer Length
The fork steerer, or the tube that connects the fork to the bicycle frame, plays a crucial role in determining the overall stability and handling of the bike. It is important to properly cut the fork steerer to the correct length to ensure optimal performance and safety.
One key aspect of cutting the fork steerer is ensuring that it is long enough to accommodate necessary components such as spacers and stem height adjustments. If the steerer is cut too short, it may limit the adjustability options and make it difficult to achieve a comfortable riding position.
On the other hand, if the fork steerer is cut too long, it can have negative effects on the bike’s handling. An excessively long steerer can create unnecessary flex and compromise the structural integrity of the fork. This can result in a loss of control and stability, especially during high-speed descents or aggressive cornering.
It is essential to strike the right balance when cutting the fork steerer. By accurately measuring and trimming the steerer to the appropriate length, cyclists can optimize their bike’s performance and ensure a safe and enjoyable riding experience.
When in doubt, it is always recommended to consult a professional bike mechanic or refer to the manufacturer’s guidelines for the specific bike model. They can provide expert advice and guidance on the proper fork steerer length based on the rider’s preferences and intended use of the bike.
Remember, a properly cut fork steerer is more than just a cosmetic consideration; it is a fundamental aspect of the bike’s functionality and safety.
Tools and Measurements Required
Before you can start cutting your fork steerer, you will need a few tools and measurements to ensure a proper fit. Here are the essential items you’ll need:
1. Fork Cutting Guide
A fork cutting guide is a specialized tool designed to help you make precise and straight cuts on your fork steerer. It usually consists of a clamp that attaches to the steerer tube and a cutting guide that ensures a straight cut. This tool is crucial in achieving a clean and accurate cut.
2. Measuring Tape or Ruler
You’ll also need a measuring tape or ruler to determine the desired length of your fork steerer. Measure from the base of the crown race seat to the top of the steerer tube, ensuring that you account for any spacers or headset components that may be installed. Accuracy in measurement is key to achieving the desired ride height and fit.
Make sure to double-check your measurements and consider any personal preferences or bike geometry considerations before proceeding.
Once you have these essential tools and measurements, you can proceed with confidence in cutting your fork steerer to the appropriate length.
Step-by-Step Guide on Determining Fork Steerer Length
When it comes to cutting the fork steerer, it is crucial to determine the appropriate length to ensure a proper fit and optimal performance of your bicycle. Follow these steps to accurately measure and cut your fork steerer:
Step 1: Prepare the Necessary Tools
Before getting started, gather the following tools:
- A measuring tape or ruler
- A marker or pencil
- A hacksaw or reciprocating saw
- A cutting guide or pipe cutter (optional)
- Sandpaper or a file (for smoothing rough edges)
Step 2: Install the Fork
Mount the fork onto the bicycle frame, ensuring that it is securely in place. Make sure that the headset and stem are properly installed and tightened.
Step 3: Measure the Desired Steerer Length
Using a measuring tape or ruler, measure the distance between the top of the stem and the top of the fork steerer. This is the desired length of the steerer after it is cut.
Note: It is recommended to leave an extra 10-20mm of steerer length for future adjustments.
Step 4: Mark the Steerer
With a marker or pencil, make a clear mark on the steerer at the desired length. Ensure that the mark is visible and accurate, as it will serve as a guide for cutting.
Step 5: Cut the Steerer
Using a hacksaw or reciprocating saw, carefully cut the steerer at the marked point. Take your time and make slow, precise cuts to avoid any mishaps or damage to the steerer.
Tip: If you have a cutting guide or pipe cutter, you can use it to ensure a straight and even cut.
Step 6: Smooth the Cut Edge
After cutting, use sandpaper or a file to smooth any rough edges on the cut end of the steerer. This will help prevent any potential injuries and make it easier to install additional components.
Step 7: Reinstall the Fork
Once the cut is smooth, reinstall the fork onto the bicycle frame. Double-check that all components are tightened correctly and securely, and make any necessary adjustments.
Following these steps will ensure that you cut the fork steerer to the correct length, allowing for a safe and efficient cycling experience. Remember to always prioritize safety and precision when working with your bicycle’s components.
Considerations for Different Types of Bicycles
When it comes to cutting the fork steerer on a bicycle, there are several considerations that vary depending on the type of bicycle. Here are some factors to keep in mind for different types of bicycles:
1. Road Bicycles:
For road bicycles, it is important to consider the intended use and riding position. If you plan to ride in an aggressive, aerodynamic position, you may want to leave a longer fork steerer to allow for more handlebar height adjustment. However, if you prefer a more relaxed riding position, a shorter fork steerer may be more appropriate.
2. Mountain Bikes:
Mountain bikes often require a longer fork steerer to accommodate suspension travel and handlebar height adjustments. It is important to consider the type of suspension system on your mountain bike, as well as any additional components such as stem risers or spacers. These factors can impact the length of the fork steerer that is needed.
3. Hybrid Bicycles:
Hybrid bicycles typically have a more upright riding position compared to road or mountain bikes. This means that a shorter fork steerer may be appropriate, as it allows for a more comfortable riding position. Consider the desired handlebar height and adjust the length of the fork steerer accordingly.
4. Touring Bicycles:
Touring bicycles are designed for long-distance rides and often have a more relaxed riding position. As such, a longer fork steerer may be suitable to accommodate front racks and provide more handlebar height adjustment. Consider the specific requirements of your touring setup and adjust the fork steerer accordingly.
It is always recommended to consult a professional bike mechanic for assistance in determining the appropriate length to cut the fork steerer on your bicycle. They will have the expertise to ensure a proper fit and riding experience.
Expert Tips for Cutting a Fork Steerer
When it comes to cutting a fork steerer, there are a few expert tips to keep in mind. Whether you are replacing your fork or simply adjusting the height, these tips can help ensure a clean and precise cut.
1. Measure Twice, Cut Once
Before cutting the steerer tube, it is important to measure the desired length accurately. Use a ruler or tape measure to measure from the top of the steerer tube to the desired height. Double-check your measurements before making any cuts to avoid any costly mistakes.
2. Use the Right Tools
Invest in a proper cutting tool designed specifically for cutting fork steerers. A sharp hacksaw or a steerer tube cutting guide with a saw guide can help ensure a clean and straight cut. Avoid using power tools as they can lead to uneven cuts and damage your fork.
3. Mark Your Cutting Line
Before cutting, mark a clear line around the steerer tube using a fine-tip marker or masking tape. This will serve as your guide to ensure a precise cut. Take your time to ensure the line is straight and evenly aligned with the fork.
4. Cut Slowly and Steadily
When cutting the steerer tube, go slow and steady. Apply even pressure to the saw, and let the saw do the work. Avoid applying too much force as it can cause the saw to jump or lead to an uneven cut. Take breaks if needed to avoid overheating the saw and causing damage to the fork.
5. File Down the Cut End
After making the cut, use a file or sandpaper to smooth down the cut end of the steerer tube. This will prevent any sharp edges or burrs that can potentially damage carbon fiber or cause injuries. Take your time and ensure the cut end is smooth and free from any rough edges.
6. Install the Spacer and Stem
Once the cut is made and the steerer tube is smooth, install a spacer or stem on the fork. This will help protect the exposed steerer tube and provide proper support. Follow the manufacturer’s instructions for proper installation and torque specifications.
By following these expert tips, you can confidently cut a fork steerer with precision and avoid any costly mistakes. Remember to always prioritize safety and use the appropriate tools and techniques for the job.
Maintenance and Safety Precautions
Proper maintenance and safety precautions are important when it comes to cutting the fork steerer on a bicycle. Here are some guidelines to follow:
- Make sure you have the right tools for the job, including a hacksaw, a threadless fork cutting guide, and a file.
- Before cutting the steerer, remove any components and accessories that may get in the way, such as the stem, spacers, and headset.
- Measure the desired length of the steerer carefully, taking into account the height of your stem and any spacers. It’s best to start with a longer steerer and gradually cut it down to avoid cutting it too short.
- Use the threadless fork cutting guide to ensure a straight and even cut. This will prevent any uneven surfaces or burrs that could compromise the integrity of the steerer.
- After cutting, use a file to smooth out any rough edges or burrs left behind. This will prevent injuries and ensure a proper fit with the stem and headset.
- Reassemble the bike, making sure to tighten all bolts and screws to the manufacturer’s recommended torque settings.
- Finally, before riding your bike, perform a thorough safety check to ensure that everything is secure and in proper working order.
Following these maintenance and safety precautions will help you ensure the longevity and functionality of your bike’s fork steerer, as well as your own safety while riding.