


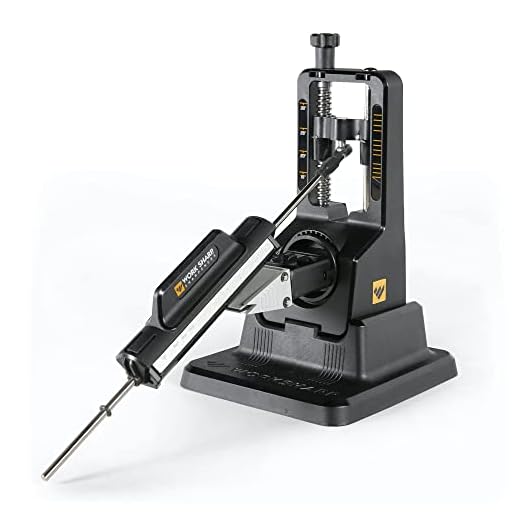
Do you struggle with dull knives that just can’t seem to cut through anything? If so, it might be time to invest in a knife sharpener. But who says you have to spend a fortune on buying one? With a little bit of creativity and some simple tools, you can build your own knife sharpener right at home, saving both money and time in the long run.
Building your own knife sharpener allows you to customize it to fit your specific needs and preferences. You can choose the materials, adjust the angle, and even incorporate additional features to make the sharpening process even easier. Plus, it’s a fun DIY project that can give you a sense of accomplishment once you see your knives slicing through anything like butter.
So, how exactly can you build your own knife sharpener? Well, it all starts with understanding the basic components of a sharpener. You’ll need an abrasive surface, such as sandpaper or a sharpening stone, to remove the dullness from the blade. Additionally, you’ll need a way to hold the knife securely in place while sharpening.
Materials and Tools for Knife Sharpener
To build your own knife sharpener, you will need the following materials and tools:
Materials:
- A wooden base or board
- A sturdy sharpening stone or whetstone
- Two wooden blocks or dowels
- Wood screws
- Sandpaper
- Wood glue
Tools:
- A drill
- A screwdriver
- A saw
- A ruler or measuring tape
- A pencil
- A clamp
These materials and tools will allow you to create a simple, yet effective knife sharpener at home. Make sure to have them ready before starting the construction process.
Choosing the right materials and tools
When it comes to building your own knife sharpener, it’s important to choose the right materials and tools to ensure a successful and effective final product. Here, we will discuss some essential materials and tools that you will need for your DIY knife sharpener project.
| Materials | Tools |
|---|---|
| 1. Wooden base | 1. Saw |
| 2. Sandpaper (coarse, medium, fine grit) | 2. Drill |
| 3. Metal rod or steel bar | 3. Screwdriver |
| 4. Non-slip mat | 4. Clamps |
| 5. Epoxy adhesive | 5. Ruler or measuring tape |
| 6. Safety goggles | 6. Pencil or marker |
Before starting your project, it’s important to note that safety should always be a top priority. Ensure you have safety goggles to protect your eyes when using tools.
The wooden base will serve as the foundation for your knife sharpener. It should be sturdy and large enough to accommodate the length of your knives.
Sandpaper of coarse, medium, and fine grits is crucial for sharpening your knives. You can use different grits depending on the level of sharpness you want to achieve.
A metal rod or steel bar will be used as the sharpening element. It needs to be durable and have a smooth surface to allow for effective sharpening.
A non-slip mat will help stabilize your knife sharpener during use, providing a secure surface for sharpening.
Epoxy adhesive will be needed to attach the metal rod or steel bar to the wooden base securely.
In terms of tools, a saw will be needed to cut the wooden base to the desired size and shape.
A drill will be required to create holes for attaching the metal rod or steel bar and the non-slip mat.
A screwdriver will be needed to fasten screws or bolts, securing the different components together.
Clamps will help hold the wooden base and metal rod or steel bar in place during the assembly process.
A ruler or measuring tape will be useful for ensuring accurate measurements and positioning of the different elements.
Finally, a pencil or marker will be needed for marking measurements and guidelines on the wooden base.
By choosing the right materials and tools, you can ensure a successful and efficient DIY knife sharpener. Now that you have a clear understanding of what you’ll need, you can proceed with confidence to the next steps of your project.
Step-by-Step Guide to Building Your Knife Sharpener
Sharpening your knives is an essential skill for any cook or chef, and building your own knife sharpener can be a fun and rewarding project. Here is a step-by-step guide to help you get started on creating your very own knife sharpener.
Materials Needed
Before you begin, gather the following materials:
| 1 | Wooden block (approximately 6 inches long, 4 inches wide, and 2 inches thick) |
| 2 | 4 small sandpaper strips (grit sizes: coarse, medium, fine, and extra fine) |
| 3 | Wood screws |
| 4 | Drill and drill bits |
| 5 | Wood glue |
Step 1: Prepare the Wooden Block
Start by cutting the wooden block to the desired length and sanding it to smooth out any rough edges. You can shape the block to be comfortable to hold while sharpening your knives.
Step 2: Attach the Sandpaper Strips
Next, attach the sandpaper strips to the wooden block. Start with the coarse grit and progressively work your way up to the extra fine grit. Secure the sandpaper by applying wood glue to the back of each strip and pressing it firmly onto the block. Alternatively, you can use double-sided tape for a temporary solution.
Step 3: Create a Base
To stabilize your knife sharpener, create a base by attaching another piece of wood to the bottom of the block. Use wood screws to firmly secure the base to the block.
Step 4: Test and Adjust
Before using your DIY knife sharpener, test the sandpaper’s grip by lightly running your finger along each strip. Make any necessary adjustments to ensure the sandpaper is securely attached and aligned.
Step 5: Sharpening Your Knives
Now that your knife sharpener is complete, it’s time to sharpen your knives. Hold the handle of the knife with one hand and place the blade against the sandpaper at a slight angle. Slowly move the blade back and forth along the sandpaper, applying light pressure. Repeat this process several times on each side of the blade until your knife is sharp.
With this step-by-step guide and a little bit of effort, you can create your own knife sharpener to keep your blades in top condition. Enjoy the satisfaction of sharpening your knives and achieving excellent results in your culinary adventures!
Preparing the base
Before starting the construction of your knife sharpener, it is important to prepare the base properly. The base will serve as the foundation for your sharpener and needs to be sturdy and stable.
First, select a suitable material for the base. It should be durable enough to withstand the pressure and movement required during the sharpening process. Hardwoods like oak or maple are good options, as they are strong and can withstand heavy use.
Next, measure and cut the base material to the desired dimensions. Depending on the size of your sharpener and personal preferences, you can make it as large or small as you like. However, it’s important to ensure that the base is large enough to securely hold the sharpening stones or rods you plan to use.
Once you have the base material cut to size, smooth the edges and surfaces using sandpaper or a wood plane. This will remove any roughness or imperfections, ensuring a clean and professional finish.
Afterwards, determine the location where you want to attach the sharpening stones or rods on the base. Mark the positions carefully, ensuring they are evenly spaced and aligned correctly.
Lastly, attach the sharpening stones or rods to the base using screws, nails, or any other suitable attachment method. Make sure they are firmly secured and level with the base surface.
With the base properly prepared, you are now ready to move on to the next step of constructing your own knife sharpener.
Creating the blade holder
To create a blade holder for your knife sharpener, follow these steps:
- Measure the width and length of the knife blade that you plan to sharpen.
- Using those measurements, cut a rectangular piece of wood that is slightly larger than the blade. Make sure the wood is thick enough to securely hold the blade in place.
- Mark the center of the wood piece with a pencil or marker.
- Measure the thickness of the knife blade at its thickest point.
- Find or create a groove in the center of the wood piece that matches the thickness of the blade. This groove will hold the blade securely in place during sharpening.
- Use a saw or chisel to carefully create the groove, making sure it is straight and smooth.
- Sand the wooden blade holder to remove any rough edges or splinters.
- Test the blade holder by inserting the knife blade into the groove. It should fit snugly but still be easy to insert and remove.
- Adjust the size of the groove if necessary to ensure a proper fit.
- Once the blade holder is complete, attach it to the base of your knife sharpener using screws or strong adhesive.
With the blade holder securely in place, you are now ready to start sharpening your knives!
Adding the sharpening stone
Once you have your base and guide system in place, it’s time to add the sharpening stone. The sharpening stone is the key component that will help bring back that razor-sharp edge to your knives.
Before attaching the sharpening stone, it’s important to make sure it is clean and free from any dirt or debris that may affect the sharpening process. Use a damp cloth to wipe the stone and ensure it is dry before proceeding.
Next, you will need to secure the sharpening stone to the base. There are different ways to do this depending on the type of stone you have. Some sharpening stones come with pre-drilled holes, while others may require you to use adhesive or clamps.
If your sharpening stone has pre-drilled holes, simply align the holes with the corresponding holes on the base and use screws or bolts to secure it in place. Make sure to tighten the screws or bolts firmly to ensure a stable and secure attachment.
If your sharpening stone does not have pre-drilled holes, you can apply adhesive to the back of the stone and press it firmly onto the base. Allow the adhesive to dry and cure according to the manufacturer’s instructions before proceeding.
If adhesive is not an option, you can also use clamps to hold the stone in place. Position the stone on the base and use clamps to secure it tightly. Make sure the stone is level and not tilted to one side.
Once the sharpening stone is securely attached, it’s time to start sharpening your knives. Remember to follow the instructions for your specific sharpening stone and use the proper techniques to achieve the best results.
Now that you have successfully added the sharpening stone to your knife sharpener, you can enjoy sharp and efficient knives once again. Regular maintenance and sharpening will help prolong the lifespan of your knives and ensure they are always ready for use.


