
Having a properly sharpened hunting knife is essential for any hunting enthusiast. A sharp blade ensures clean and precise cuts, making it easier to field dress game and perform other tasks in the field. One effective method of sharpening a hunting knife is by using a wet stone.
A wet stone, also known as a whetstone, is a type of sharpening stone that uses water to lubricate the surface and prevent overheating of the blade. This method allows for a controlled and consistent sharpening process, resulting in a razor-sharp edge.
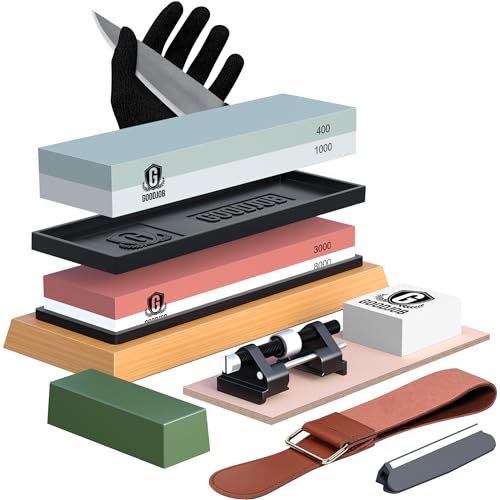
Before you begin sharpening your hunting knife with a wet stone, it’s important to gather the necessary tools. You will need a wet stone, a container of water, and a towel or cloth to dry the knife afterwards. Additionally, it’s recommended to wear gloves for safety and to protect your hands from the sharpening process.
To start the sharpening process, soak the wet stone in water for about 10-15 minutes until it is fully saturated. Place the wet stone on a stable surface, such as a countertop or table, and make sure it does not slip while sharpening. Hold the knife securely with a firm grip and position the blade at a 20-degree angle against the wet stone.
Proper technique for sharpening a hunting knife
Properly sharpening a hunting knife is essential for maintaining its cutting performance and prolonging its lifespan. Here is a step-by-step guide on how to sharpen your hunting knife using a wet stone:
|
Step 1: Begin by soaking the wet stone in water for about 10-15 minutes. This will ensure that the stone is properly hydrated and ready for use. |
|
Step 2: Set up your sharpening station in a well-lit and well-ventilated area. Place a damp towel underneath the wet stone to secure it and prevent it from slipping during the sharpening process. |
|
Step 3: Hold the hunting knife firmly by the handle and position the blade against the wet stone at a 20-degree angle. This angle will help maintain the knife’s original bevel. |
|
Step 4: Using light and steady pressure, move the knife blade across the wet stone in a sweeping motion. Start from the base of the blade and work towards the tip, making sure to maintain a consistent angle. |
|
Step 5: Continue sharpening the knife by repeating the sweeping motion on both sides of the blade. Aim for approximately 5-10 strokes per side, depending on the knife’s condition and bluntness. |
|
Step 6: After completing the sharpening process, rinse the knife blade thoroughly to remove any metal shavings or residue. Dry the blade with a clean towel. |
|
Step 7: For a finer edge, you can repeat the sharpening process using a higher grit wet stone. This will provide a polished finish and enhance the knife’s cutting performance. |
|
Step 8: Finally, apply a coat of oil or lubricant to the knife blade to prevent corrosion and maintain its sharpness. Store the knife in a safe place to ensure its longevity. |
By following these steps, you can properly sharpen your hunting knife and keep it in optimal condition for your outdoor adventures. Remember to take your time and exercise caution to avoid any accidents or injuries during the sharpening process.
Choosing the right wet stone
When it comes to sharpening your hunting knife with a wet stone, one of the most important factors to consider is choosing the right type of stone. There are a variety of wet stones available on the market, each with its own unique properties and benefits.
Here are a few key factors to keep in mind when selecting a wet stone for sharpening your hunting knife:
| Grit | A wet stone’s grit refers to the coarseness or fineness of the stone’s surface. Lower grit stones, such as those under 1,000 grit, are more abrasive and suitable for repairing heavily damaged or dull blades. Higher grit stones, on the other hand, are finer and better for maintaining an already sharp edge. It’s important to choose a grit that matches your knife’s needs. |
| Material | Wet stones can be made from different materials, such as natural stones like Arkansas or synthetic materials like aluminum oxide. Natural stones tend to offer a more traditional and refined sharpening experience, while synthetic stones are generally more consistent and easy to use. Consider your personal preference and the specific qualities of each material before making a decision. |
| Size and Shape | Wet stones come in various sizes and shapes, and choosing the right one depends on your personal preferences and the size of your hunting knife. Smaller stones are portable and easy to use, but may take longer to sharpen larger blades. Larger stones, however, can accommodate bigger knives and allow for faster sharpening. |
| Water or Oil | Some wet stones require water for lubrication, while others require oil. Water stones are generally easier to clean and less messy, making them a popular choice for hunters. Oil stones, on the other hand, tend to provide a finer finish and require less frequent flattening. Consider your desired maintenance routine and preferences when choosing between water or oil stones. |
By considering these factors and evaluating your own needs and preferences, you can choose the right wet stone for sharpening your hunting knife. Remember to always follow the manufacturer’s instructions and take proper safety precautions when using a wet stone.
Preparing the wet stone
Before you begin sharpening your hunting knife with a wet stone, it’s important to properly prepare the stone to ensure the best results. Here are the steps to follow:
Gather the necessary materials
First, gather all the materials you’ll need for the sharpening process. This includes:
| 1. Wet stone |
| 2. Water |
| 3. Towel or cloth |
| 4. Optional honing oil |
Soak the wet stone
Next, fill a container with water deep enough to fully submerge the wet stone. Place the stone in the water and let it soak for about 10 to 15 minutes. This step is important as it allows the stone to absorb water and ensures it stays wet throughout the sharpening process.
Alternatively, if you’re using a combination stone that has two different grits, soak each side separately for the recommended time.
Prepare your workspace
While the wet stone is soaking, prepare your workspace. Lay down a towel or cloth to catch any water or debris that may fall during the sharpening process. This will help keep your area clean and prevent any accidental slips or damage to your knife.
Additionally, make sure you have enough space to comfortably work with the wet stone and your hunting knife. You’ll want to be able to move the knife back and forth across the stone without any obstructions.
Once the wet stone has finished soaking and your workspace is ready, you’re ready to begin sharpening your hunting knife!
Positioning the knife for sharpening
Proper positioning of the hunting knife on the wet stone is crucial for achieving a sharp edge. Follow these steps to ensure you position the knife correctly:
Step 1: Place the wet stone on a stable surface
Find a flat and stable surface to place the wet stone on. Make sure it won’t move or slide while you are sharpening the knife.
Step 2: Grip the knife securely
Hold the knife firmly with your dominant hand. Make sure you have a secure grip on the handle to ensure accuracy and control during the sharpening process.
Step 3: Choose the right angle
Determine the angle you want to sharpen the knife at. Most hunting knives have a bevel angle of around 20 to 25 degrees. You can use an angle guide to help maintain the correct angle while sharpening.
Step 4: Position the knife on the wet stone
Place the heel of the blade against the wet stone’s surface, with the edge facing down and away from you. Make sure the entire length of the edge is in contact with the stone.
Step 5: Hold the knife at the correct angle
With the knife positioned on the wet stone, hold the blade at the chosen angle. Keep the angle consistent throughout the sharpening process to ensure an even and sharp edge.
Remember to take your time and focus on maintaining the correct position and angle while sharpening the knife. With practice, you’ll be able to expertly position the knife for optimal results.
Sharpening the blade
Now that you have gathered all the necessary materials, it’s time to start sharpening your hunting knife. Follow these step-by-step instructions to achieve a razor-sharp edge:
Step 1: Preparing the wet stone
Before you begin sharpening, soak the wet stone in water for about 10-15 minutes. This will ensure that the stone is properly lubricated and ready for use.
Step 2: Finding the right angle
Hold the knife firmly in one hand and place the blade against the wet stone at about a 20-degree angle. This angle will allow you to achieve a fine edge without damaging the blade.
Step 3: Starting the sharpening process
Start by sliding the blade across the wet stone in a smooth and controlled motion. Use moderate pressure and maintain a consistent angle throughout the process. Repeat this motion several times on one side of the blade, then switch to the other side.
Tip: To ensure an even sharpening, alternate sides after every few strokes.
Step 4: Checking the sharpness
Periodically check the sharpness of your blade by gently running your finger along the edge. Be cautious to avoid any accidents. If the blade feels dull or catches on your skin, continue sharpening until it becomes smooth and sharp.
Warning: Always exercise caution when handling sharp objects and avoid placing excessive pressure on the blade to prevent accidents.
Step 5: Finishing touches
Once you are satisfied with the sharpness of the blade, rinse it with water and dry it thoroughly. You can also use a leather strop to further refine and polish the edge.
Note: Proper maintenance and regular sharpening are essential to keep your hunting knife in optimal condition. It is recommended to sharpen your knife before each hunting season and as needed throughout the year.
By following these steps and taking the time to properly sharpen your hunting knife, you will ensure that it remains sharp and reliable for your outdoor adventures.
Cleaning and maintaining the wet stone
Proper cleaning and maintenance of your wet stone is essential to ensure its longevity and performance. Here are some steps you can follow:
- After each use, rinse the wet stone with clean water to remove any metal shavings or debris.
- Use a brush or cloth to scrub the surface of the wet stone gently. Avoid using abrasive materials that can damage the stone.
- Allow the wet stone to air dry completely before storing it. Avoid leaving it in a damp or humid area, as this can lead to mold or mildew growth.
- Regularly inspect the wet stone for any signs of wear or damage. If you notice any cracks or chips on the surface, it is recommended to replace the stone.
- Periodically, you may need to flatten the wet stone to ensure an even sharpening surface. This can be done using a diamond honing plate or flattening stone.
- Store the wet stone in a dry and secure place, away from direct sunlight or extreme temperatures.
By following these cleaning and maintenance tips, you can prolong the lifespan of your wet stone and ensure optimal performance when sharpening your hunting knife.
Testing the knife’s sharpness
After sharpening the hunting knife with a wet stone, it is important to test its sharpness before going out into the field. Testing the knife’s sharpness will ensure that it is ready for use and will perform effectively during the hunt.
To test the sharpness of the knife, you can follow these steps:
- Visual inspection: Examine the blade under good lighting to check for any dull spots or burrs. A sharp knife should have a clean and smooth edge without any imperfections.
- Paper test: Hold a sheet of paper with one hand and use the hunting knife to cut through it with a slicing motion. A sharp knife will effortlessly slice through the paper without tearing or snagging.
- Hair test: Hold a strand of hair between your fingers and gently run the blade along the hair, from the base to the tip. A sharp knife will easily cut through the hair with minimal effort.
- Fingertip test: Carefully and lightly run the edge of the blade along the pad of your fingertip. Be cautious and apply only minimal pressure. A sharp knife will smoothly and cleanly cut through the skin without causing any pain or discomfort.
By performing these tests, you can ensure that your hunting knife is sharpened to the desired level and will perform optimally during your hunting trip. Remember to handle the knife with caution and always prioritize safety when testing its sharpness.


