
Keeping your kitchen knife sharp is essential for efficient and safe cooking. While there are many methods and tools available for sharpening knives, using a sharpening stone is one of the most traditional and effective techniques. Sharpening your knife using a stone allows you to control the angle and pressure, resulting in a razor-sharp edge that will make your cutting tasks a breeze.
Step 1: Choose the Right Stone
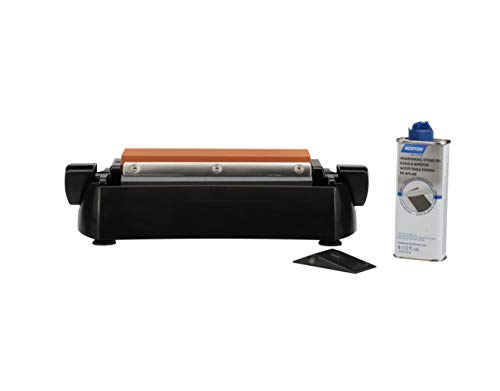
Before you begin sharpening your knife, it’s important to choose the right stone for the job. There are different types of sharpening stones available, such as oil stones, water stones, and diamond stones. Each stone has its own advantages and disadvantages, so it’s important to choose one that suits your needs and preferences.
Oil stones are the traditional choice and require oil or honing fluid for lubrication. They are durable and suitable for most types of knives. Water stones, as the name suggests, need to be soaked in water for a few minutes before use. They produce a sharp edge and are ideal for high-quality knives. Diamond stones are made with industrial-grade diamonds and are known for their fast cutting action. They are great for quickly restoring a dull knife.
Step 2: Prepare the Stone
Once you have chosen your sharpening stone, it’s important to prepare it before use. If you are using an oil stone, you will need to apply a thin layer of honing oil or mineral oil to the surface. For water stones, soak the stone in water for the recommended time mentioned by the manufacturer. This step is crucial as it helps lubricate the stone and prevent the knife from getting damaged during the sharpening process.
Step 3: Sharpen the Knife
Now that your stone is ready, it’s time to sharpen the knife. Hold the knife at a 15 to 20-degree angle against the stone’s surface. Start from the base of the blade and push it towards the tip, maintaining consistent pressure. Repeat this motion several times, alternating sides of the blade until you achieve the desired sharpness. Remember to lift and flip the knife to maintain an even edge on both sides.
Tip: If you are not confident in maintaining a consistent angle, you can use an angle guide or a sharpening tool to help you achieve a precise edge.
Step 4: Hone the Knife
After sharpening the knife, it’s important to hone the edge to remove any burrs and further refine its sharpness. Take a honing rod and hold it vertically. Place the rod against the blade’s edge at a 15 to 20-degree angle and draw the knife down the rod, smoothly and gently. Repeat this motion several times on both sides of the blade until you achieve a smooth, polished edge.
By following these steps, you can keep your kitchen knives sharp and ready for any culinary challenge. Remember to always take caution and pay attention to your technique while sharpening your knives. With practice, you will master the art of knife sharpening and enjoy the benefits of a perfectly sharp kitchen tool.
Why is it important to sharpen a kitchen knife?
A sharp kitchen knife is an essential tool for any cook or chef. It not only makes the preparation of food easier and more efficient, but it also enhances the safety in the kitchen. Here are several reasons why it is important to sharpen a kitchen knife regularly:
1. Improved Efficiency
A sharp knife allows you to slice, chop, and dice ingredients with ease. With a dull knife, you may find yourself applying extra force, which can lead to less control and a higher risk of accidents. Sharpening your kitchen knife will ensure that cutting and chopping tasks are done quickly and smoothly, saving you time and effort.
2. Enhanced Safety
A dull knife is more prone to slipping and sliding, making it more dangerous to use. When a knife is dull, it requires more force to cut through food, increasing the chances of an accidental slip and injury. By keeping your kitchen knife sharp, you reduce the risks of accidents and minimize the chances of cutting yourself.
3. Maintaining Food Quality
A sharp knife allows for clean and precise cuts, which helps to preserve the integrity and appearance of food. When using a dull knife, you might end up crushing or tearing delicate ingredients, negatively impacting the texture and presentation of your dishes. By sharpening your kitchen knife regularly, you can maintain the quality and aesthetics of the food you prepare.
4. Prolonging Knife Lifespan
A well-maintained knife will last longer and provide you with years of reliable use. When knives are dull, they tend to be used more aggressively, leading to excessive wear and tear on the blade. By regularly sharpening your kitchen knife, you can preserve its sharpness and ensure that it remains effective for a longer time.
In conclusion, sharpening a kitchen knife is essential for efficient food preparation, maintaining safety in the kitchen, preserving food quality, and prolonging the lifespan of the knife. By keeping your kitchen knife sharp, you can elevate your cooking experience and enjoy the benefits of a reliable and effective tool.
Choosing the right sharpening stone
When it comes to sharpening kitchen knives, choosing the right sharpening stone is crucial. There are various types and materials of stones available, and each one has its own advantages and disadvantages.
Natural Stones
Natural stones, such as Arkansas stones, are known for their long-lasting sharpening capabilities. They are usually made of novaculite, a type of very fine-grained sedimentary rock. Natural stones come in different grits, which determine the level of coarseness or fineness. Coarser grits (around 1000) are used for shaping the edge, while finer grits (above 3000) are used for polishing and refining the edge.
Artificial Stones
Artificial stones, also known as synthetic stones or water stones, are made from man-made materials like aluminum oxide or silicon carbide. They are usually softer than natural stones, which means they tend to wear down faster. However, their softness allows for faster sharpening. Artificial stones are available in various grits, ranging from coarse to fine, similar to natural stones.
Additionally, some synthetic water stones require soaking in water before use, while others can be used with water as a lubricant. It’s important to read the manufacturer’s instructions for the specific stone you choose.
Diamond Stones
Diamond stones, as the name suggests, have a surface coated with diamond particles. This makes them extremely durable and fast-cutting. Diamond stones are available in different grits, just like natural and artificial stones. They are often recommended for sharpening harder steel knives, as they can remove material quickly.
However, diamond stones can be quite expensive compared to other types of stones. They may also have a rougher surface, so it’s essential to use them carefully and maintain the correct angle while sharpening.
Ultimately, the choice of a sharpening stone depends on personal preference and the type of knife being sharpened. It’s essential to consider the blade material, the desired sharpness level, and the required maintenance when selecting a stone. Whichever stone you choose, it’s important to practice proper sharpening techniques and take your time to achieve the best results.
Different types of sharpening stones
When it comes to sharpening your kitchen knife using a stone, it is important to know that there are different types of sharpening stones available. Different stones have different properties and can provide varying levels of sharpness to your knife. Here are a few commonly used types of sharpening stones:
- Oil Stones: These are traditional sharpening stones made from aluminum oxide or silicon carbide. Oil stones require the use of honing oil or mineral oil to help keep them clean and prevent clogging. They are known for their durability and ability to create a sharp edge.
- Water Stones: These sharpening stones are known for their ability to quickly remove metal and create a very sharp edge. Water stones are made from a combination of abrasive particles and a bonding agent. They require soaking in water before use to prevent the surface from drying out.
- Diamond Stones: Diamond stones are made with a metal plate coated with diamond particles. They are known for their hardness and efficiency in sharpening knives. Diamond stones are great for quick and efficient sharpening, but they can be more expensive compared to other types of stones.
- Ceramic Stones: Ceramic stones are made from a combination of ceramic and abrasive particles. They are known for their long-lasting properties and ability to create a very fine edge. Ceramic stones can be used dry or with water, and they are a popular choice for professional chefs.
When choosing a sharpening stone, consider the type of knife you have and the level of sharpness you desire. Experiment with different types of stones to find the one that works best for you and your kitchen knife. Remember to follow proper sharpening techniques and always take safety precautions when using a sharpening stone.
Preparing the knife for sharpening
Before you begin sharpening your kitchen knife with a stone, it is important to properly prepare the knife. This ensures that you achieve the best results and prolongs the lifespan of the stone.
First, make sure the knife is clean and free of any residue or food particles. You can wash it with warm soapy water and dry it thoroughly.
Next, inspect the knife for any nicks, chips, or uneven edges. If you notice any imperfections, you may need to use a honing rod or take the knife to a professional for repairs. It is crucial to fix any major issues before attempting to sharpen the knife.
Once you have a clean and smooth knife, it is time to prepare the stone. Place the stone on a stable surface and secure it with a damp cloth. This will prevent the stone from slipping during sharpening.
You may also need to soak the stone in water for a specified amount of time, depending on the type of stone you are using. Read the manufacturer’s instructions for guidance on soaking time.
By properly preparing both the knife and the stone, you are ready to move on to the next step of sharpening your kitchen knife.
Cleaning the knife
After sharpening your kitchen knife, it is important to properly clean and dry it before using it for food preparation. Cleaning your knife not only helps maintain its sharpness but also ensures cleanliness and prevents cross-contamination.
Step 1: Wash the knife
Using warm soapy water, carefully wash the knife, making sure to clean both sides of the blade and the handle. Pay special attention to any food particles or debris that may be stuck on the knife.
Step 2: Rinse with clean water
Thoroughly rinse the knife under clean running water to remove any soap residue. This step is crucial to avoid transferring soapy flavors or chemicals to your food.
Step 3: Dry the knife
Using a clean and dry cloth, carefully dry the knife. Make sure to dry both the blade and the handle. Drying the knife helps prevent rust and keeps it in good condition.
Note: Avoid using abrasive sponges or scouring pads to clean your knife, as they can scratch the blade’s surface. Additionally, never leave your knife soaking in water or place it in the dishwasher, as this can damage the blade and handle.
| Materials | Instructions |
|---|---|
| Warm soapy water | Wash the knife |
| Clean water | Rinse the knife |
| Clean and dry cloth | Dry the knife |
Securing the knife on a stable surface
Before beginning the sharpening process, it is important to secure the knife on a stable surface. This will ensure safety and stability throughout the sharpening process. Here are some steps to follow:
1. Choose a suitable work surface
Select a flat and solid work surface, such as a countertop or a table. Ensure that the surface is clean and free from any clutter, as this will provide a stable base for your knife while sharpening.
2. Place a damp towel or non-slip mat
To prevent the knife from slipping or moving while sharpening, place a damp towel or a non-slip mat underneath the work surface. This will provide an extra layer of stability and ensure that the knife stays in place during the sharpening process.
3. Position the knife perpendicular to the work surface
Hold the knife firmly with one hand, making sure that the blade is positioned perpendicular to the work surface. This will allow for a consistent and effective sharpening angle.
| Tip: | While securing the knife, make sure to keep your fingers away from the blade to avoid accidental cuts. |
By securing the knife on a stable surface, you can sharpen it safely and effectively. This will result in a sharp and efficient kitchen tool that will make your cooking tasks much easier and more enjoyable.
Sharpening the knife
Sharpening a kitchen knife is an essential skill that every chef should master. A sharp knife not only makes cooking more enjoyable but also ensures precision and efficiency in the kitchen.
When it comes to sharpening a knife, using a stone is one of the most effective methods. Follow these steps to sharpen your kitchen knife with a stone:
Step 1: Choosing the right sharpening stone
There are different types of sharpening stones available, such as oil stones, water stones, and diamond stones. Each type has its own advantages, so choose one that suits your needs and preferences.
Step 2: Preparing the stone
Before sharpening your knife, soak the stone in water for about 15 minutes. This will help to prevent the stone from drying out and provide a smooth surface for sharpening.
Step 3: Positioning the knife
Hold the knife firmly with one hand and place the blade against the stone at a 20-degree angle. Make sure to maintain a consistent angle throughout the sharpening process.
Step 4: Starting the sharpening process
Using moderate pressure, glide the knife blade across the stone in a sweeping motion, from the base of the blade to the tip. Repeat this motion several times, alternating sides of the blade until you achieve the desired sharpness.
Step 5: Testing the sharpness
After sharpening, carefully run your finger along the blade to check for any dull spots. If you feel any resistance or rough patches, continue sharpening until the entire blade feels smooth and sharp.
A properly sharpened knife will make all the difference in your cooking experience. Remember to always handle sharpened knives with care, as they can be extremely sharp. Keep your knife sharp by regularly honing it with a honing rod, and it will serve you well for a long time.
Wet the sharpening stone
Before starting the sharpening process, it is important to wet the sharpening stone. This helps to create a smooth and consistent surface for sharpening the kitchen knife.
To wet the sharpening stone, you can either soak it in water for about 10-15 minutes or spray it with water until it is evenly damp. Adding water to the stone helps to prevent the knife from overheating during the sharpening process, which can damage the blade.
Make sure to use clean water and avoid using any oils, as they can interfere with the sharpening process.
Soaking the stone
If you choose to soak the sharpening stone, fill a container or sink with water and place the stone in it. Allow the stone to sit in the water for the recommended time, typically around 10-15 minutes, or until it is fully saturated.
During this time, you can take the opportunity to prepare the workspace and gather all the necessary tools for the sharpening process.
Spraying water on the stone
If you prefer not to soak the sharpening stone, you can simply spray water on it until it is evenly damp. Use a spray bottle or a small container with water to wet the entire surface of the stone.
Make sure to moisten the surface enough so that it is not dry but not too much that water is pooling on the stone. The goal is to achieve a slightly wet surface that will aid in the sharpening process.
Once the sharpening stone is wet, you are ready to proceed with sharpening your kitchen knife.


