


Having a sharp knife is essential for any cook or chef. A sharp knife not only makes the task of cutting and slicing easier but also ensures precision and safety in the kitchen. However, over time, even the best knives can become dull and lose their sharpness. Fortunately, there are several effective methods to sharpen a knife and restore its cutting edge.
One popular and widely used method is using a sharpening stone. A sharpening stone, also known as a whetstone, is a rectangular block made of abrasive material, such as silicon carbide or diamond. To sharpen a knife with a stone, start by wetting the stone with water or oil, depending on the type of stone you have. Then, hold the knife at a slight angle against the stone and move it back and forth using gentle pressure. Repeat this process on both sides of the knife blade until you achieve the desired sharpness.
Another effective method to sharpen a knife is by using a honing rod. A honing rod, sometimes called a sharpening steel, is a long, cylindrical metal rod that helps align the blade of a knife. To use a honing rod, hold the rod vertically with one hand and place the knife blade against the rod at a 20-degree angle. Using light pressure, glide the knife along the rod from the base to the tip, maintaining the angle. Repeat this motion several times on both sides of the blade to sharpen it.

Lastly, there are also electric knife sharpeners available in the market that can quickly and conveniently sharpen your knife. Electric sharpeners usually come with built-in angled guides and multiple slots for different stages of sharpening. Simply insert the knife into the appropriate slot and let the machine do the work. However, it’s important to be careful when using electric sharpeners, as they can remove more metal from the blade, which may shorten its lifespan.
Remember, regardless of the method you choose, it’s important to practice proper knife sharpening techniques and take your time to ensure the best results. A sharp knife not only improves your cooking experience but also enhances safety in the kitchen. So, take the time to sharpen your knives regularly and enjoy the benefits of precision cutting.
Step-by-step guide to sharpening a knife effectively
Keeping your kitchen knives sharp is essential for efficient and safe cooking. Dull blades can make chopping and slicing more difficult, and can even increase the risk of accidents. Here is a step-by-step guide to help you sharpen your knives effectively:
1. Gather the necessary tools: You will need a sharpening stone or honing rod, a damp cloth, and some lubricating oil.
2. Prepare the sharpening surface: Place the sharpening stone on a stable surface, making sure it won’t slide around while you’re sharpening the knife. If using a honing rod, hold it firmly with one hand.
3. Clean the knife: Wipe the blade clean with a damp cloth to remove any dirt or debris. This will ensure a smoother sharpening process.
4. Determine the blade angle: Most kitchen knives have a beveled edge, and it’s important to maintain the same angle while sharpening. Check the manufacturer’s recommendations or try to match the existing edge angle.
5. Start sharpening: If using a sharpening stone, apply a few drops of lubricating oil to the stone’s surface. Hold the knife firmly and place the heel of the blade against the stone. Using light pressure, slide the knife down the stone while maintaining a consistent angle. Repeat this process several times on each side of the blade.
6. Alternate sides: To ensure an even sharpening, alternate the side of the blade you are sharpening. This will help maintain a balanced edge.
7. Test the sharpness: After several passes on each side, test the sharpness of the knife by carefully running your thumb along the edge, perpendicular to the blade. Be cautious and avoid applying too much pressure. A sharp knife should easily catch your thumb. If it doesn’t, continue sharpening.
8. Hone the edge: Once the knife is sharp, you can use a honing rod to refine the edge. Hold the rod at a slight angle and gently slide the blade down its length, maintaining the same angle as before. Repeat this process a few times on each side of the blade.
9. Clean the blade: Finally, wipe the blade clean with a damp cloth to remove any residual metal particles or oil.
By following these steps, you can keep your kitchen knives sharp and ready for any culinary challenge. Remember to exercise caution while sharpening and always prioritize safety. Happy cooking!
Gather the necessary materials
Before you can begin sharpening your knife, it is important to gather all the necessary materials. Having the right tools will ensure that you can effectively sharpen your knife and achieve the best results. Here are the essential materials you will need:
- A whetstone or sharpening stone
- A honing guide (optional, but recommended for beginners)
- A lubricant, such as water or oil, depending on the type of stone
- A towel or cloth for cleaning the knife and drying the stone
- A stable surface to work on, like a table or workbench
- Paper or a marker for testing the sharpness of the knife
- Gloves for safety, especially if you are new to sharpening knives
Make sure you have all these materials on hand before you start the sharpening process. This will save you time and frustration, as you won’t have to pause midway through to find something you need.
Prepare the knife for sharpening
Before you begin the sharpening process, it is important to properly prepare the knife. Taking a few minutes to inspect and clean your knife will ensure that you achieve the best results.
Inspect the knife
Start by carefully examining the blade of your knife. Look for any visible chips, nicks, or damage. If you notice any major issues, it may be necessary to take your knife to a professional for repair before proceeding with sharpening.
Additionally, check the edge of the blade to determine if it is in good condition. Over time, the edge can become dull and rounded, making it less effective for cutting. If needed, thin out the edge of the blade using a grinding stone or honing guide, ensuring that the angle of the edge remains consistent.
Clean the knife
Next, thoroughly clean your knife to remove any dirt, debris, or food particles. Use warm water and dish soap to gently scrub the blade, being careful not to scrub too aggressively or use abrasive materials that could scratch the surface. Rinse the knife and dry it completely with a clean towel to prevent any corrosion.
After cleaning, it is recommended to apply a thin layer of oil to the blade to protect it from rust and moisture. Use a food-safe oil, such as mineral oil or vegetable oil, and apply it using a clean cloth or paper towel. Make sure to cover the entire blade, including the tip and handle.
By properly inspecting and cleaning your knife before sharpening, you will be able to optimize the sharpening process and achieve a razor-sharp edge. These simple steps will help prolong the lifespan of your knife and ensure safe and efficient cutting.
Choose the right sharpening tool
When it comes to sharpening a knife effectively, having the right sharpening tool is crucial. There are several options available, each with its own advantages and disadvantages.
Sharpening stones: Sharpening stones, also known as whetstones, are traditional tools used for sharpening knives. They come in different grits, ranging from coarse to fine, allowing you to choose the level of sharpening needed. Stones require proper technique and skill to achieve the desired results.
Sharpening rods: Sharpening rods, also known as honing rods or sharpening steels, are long, cylindrical rods made of ceramic, diamond-coated steel, or other materials. They are used to maintain the sharpness of a knife’s edge between sharpenings. Sharpening rods are easy to use and convenient, but they are not suitable for major sharpening tasks.
Electric sharpeners: Electric sharpeners are powered devices that use rotating wheels or belts to sharpen knives. They are quick and easy to use, making them a popular choice for many home cooks. However, they may remove more metal from the blade than necessary if not used properly.
Manual sharpeners: Manual sharpeners, such as pull-through sharpeners or handheld sharpeners, are designed for convenience and ease of use. They usually have pre-set angles to ensure consistent sharpening results. While they may not offer the same level of control as sharpening stones, they are suitable for most home users.
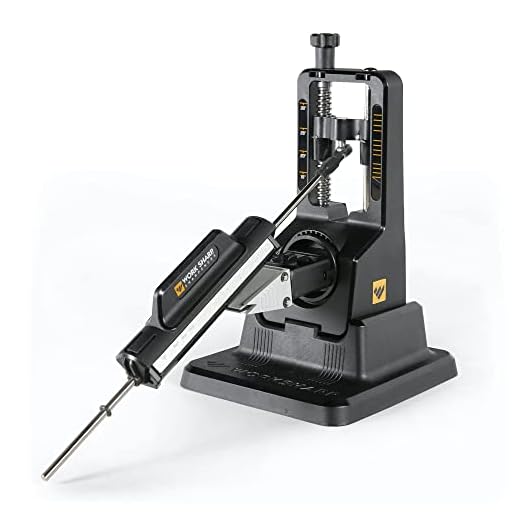
Guided sharpening systems: Guided sharpening systems consist of a sharpening stone or rod attached to a guide that maintains the correct angle for sharpening. These systems provide excellent control and are suitable for beginners or those who prefer a more guided approach.
When choosing a sharpening tool, consider your skill level, the type of knife you have, and the level of sharpening required. It is also important to follow the manufacturer’s instructions and practice proper safety precautions.
Use the correct sharpening technique
Using the correct technique is crucial when sharpening a knife. It not only ensures that you achieve the desired sharpness, but it also helps maintain the integrity of the blade. Here are some tips on how to use the correct sharpening technique:
1. Choose the right sharpening tool: There are various sharpening tools available, such as whetstones, honing rods, and electric sharpeners. Each tool has its advantages and disadvantages, so it’s essential to select the one that suits your needs and skill level.
2. Follow the angle guide: Most knives have a specific angle at which they should be sharpened. It’s crucial to follow this angle guide to achieve optimum results. If you’re not sure about the angle, consult the manufacturer’s instructions or research the recommended angle for your specific knife.
3. Start with coarse grit: If your knife is dull or has nicks, begin sharpening with a coarse grit sharpening tool. It helps remove the metal quickly and reshape the blade. Work on each side of the blade evenly, using a steady motion from the base to the tip.
4. Move to finer grit: After reshaping the blade, switch to a finer grit sharpening tool. This step helps refine the edge and achieve a sharper finish. Again, work on each side of the blade evenly and maintain a consistent angle.
5. Strop the blade: Once you’ve achieved the desired sharpness, use a leather strop or a sharpening compound to polish the edge further. This step helps remove any burrs or rough edges, giving your knife a razor-sharp finish.
6. Practice proper technique: Sharpening a knife can require some practice and skill. Ensure you maintain a steady hand and apply consistent pressure throughout the process. Remember to take breaks if needed and frequently check the sharpness of the blade as you progress.
By using the correct sharpening technique, you can effectively sharpen your knife and maintain its longevity. Remember to always prioritize safety and take your time when sharpening to achieve the best results.
Test the sharpness of the knife
Once you have finished sharpening your knife, it is important to test its sharpness before you start using it. There are a few simple tests you can perform to determine if your knife is sharp enough:
| Test | Description |
|---|---|
| Paper Test | Take a piece of paper and hold it in your hand. With the sharp edge of the knife, try to slice the paper. If the knife cuts through the paper smoothly and effortlessly, it is sharp enough. |
| Tomato Test | Take a ripe tomato and hold it firmly in one hand. Place the knife blade on the tomato’s skin and gently draw it across. If the knife effortlessly cuts through the tomato without squishing or tearing it, it is sharp enough. |
| Hair Test | Hold a strand of hair taut between your fingers. With the knife blade, gently touch the hair near the root. If the knife slices through the hair without bending or breaking it, it is sharp enough. |
Remember, even if your knife passes these tests, always exercise caution when handling sharp objects. Proper knife handling and safety measures are crucial to prevent accidents and injuries.

Maintain the sharpness of the knife
Once you have successfully sharpened your knife, it is important to maintain its sharpness for optimal performance. Here are some tips to help you keep your knife sharp:
-
Hand wash your knife
Avoid putting your knife in the dishwasher as it can cause the blade to dull. Instead, hand wash it with warm soapy water and dry it thoroughly before storing.
-
Store your knife properly
Invest in a knife block or a protective sheath to store your knife. Avoid tossing it in a drawer or overcrowding it with other utensils, as this can cause the blade to nick or chip.
-
Avoid cutting on hard surfaces
Avoid cutting on hard surfaces like glass, ceramic, or bamboo cutting boards. These surfaces can be too unforgiving on the blade and dull it quickly. Opt for softer materials like wood or plastic cutting boards instead.
-
Regularly hone your knife
Use a honing steel or rod to gently realign the knife’s edge between sharpenings. Hold the steel at a 20-degree angle and swipe the blade across it several times on each side to maintain its sharpness.
-
Sharpen as needed
Pay attention to how your knife performs and sharpen it as needed. If you notice that it is becoming dull or the blade is visibly damaged, it is time for another sharpening session.
By following these maintenance tips, you can ensure that your knife stays sharp and ready for any culinary task that comes your way.


