
Sharpening a knife is an essential skill for any cook or chef, and it’s even more important for left-handed individuals. Using a dull knife can be frustrating and dangerous, but with the right technique, you can easily get a sharp edge on your knife.
Before you begin, it’s important to understand the difference between honing and sharpening. Honing is the process of realigning the edge of the blade, while sharpening involves removing small amounts of metal to create a new edge. For left-handed individuals, it’s crucial to adjust the angle and grip to ensure an optimal result.
To sharpen a knife for left-handed, you’ll need a sharpening stone or a whetstone. Begin by wetting the stone with water and placing it on a stable surface. Hold the knife with your left hand and grip the handle firmly. Position the blade against the stone at a 20-degree angle, with the cutting edge facing away from you.
Using moderate pressure, move the blade back and forth across the stone in a sweeping motion. Be sure to maintain a consistent angle and apply even pressure to both sides of the blade. Repeat this process several times, gradually increasing the pressure and number of strokes to sharpen the knife.
After sharpening the knife, it’s essential to hone the edge to further refine its sharpness. Use a honing rod or a ceramic rod to realign the blade’s edge, ensuring a precise and razor-sharp finish. Hold the rod with your left hand and position the blade against it at a 20-degree angle. Glide the blade down the rod, moving from the base to the tip, while maintaining a steady and controlled motion.
Remember to always wash and dry your knife after sharpening to remove any metal particles and debris. With regular practice and proper technique, you can keep your knives sharp and ready for any kitchen task. Don’t let being left-handed discourage you – with the right approach, you can sharpen your knives with ease and precision.
Choosing the Right Knife Sharpening Tools
When it comes to sharpening a knife, using the right tools is essential to achieve the best results. With the wide variety of sharpening tools available on the market, it can be overwhelming to choose the right one. Here are some factors to consider when selecting knife sharpening tools:
Type of Knife:
The first step in choosing the right sharpening tools is to consider the type of knife you have. Different knives require different sharpening techniques and tools. For instance, a serrated knife requires a specialized sharpening tool specifically designed for serrated blades.
Sharpening Method:
There are different methods of knife sharpening, including using whetstones, sharpening rods, and electric sharpeners. Each method has its advantages and disadvantages. Consider your skill level and the time you are willing to invest in the sharpening process. Whetstones require more skill and time but offer precise control, while electric sharpeners are quick and convenient.
Grit Size:
Another important factor is the grit size of the sharpening tools. Grit size refers to the size of the abrasive particles on the sharpening surface. Coarser grits are suitable for repairing damaged or dull edges, while finer grits are ideal for achieving a polished and razor-sharp edge. It’s recommended to have sharpening tools with different grit sizes to cater to various sharpening needs.
Once you have considered these factors, you can make an informed decision and choose the right knife sharpening tools that suit your needs. Remember, using the appropriate tools and techniques will ensure that your knife is sharpened efficiently and effectively.
The Importance of using Left-Handed Sharpening Equipment
When it comes to sharpening knives, using the right equipment is crucial for achieving the best results. For left-handed individuals, it is especially important to have access to dedicated left-handed sharpening tools. Here are a few reasons why using left-handed sharpening equipment is essential:
1. Proper Angle
Left-handed individuals have a different hand orientation compared to right-handed people. This means that when sharpening a knife, the angle at which the blade meets the sharpening surface will vary. Using left-handed sharpening equipment ensures that the knife edge is properly aligned, resulting in a more consistent and effective sharpening process.
2. Comfort and Control
Using right-handed sharpening tools can be uncomfortable for left-handed individuals and may affect their grip and control. Left-handed sharpening equipment is designed with ergonomic features that cater to the needs of left-handed users. This allows for improved comfort and better control over the sharpening process, ultimately leading to better overall results.
3. Safety
Safety should always be a top priority when sharpening knives. Using the wrong equipment can increase the risk of accidents or injuries. Left-handed individuals may find it challenging to use right-handed sharpening tools safely, as they may need to modify their technique or struggle to maintain a secure grip on the tool. Left-handed sharpening equipment eliminates these potential safety hazards, providing a safer and more convenient sharpening experience.
By using dedicated left-handed sharpening equipment, left-handed individuals can ensure that their knives are sharpened effectively and safely. Investing in high-quality left-handed sharpening tools is a worthwhile decision that will enhance the longevity and performance of their knives.
Cleaning and Preparing Your Knife
Before you begin sharpening your left-handed knife, it is essential to ensure that it is clean and properly prepared. Here are some key steps to follow:
Step 1: Safety first
Before handling your knife, make sure to put on a sturdy pair of cut-resistant gloves to protect your hands. Safety should always be your top priority.
Step 2: Remove any dirt or debris
Inspect the blade of your knife for any dirt, rust, or residue. Use a damp cloth or sponge to wipe away any debris from the surface of the blade. Be sure to pay close attention to the area where the edge meets the handle, as this is often overlooked.
Step 3: Wash with mild soap
Fill a sink or basin with warm water and add a few drops of mild dish soap. Gently wash the entire knife, including the blade, handle, and any other parts. Use a soft-bristled brush or sponge to remove any stubborn dirt or grime.
Step 4: Rinse and dry
Thoroughly rinse the knife under running water to remove any soap residue. Pay extra attention to ensure that no soap remains on the cutting edge. Once rinsed, use a clean towel or paper towel to dry the knife completely.
Step 5: Inspect for damages
Carefully examine the knife for any signs of damage, such as chips or cracks. If you notice any, it is recommended to consult a professional for repairs or consider replacing the knife.
By following these steps to clean and prepare your left-handed knife, you can ensure that it is in optimal condition before sharpening. A clean and well-maintained knife will result in a more efficient and effective sharpening process.
Removing Rust and Dirt from the Blade
Before sharpening your left-handed knife, it is crucial to remove any rust and dirt that may have accumulated on the blade. Not only does this help improve the cutting efficiency, but it also helps prevent further damage to the knife.
Here are some effective methods for removing rust and dirt from your left-handed knife:
- Using Vinegar: Soak a cloth or sponge in white vinegar and gently scrub the blade to remove rust. Rinse the knife with water and dry it thoroughly.
- Using Lemon Juice: Apply lemon juice to the blade and scrub it using a soft brush or cloth. Lemon juice contains citric acid, which helps dissolve rust. Rinse the knife with water and dry it completely.
- Using Baking Soda: Create a paste by mixing baking soda with water. Apply the paste to the rusty areas of the blade and scrub it gently with a soft brush. Rinse the blade with water and dry it thoroughly.
- Using Sandpaper: If the rust is stubborn and cannot be removed with the methods mentioned above, you can try using fine-grit sandpaper. Gently rub the rusted areas with the sandpaper in a circular motion until the rust is removed.
Remember to always exercise caution when removing rust from a knife blade to prevent any injuries. Once the rust and dirt have been adequately removed, you can proceed with sharpening your left-handed knife to restore its cutting edge.
Why Proper Knife Cleaning is Essential for Sharpening
Proper knife cleaning is an essential step in the sharpening process for left-handed individuals. Neglecting to clean your knife before sharpening can lead to less effective results and can even damage your knife. Here are a few reasons why proper knife cleaning is important:
1. Prevents Build-up
Over time, knives accumulate food particles, dirt, and oils on their blades. This build-up can hinder the effectiveness of the sharpening process and prevent proper blade contact with the sharpening tool. By thoroughly cleaning your knife, you ensure that the sharpening process can be performed optimally and that any debris does not interfere with the sharpening angle.
2. Increases Sharpening Efficiency
A clean knife allows for better contact between the blade and the sharpening tool, resulting in a more efficient sharpening process. Cleaning the knife removes any obstacles that may hinder the sharpening process, allowing the sharpener to work on a smooth surface and achieve optimal results. It is important to note that using a dirty knife can cause the sharpening tool to wear down more quickly.
| Proper Knife Cleaning Tips: |
|---|
| 1. Use warm water and mild dish soap to wash the knife. |
| 2. Scrub the blade gently with a soft sponge or cloth to remove any stuck-on residues. |
| 3. Pay extra attention to the handle and hilt to ensure all areas are cleaned. |
| 4. Rinse the knife thoroughly with warm water to remove any soap residue. |
| 5. Dry the knife completely before proceeding with the sharpening process. |
By taking the time to properly clean your knife before sharpening, you can ensure the best possible results and prolong the life of your knife. Remember, a clean knife is a sharp knife!
Sharpening Techniques for Left Handed
When it comes to sharpening a knife, left-handed individuals may face some challenges. However, with the right techniques and tools, sharpening a knife can be just as easy for left-handed people as it is for right-handed people. Here are some sharpening techniques specifically designed for left-handed individuals:
1. Adjusting the Angle
One of the key factors in sharpening a knife is maintaining the correct angle between the blade and the sharpening tool. For left-handed individuals, this may involve adjusting the angle to suit their dominant hand. It is important to find a comfortable position and grip that allows for precise control over the sharpening process.
Using a sharpening guide or jig can help left-handed individuals maintain a consistent angle throughout the sharpening process. These tools can be adjusted to accommodate the dominant hand and ensure a uniform edge is achieved.
2. Mirror Technique
The mirror technique is a useful method for left-handed individuals. It involves placing a small mirror in front of the sharpening stone or tool to reflect the image of the blade. By watching the mirror’s reflection, left-handed individuals can mimic the same motions as right-handed individuals but in reverse.
This technique can provide a visual guide for left-handed individuals, making it easier to control the sharpening angle and ensure an even edge is achieved.
Additionally, using a sharpening system that allows blades to be sharpened from both sides can be advantageous for left-handed individuals. This way, they can alternate between the dominant and non-dominant hands, making the sharpening process more comfortable and efficient.
By implementing these sharpening techniques, left-handed individuals can confidently and effectively sharpen their knives. With practice and patience, achieving a sharp and precise edge on a knife can become second nature, regardless of whether someone is left or right-handed.
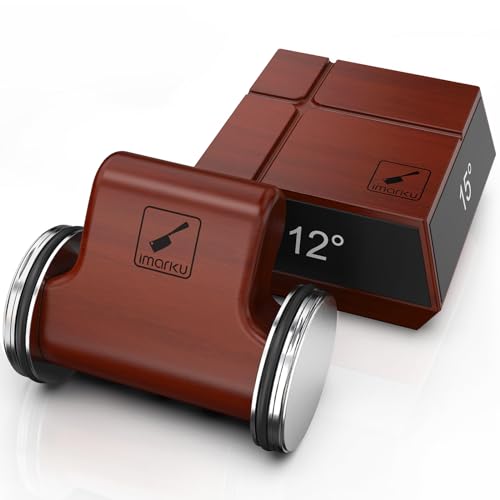
Understanding the Correct Knife Sharpening Angles
When it comes to knife sharpening, understanding the correct angles is crucial in achieving optimal results. Different knives have different blade angles, and it’s important to know which angle to use when sharpening your knife.
Primary and Secondary Bevels
Most knives have two bevels: a primary bevel and a secondary bevel. The primary bevel is the main part of the blade that determines the shape and cutting ability of the knife. The secondary bevel is a smaller bevel that is formed at the edge of the blade during the sharpening process.
To sharpen a knife properly, you need to maintain the correct angle between the blade and the sharpening stone. The angle for the primary bevel typically ranges between 15 and 20 degrees, depending on the type of knife. Knives used for heavy-duty tasks, like chopping or butchering, usually have a more obtuse angle closer to 20 degrees, while knives used for precision work, like filleting or slicing vegetables, tend to have a narrower angle closer to 15 degrees.
The Importance of Consistency
Consistency in maintaining the correct sharpening angle is vital to achieve a sharp and effective edge. Using a sharpening guide or honing system can help ensure that you maintain a consistent angle throughout the sharpening process. These tools act as guides and help you hold the knife at the desired angle while sharpening.
However, if you prefer to sharpen freehand, it’s important to practice and develop a steady hand. It takes time and experience to be able to consistently hold the knife at the correct angle without the aid of a guide or honing system.
Note: Left-handed individuals should follow the same angle recommendations as right-handed individuals. The angle is determined by the knife type and not the user’s dominant hand.
Conclusion
Understanding the correct knife sharpening angles is essential for achieving razor-sharp blades. By maintaining the appropriate angle during the sharpening process, you can ensure that your knives are ready for any cutting task. Whether you use a sharpening guide or develop the skill to sharpen freehand, consistency is key to achieving excellent results.
Tips for Achieving a Razor-Sharp Edge
When it comes to sharpening a knife, it is important to have the right technique and tools. Here are some tips to help you achieve a razor-sharp edge:
1. Choose the right angle: Finding the correct sharpening angle is crucial. For most knives, a 20-degree angle is ideal. However, some knives may require a different angle, so it’s best to check the manufacturer’s instructions.
2. Use a sharpening stone: A sharpening stone is a great tool for achieving a sharp edge. Wet the stone with water and hold the knife at the desired angle. Using gentle pressure, slide the knife back and forth across the stone in a sweeping motion. Repeat this process several times on each side of the blade.
3. Maintain a consistent pressure: Applying consistent pressure while sharpening is essential. Make sure to maintain a steady hand and apply equal pressure throughout the sharpening process. This will help ensure a uniform edge.
4. Hone the edge: After sharpening, it’s important to hone the edge to refine and smooth it. Use a honing rod or a strop to gently run the blade along the surface in a controlled manner. This will help remove any burrs and polish the edge.
5. Test the sharpness: To ensure your knife is razor-sharp, perform a simple cutting test. Carefully slice through a piece of paper or shave a small patch of hair from your arm. If the knife glides through effortlessly, then you have achieved a sharp edge.
Remember, practice makes perfect when it comes to sharpening knives. Take your time and be patient, and soon you will be able to achieve a razor-sharp edge consistently.


