
Sharpening a knife is an essential skill for any chef or culinary enthusiast. A dull knife not only makes every task in the kitchen more difficult but also increases the risk of accidents. While there are many methods to sharpen a knife, using a belt sander is one of the quickest and most effective ways to achieve a razor-sharp edge. In this article, we will guide you through the process of sharpening a knife using a belt sander, allowing you to effortlessly slice through ingredients like a pro.
Why choose a belt sander?
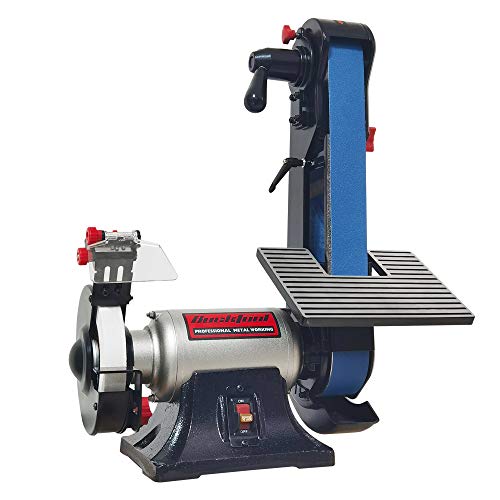
A belt sander is a powerful tool that is commonly used for wood sanding and shaping. However, it can also be a fantastic option for sharpening knives. The high-speed spinning belt can remove metal quickly and efficiently, providing a sharp edge in a matter of minutes. With the right technique and a little practice, you can achieve professional-level results, transforming a dull blade into a finely honed instrument.
Important safety precautions
Before we begin, it is important to note that sharpening a knife with a belt sander can be potentially dangerous if not done correctly. Always wear protective goggles and gloves to prevent any accidents. Additionally, make sure to secure the belt sander firmly before starting, and position yourself in a stable and comfortable stance. With the proper safety precautions in place, you can proceed with confidence and sharpen your knife with ease.
Sharpening a Knife with a Belt Sander
Sharpening a knife with a belt sander is a quick and effective method to restore a dull blade to its former sharpness. Using a belt sander allows you to remove material from the blade, creating a new edge with a consistent bevel angle.
Step 1: Safety Precautions
Before you begin, it’s important to take necessary safety precautions. Ensure that you are wearing safety goggles and gloves to protect your eyes and hands from any flying debris. Additionally, make sure to secure the belt sander to a sturdy workbench or table to prevent any accidents or injuries.
Step 2: Choosing the Right Belt
When sharpening a knife with a belt sander, it’s crucial to select the right type of belt. Opt for a coarse-grit belt, such as 60 or 80 grit, to remove the dull edge and establish a new bevel. Keep in mind that using a finer grit belt may not be as effective and can result in a longer sharpening process.
Step 3: Blade Positioning
Hold the knife firmly with one hand and position the blade against the moving belt at a consistent angle. Maintain a slight downward pressure to ensure optimal contact between the blade and the belt. Begin sharpening from the heel of the blade and work your way towards the tip, applying even pressure throughout the process.
Step 4: Bevel Angle
It’s important to maintain a consistent bevel angle while sharpening with a belt sander. This will ensure that the edge of the blade is uniform and sharp. A bevel angle of around 20 degrees is typically recommended for most knives, but this may vary depending on the type and purpose of the blade.
Step 5: Cooling the Blade
As you sharpen the knife, the heat generated by the friction can affect the hardness of the blade. To prevent overheating, periodically dip the blade into a container of water or use a wet sponge to cool it down. This will help maintain the integrity of the steel and prevent any potential damage.
Step 6: Fine-Tuning the Edge
Once you have completed the initial sharpening with the coarse-grit belt, you can refine the edge further using a finer-grit belt. This step will help remove any remaining burrs and enhance the sharpness of the blade. Be sure to follow the same technique and maintain the bevel angle as before.
Remember, practicing proper technique and exercising caution is essential when sharpening a knife with a belt sander. Take your time, start with a dull blade, and gradually work your way up to a finer grit belt for the best results.
Gathering the Necessary Tools
Before you begin sharpening your knife using a belt sander, it is important to gather all the necessary tools. Having the right tools will make the sharpening process more efficient and ensure better results.
1. Belt Sander
The most important tool for this sharpening method is a belt sander. Make sure you have a quality belt sander with a variable speed control, as this will allow you to adjust the speed according to the knife and your desired results.
2. P80 Grit Belt
To begin the sharpening process, you will need a P80 grit belt. This coarse belt is ideal for removing material from the knife’s blade and creating a new cutting edge.
3. P220 Grit Belt
After using the P80 grit belt, you will switch to a finer P220 grit belt. This belt will help refine the cutting edge and remove any scratches left by the previous belt.
4. Leather Strop
Once you have finished sharpening the knife with the belt sander, it is recommended to use a leather strop. The strop, with polishing compound applied, will give your knife a final honing and make the edge razor-sharp.
With these tools at hand, you are now ready to start the sharpening process using a belt sander.
Setting up the Belt Sander
Before you begin sharpening your knife with a belt sander, it’s important to properly set up the sander to ensure safe and effective results. Here are the steps to get your belt sander ready for the sharpening process:
- Find a suitable work area: Choose a well-ventilated area with enough space to safely operate the belt sander. Clear the area of any debris or clutter that may interfere with your work.
- Select the appropriate grit belt: Depending on the condition of your knife blade and the level of sharpening required, choose the right grit belt for your belt sander. Coarse grits like 60 or 80 are suitable for repairing heavily damaged edges, while finer grits like 220 or 400 are ideal for honing and refining the blade.
- Install the belt on the sander: To set up the belt, locate the tension release lever or knob on the sander and disengage it. Carefully align the belt with the sander’s rollers, making sure it is centered and properly seated. Once aligned, release the tension lever to secure the belt in place.
- Check the belt tracking: Before you start sharpening, check the belt tracking to ensure it runs straight and true. Switch on the sander and observe the movement of the belt. If it veers off to one side, use the tracking adjustment knob to bring it back to the center position.
- Adjust the table angle: Many belt sanders come with an adjustable table that allows you to set the angle at which the knife will be sharpened. Refer to the manufacturer’s instructions to properly adjust the table angle for your specific model.
- Safety precautions: Always wear appropriate safety gear, including safety glasses and gloves, to protect yourself from any flying debris. Make sure the belt sander is securely placed on a stable surface before use.
By following these steps, you will be able to set up your belt sander correctly and safely begin the knife sharpening process.
Sharpening Technique
When sharpening a knife using a belt sander, it’s important to follow the proper technique to achieve optimal results. Here is a step-by-step guide on how to sharpen your knife effectively.
| Step | Description |
|---|---|
| 1 | Start by ensuring that the belt sander is securely fixed to a stable surface. This will provide stability and safety during the sharpening process. |
| 2 | Choose the appropriate grit of sandpaper for the type of knife you are sharpening. Coarse grits are suitable for repairing damaged blades, while finer grits are better for regular sharpening. |
| 3 | Hold the knife firmly with one hand, making sure to keep your fingers away from the belt. Position the blade against the moving belt at about a 20-degree angle. |
| 4 | Gently move the knife against the belt in a consistent and controlled manner. Ensure that the entire blade makes contact with the belt to maintain an even sharpening. |
| 5 | Avoid applying excessive pressure on the knife, as this can lead to overheating and damage to the blade. Let the belt do the work and maintain a steady pace. |
| 6 | After a few passes, check the sharpness of the knife by carefully running your finger along the edge. If it feels sufficiently sharp, move on to the next step. |
| 7 | Flip the knife over and repeat the process on the other side to ensure even sharpening. Remember to maintain the same angle and steady motion. |
| 8 | Once you are satisfied with the sharpness of the blade, switch to a finer grit sandpaper to further refine the edge. Repeat the process with the finer grit until desired sharpness is achieved. |
Following this sharpening technique will help you achieve a sharp and precise edge on your knife using a belt sander. Remember to always prioritize safety and take your time to ensure the best results.
Finishing and Testing the Knife
Once you have sharpened the knife on the belt sander, it is important to finish and test the blade to ensure a sharp and clean edge. Follow these steps to complete the process:
Cleaning the Blade
Before testing the knife, it is crucial to clean off any debris or metal shavings that may still be on the blade. Use a clean cloth or paper towel to wipe the blade thoroughly. Pay close attention to the areas near the edge to ensure they are completely clean.
Honing the Edge
Although the belt sander creates a sharp edge, it can leave small burrs or imperfections on the blade. To remove these, gently run the blade along a honing rod or a sharpening stone a few times on each side. This will help refine the edge and ensure a smoother cut.
Testing the Sharpness
To test the sharpness of the knife, carefully run the blade across a piece of paper or try cutting a tomato or onion. If the knife easily cuts through the paper or the produce without any resistance, then it is sharp. If not, repeat the honing process to further refine the edge and retest.
Remember to always handle sharp knives with caution and safety. Store your newly sharpened knife in a secure place to prevent accidents. Regular honing and maintenance will help preserve the sharpness of your knife and ensure its longevity.


