

Introduction: Having a dull knife can be frustrating and dangerous. It can make cooking tasks more difficult and increase the risk of accidents. However, you don’t always need to send your knife for professional sharpening or invest in expensive sharpening tools. In fact, you can sharpen your knife at home using a belt sander. This powerful tool can help you achieve a razor-sharp edge on your knife in no time, making your cooking experience much more enjoyable and efficient.
Step 1: Safety First
Before you begin sharpening your knife with a belt sander, it’s important to prioritize safety. Make sure you wear protective gloves to avoid any accidental cuts. Additionally, use safety goggles to protect your eyes from sparks or debris that may fly off during the sharpening process. Remember, safety should always be your top priority when working with power tools.
Step 2: Attach the Knife to the Belt Sander
Once you have taken the necessary safety precautions, it’s time to attach your knife to the belt sander. Ensure that the blade is securely fastened to the tool, making sure it won’t come loose during the sharpening process. Keep in mind that the belt sander should have a medium grit belt for effective sharpening. If the belt is too coarse, you risk removing too much metal from the knife, while a fine grit belt may not provide sufficient sharpening.
Step 3: Sharpening Technique
Start by positioning the knife at a 20-degree angle to the belt sander. The angle is crucial, as it determines the sharpness of the edge. Maintain a firm grip on the knife handle and slowly slide the blade along the belt, moving in a single direction. Avoid applying too much pressure, as this can damage the blade or cause it to overheat. Repeat this process several times on each side of the blade until you achieve the desired sharpness.
Conclusion: Sharpening your knife with a belt sander is a cost-effective and efficient way to maintain a sharp edge. With the proper technique and safety precautions, you can easily achieve professional results at home. Remember to take your time and be patient during the sharpening process. Before you know it, you’ll have a perfectly sharp knife that will make your cooking tasks a breeze.
Why You Should Sharpen Your Knife
Keeping your knives sharp is crucial for a number of reasons. Here are some key points to consider:
- Efficiency: A sharp knife helps you work more efficiently in the kitchen. It allows for smoother and quicker cuts, reducing the time and effort required to prepare your meals. Whether you’re slicing vegetables or carving meat, a sharp knife makes the task much easier.
- Safety: Dull knives are more likely to slip, which can lead to accidents and injuries. When a knife is not sharp, you might exert more force while cutting, increasing the risk of the blade slipping and causing unintended harm. By keeping your knives sharp, you can minimize the chances of accidents and make your kitchen a safer place.
- Precision: A sharp knife allows for more precise cuts. It gives you better control over the blade and makes it easier to achieve the desired outcome. Whether you’re looking to create thin slices of tomato or finely dice an onion, a sharp knife will help you achieve precise and consistent results.
- Longevity: Properly maintaining your knives by regularly sharpening them can extend their lifespan. Dull knives often lead to more wear and tear on the blade, as they require more force to cut through objects. Regular sharpening helps to maintain the edge of the blade and prevent unnecessary damage. By keeping your knives sharp, you can ensure they last longer and perform at their best.
- Cooking Experience: Using a sharp knife enhances your overall cooking experience. It allows you to work with precision, speed, and confidence, making your time in the kitchen more enjoyable. When your knives are sharp, chopping, mincing, and slicing become effortless tasks, enhancing both the efficiency and satisfaction you derive from cooking.
Now that you understand the importance of sharpening your knife, it’s time to learn how to sharpen it effectively using a belt sander. Follow our step-by-step guide to achieve razor-sharp results.
Benefits of a Sharp Knife
A sharp knife is an essential tool in any kitchen. Not only does it make your food preparation tasks easier and more efficient, but it also promotes safety in the kitchen. Here are some of the key benefits of a sharp knife:
1. Precision Cutting: A sharp knife allows you to cut through ingredients with precision and control. This is especially important when working with delicate foods like herbs or thinly sliced vegetables. With a sharp knife, you can achieve professional-level cuts and presentation.
2. Time-saving: Cutting with a blunt knife can be a frustrating and time-consuming task. On the other hand, a sharp knife glides effortlessly through ingredients, saving you valuable time in the kitchen. Whether you’re chopping, dicing, or slicing, a sharp knife will help you get the job done quickly.
3. Safety: Contrary to common belief, a sharp knife is actually safer than a dull one. When using a sharp knife, you have better control and are less likely to apply unnecessary force. This reduces the risk of slips and accidental cuts. In the long run, using a sharp knife can help prevent injuries in the kitchen.
4. Maintaining Food Quality: A blunt knife can crush and damage the texture of the ingredients, resulting in a loss of flavor and quality. With a sharp knife, you can make clean cuts that preserve the integrity of the food. This is especially important when working with delicate meats and fish.
5. Versatility: A sharp knife is a versatile tool that can be used for various kitchen tasks. From slicing fruits and vegetables to carving meats and deboning fish, a sharp knife can handle it all. By investing in a high-quality, sharp knife, you can expand your culinary skills and tackle a wide range of recipes.
In conclusion, a sharp knife is more than just a kitchen tool – it’s a game-changer. Whether you’re a professional chef or a home cook, a sharp knife will revolutionize the way you prepare food. It offers precision, time-saving, safety, and the ability to maintain food quality. So, sharpen your knife regularly and enjoy the benefits it brings to your culinary adventures!
Knife Sharpening Tools
When it comes to sharpening a knife, having the right tools is essential for achieving a sharp and polished edge. Here are some essential knife sharpening tools:
1. Whetstone: A whetstone, also known as a sharpening stone, is a traditional method for sharpening knives. It is made of abrasive material, usually a combination of silicon carbide or aluminum oxide, embedded in a matrix of metal or ceramic. Whetstones come in different grit levels, ranging from coarse to fine, allowing you to gradually refine the edge of your knife.
2. Sharpening Steel: A sharpening steel, also called a honing steel, is a long rod with a handle that is used to align the edge of a knife. Contrary to popular belief, a sharpening steel does not actually sharpen a knife, but rather helps to maintain the edge, keeping it aligned and in good condition. It is an essential tool for regular maintenance and prolonging the sharpness of a knife.
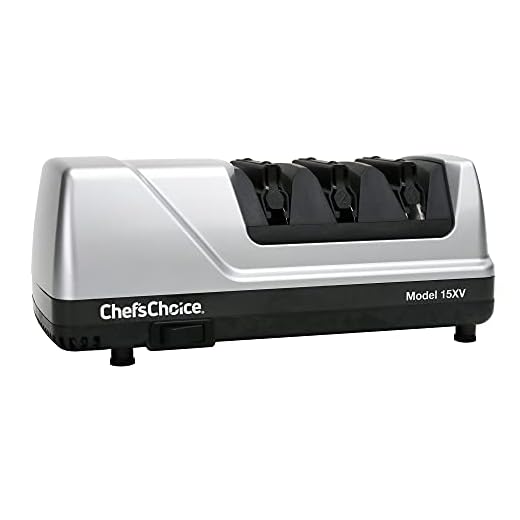
3. Electric Knife Sharpener: An electric knife sharpener is a convenient tool that uses rotating abrasive wheels to quickly and efficiently sharpen a knife. It can be a great option for those who want a hassle-free method of sharpening, as it typically requires little to no manual skill. Electric knife sharpeners are generally easy to use and can produce consistent and sharp results.
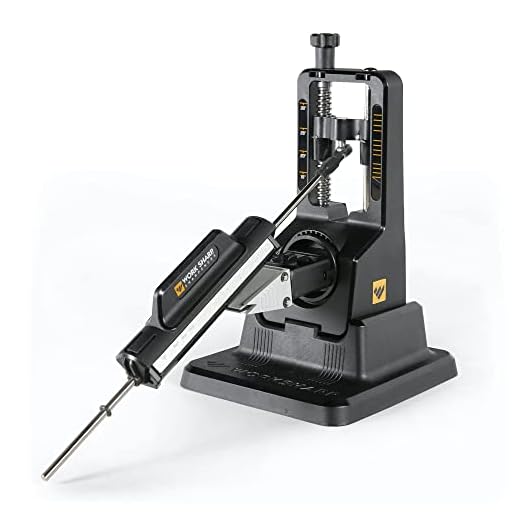
4. Belt Sander: A belt sander is a powerful tool that can be used to sharpen knives, among other things. It consists of a motorized belt that moves at high speed, allowing you to remove material and reshape the blade of a knife. However, using a belt sander requires caution and skill, as it can easily overheat the blade or remove too much material if not used properly.
These are just a few of the most common knife sharpening tools available on the market. Each tool has its own advantages and drawbacks, so it’s important to choose the one that best suits your needs and skill level. Remember to always follow proper safety precautions when sharpening a knife and take your time to achieve the best results.
How to Sharpen a Knife with a Belt Sander
A belt sander can be a convenient tool for sharpening knives, providing a quick and efficient way to restore the blade’s edge. Follow these step-by-step instructions to effectively sharpen your knife using a belt sander.
Step 1: Prepare the Belt Sander
Before you begin, ensure that the belt sander is securely positioned on a stable workbench or table. Make sure the sander is turned off and unplugged. Install a medium-grit sanding belt that is suitable for knife sharpening.
Step 2: Set the Angle
Determine the angle at which you would like to sharpen your knife. Most kitchen knives have a bevel angle of around 20 degrees, but this can vary depending on the type of knife. Adjust the angle guide on the belt sander to match your desired angle.
Step 3: Wear Safety Gear
Put on safety goggles and protective gloves to ensure your safety during the sharpening process. This will protect your eyes from any debris and your hands from accidental cuts.
Step 4: Position the Knife
Hold the knife firmly by the handle and position the blade against the sanding belt at the desired angle. Make sure the entire length of the blade comes into contact with the belt to ensure even sharpening.
Step 5: Start Sharpening
With a firm grip on the knife, turn on the belt sander and slowly move the blade across the sanding belt. Use consistent, light pressure and maintain the angle to achieve an even and consistent edge. Repeat this process several times, alternating the sides of the blade, until you achieve the desired sharpness.
Step 6: Check the Blade
After sharpening, carefully inspect the blade for any burrs or imperfections. If necessary, lightly pass the blade over the sanding belt a few more times to remove any remaining burrs.
Step 7: Hone the Edge
Once you are satisfied with the sharpness of the blade, use a honing rod or a sharpening stone to refine and polish the edge. This will help to maintain the knife’s sharpness over time.
By following these steps, you can effectively sharpen your knife using a belt sander. Remember to always prioritize safety and take your time to ensure a proper sharpening result.
Preparing Your Belt Sander
Before you begin sharpening your knife with a belt sander, it’s important to properly prepare your sander to ensure optimal results and safety. Follow these steps to prepare your belt sander:
- Choose the right abrasive belt: Select an abrasive belt specifically designed for knife sharpening. Knife sharpening belts typically have finer grits, ranging from 1000 to 4000 grit, which helps to achieve a sharper edge.
- Install the belt: Follow the manufacturer’s instructions to install the chosen abrasive belt onto your belt sander. Make sure the belt is securely attached and properly aligned to ensure smooth operation.
- Adjust the tracking: Use the tracking adjustment knob or lever on your belt sander to correct any misalignment of the belt. This will ensure that the belt stays centered during operation and prevents any unnecessary wear or damage.
- Secure the sander: Place your belt sander on a sturdy workbench or table and secure it firmly. This will prevent the sander from moving or vibrating excessively during the sharpening process, ensuring better control and accuracy.
- Check safety precautions: Before starting the sharpening process, ensure that you are wearing appropriate safety gear, including safety goggles and gloves. It’s important to prioritize safety and protect yourself from any potential hazards.
By following these steps, you will be well-prepared to sharpen your knife using a belt sander. Taking the time to properly set up your sander and ensure safety will help you achieve better results and prolong the lifespan of your tool.
Sharpening Steps with a Belt Sander
Sharpening a knife with a belt sander is an effective way to restore its cutting edge. Here are the steps to follow:
| Step 1: | Prepare the belt sander by setting it up on a stable work surface. Make sure it is securely fastened, and the belt is properly aligned. |
| Step 2: | Put on safety goggles and gloves to protect yourself from any potential injuries. |
| Step 3: | Inspect the knife blade for any chips or nicks. If there are any, use a coarse-grit sandpaper or a grinding wheel to remove them before proceeding. |
| Step 4: | Turn on the belt sander and hold the knife firmly in your dominant hand. Place the blade against the running belt at a 20-degree angle. |
| Step 5: | Move the knife steadily along the belt, maintaining the angle and applying light pressure. Work from the base of the blade towards the tip, repeating the process several times. |
| Step 6: | Periodically check the sharpness of the blade by carefully running your finger across the cutting edge. Be cautious to avoid getting cut. |
| Step 7: | Once the desired sharpness is achieved, turn off the belt sander and carefully wipe the blade with a clean cloth to remove any metal dust or debris. |
| Step 8: | Finish the sharpening process by polishing the blade with a fine-grit sandpaper or a leather strop to refine the edge and remove any burrs. |
| Step 9: | Clean the belt sander and store it properly after use. |
Remember, using a belt sander for knife sharpening requires caution and precision. Always prioritize safety and take your time to achieve the best results.
Safety Precautions
When sharpening a knife with a belt sander, it is essential to take proper safety precautions to avoid accidents and injuries. Here are some important safety measures to follow:
1. Wear Safety Glasses
Always wear safety glasses or goggles to protect your eyes from any debris or sparks that may fly off during the sharpening process. Safety glasses will prevent any potential eye injuries and should be worn throughout the entire process.
2. Use Protective Gloves
Protective gloves are crucial to prevent any cuts or injuries while working with the knife and the belt sander. They provide a barrier between your hands and the machine, reducing the risk of accidents and ensuring a better grip on the knife.
3. Secure the Knife Firmly
Before starting the sharpening process, make sure the knife is securely held in place. This can be done by using a clamp or a vise to hold the knife steady and prevent it from slipping or moving while being sharpened.
4. Position the Belt Sander Safely
Ensure that the belt sander is placed on a stable surface and firmly secured. This will prevent any movement or vibrations during the sharpening process, ensuring precision and reducing the risk of accidents.
5. Keep a Safe Distance
Maintain a safe distance between your body and the belt sander while sharpening the knife. This will minimize the risk of accidental contact with the machine and reduce the chance of injuries.
6. Follow the Belt Movement
When sharpening the knife, always move it against the direction of the belt. This will provide better control and prevent the knife from being caught or pulled into the machine, reducing the risk of accidents.
7. Avoid Overheating
Continuous sharpening can generate heat, which can negatively affect the knife’s temper and ruin its edge. Take breaks during the sharpening process to allow the knife to cool down and avoid overheating.
8. Practice Proper Technique
It is important to have a good understanding of the correct sharpening technique before using a belt sander. Follow the manufacturer’s instructions and practice on less valuable knives or scrap pieces before sharpening your best knives.
By following these safety precautions, you can ensure a safe and effective knife sharpening experience using a belt sander. Remember to prioritize safety at all times to prevent any accidents or injuries.


