

Sharpening a knife is an essential skill for any chef or outdoors enthusiast. A dull knife can make slicing and dicing a frustrating and unsafe task. Fortunately, with the right tools and techniques, you can easily bring your knife back to its original sharpness. One of the most effective tools for sharpening knives is a diamond whetstone. This versatile sharpening stone is durable, long-lasting, and capable of producing a razor-sharp edge on your knife.
Step 1: Prepare the Diamond Whetstone
Before you begin sharpening your knife, you need to prepare the diamond whetstone. Start by placing the whetstone on a stable surface, such as a countertop or workbench. Make sure the whetstone is clean and free from any debris or oil. If the whetstone is dry, you can sprinkle a little water on the surface to create a slurry that helps with the sharpening process.
Note: Different diamond whetstones may have specific instructions for preparation. Always refer to the manufacturer’s guidelines for the best results.
Step 2: Hold the Knife Properly
Once the diamond whetstone is ready, it’s time to hold the knife correctly. Grip the knife handle firmly with your dominant hand, making sure your fingers are secure and out of the way of the blade. Hold the knife at a slight angle, around 20 degrees, against the whetstone. Remember to maintain a consistent angle throughout the sharpening process to achieve an even edge.
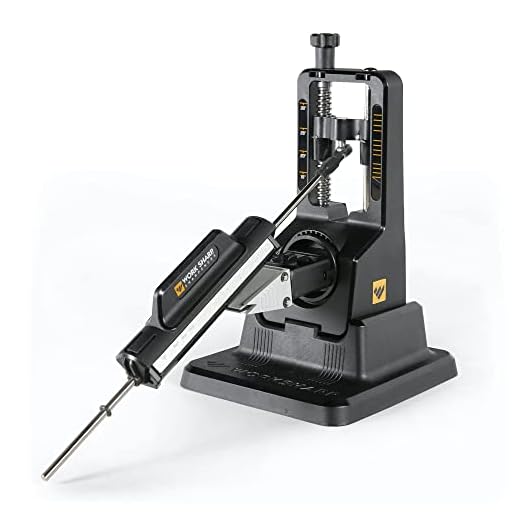
Pro Tip: If you’re unsure about the correct angle, you can use a sharpening guide or angle guide to help you maintain the desired angle.
Choosing the Right Diamond Whetstone
When it comes to sharpening your knife, it is crucial to choose the right diamond whetstone for the job. Diamond whetstones are known for their durability and effectiveness in sharpening blades. Here are some factors to consider when selecting a diamond whetstone:
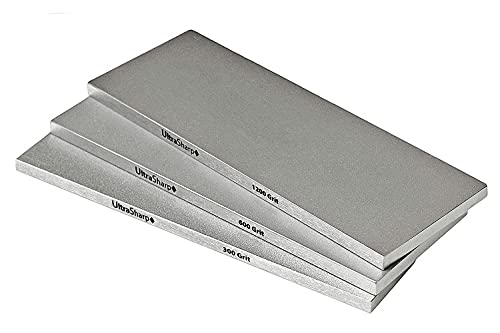
Grit Size: Diamond whetstones come in different grit sizes, ranging from coarse to fine. Coarse grit is ideal for repairing severely damaged or dull blades, while fine grit is suitable for maintaining already sharp edges. Consider the condition of your knife and the level of sharpness you want to achieve when selecting the grit size.
Stone Size: Diamond whetstones are available in various sizes, and the right size will depend on the length of your knife blade. It is recommended to choose a whetstone that is at least as long as your knife’s blade. This will ensure that the entire length of the blade can be sharpened evenly.
Base Material: Diamond whetstones are typically mounted on a base made of plastic, metal, or wood. The base provides stability while sharpening and helps prevent the stone from sliding. Consider the type of base material that suits your needs and preferences.
Quality: It is important to invest in a high-quality diamond whetstone that will last for a long time and provide consistent results. Look for reputable brands and read reviews from other users to determine the quality and performance of the whetstone.
Usage: Consider how often you will be using the diamond whetstone and the types of knives you will be sharpening. If you regularly sharpen knives, it may be worth investing in a higher-priced whetstone that can withstand heavy usage and produce excellent results.
Remember, choosing the right diamond whetstone is essential for achieving a sharp and precise edge on your knife. Take into account the grit size, stone size, base material, quality, and usage to make an informed decision when purchasing a diamond whetstone.
Consider the Grit Size and Material
When choosing a diamond whetstone for sharpening your knife, it is important to consider both the grit size and the material of the stone. The grit size refers to the coarseness or fineness of the stone’s abrasive surface, while the material refers to what the stone is made of.
The grit size of a diamond whetstone determines how quickly and aggressively it will remove material from the blade of your knife. Generally, lower grit sizes, such as 200 or 300, are used for repairing or reprofiling a dull or damaged edge, while higher grit sizes, such as 800 or 1000, are used for achieving a finer edge and refining the blade.
Additionally, the material of the diamond whetstone can vary. It can be made of natural or synthetic diamond particles embedded in a metal or plastic base. Natural diamond stones tend to be more expensive but offer excellent hardness and long-lasting performance. Synthetic diamond stones, on the other hand, are more affordable and still provide good sharpening results.
When selecting a diamond whetstone, consider the specific needs of your knife and the type of sharpening you want to achieve. If you have a damaged or extremely dull blade, a lower grit size may be necessary. On the other hand, if you are looking for maintenance or touch-up sharpening, a higher grit size may be more suitable. Additionally, consider your budget and the durability of the stone, taking into account whether you prefer a natural or synthetic option.
Choosing the Right Grit Size:
- Lower grit sizes (200-300): For repairing or reprofiling a dull or damaged edge.
- Higher grit sizes (800-1000): For achieving a finer edge and refining the blade.
Considering the Material:
- Natural diamond stones: More expensive but offer excellent hardness and long-lasting performance.
- Synthetic diamond stones: More affordable and still provide good sharpening results.
By considering the grit size and material of a diamond whetstone, you can choose the right tool for sharpening your knife and achieve the desired level of sharpness and refinement.
Look for a Whetstone with a Holder
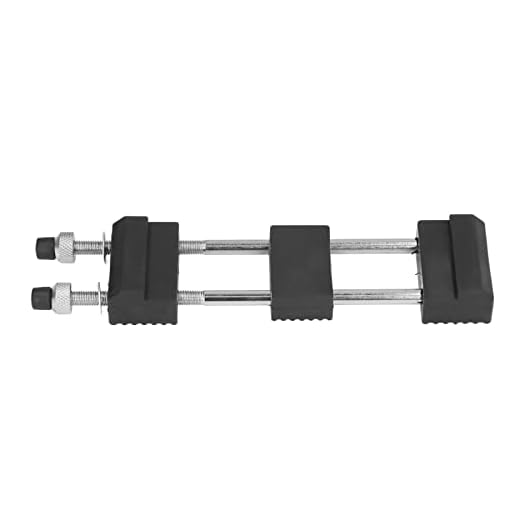
When purchasing a diamond whetstone, it is important to look for one that comes with a holder. A holder is a necessary accessory as it provides stability and prevents the whetstone from moving around while you are sharpening your knife.
Using a whetstone without a holder can be quite tricky, especially if you are a beginner. Without a holder, the whetstone may slip and slide, making it difficult to maintain the proper angle and control over the sharpening process. This can result in inconsistent sharpening and potential damage to your knife.
Furthermore, a holder also acts as a safety measure, preventing any accidental slippage of the whetstone that can lead to injury. It provides a solid foundation for your whetstone, ensuring that it remains in place throughout the sharpening process.
When choosing a whetstone with a holder, look for one that is compatible with the size and shape of your diamond whetstone. The holder should have adjustable features to accommodate different thicknesses of whetstones. Additionally, make sure that the holder is made of sturdy materials that can withstand the pressure and movements involved in sharpening.
By choosing a whetstone with a holder, you can enhance your sharpening experience and achieve better results. The holder adds stability and safety, allowing you to sharpen your knife with ease and precision.
Preparing the Diamond Whetstone
Before you can start sharpening your knife with a diamond whetstone, it is important to properly prepare the whetstone to ensure optimal results. Here are the steps to follow:
- Clean the whetstone: Begin by wiping the surface of the diamond whetstone with a clean, damp cloth to remove any dirt or debris. This will help prevent any unwanted particles from interfering with the sharpening process.
- Soak the whetstone: Some diamond whetstones, especially those that are double-sided, may require soaking in water before use. Check the manufacturer’s instructions to determine if this is necessary and how long you should soak the whetstone for. Typically, a few minutes of soaking is sufficient.
- Set up a stable work surface: Place a non-slip mat or towel on a flat, stable surface to prevent the whetstone from moving while you are sharpening your knife. This will ensure your safety and help you maintain control during the sharpening process.
- Position the whetstone: Once the whetstone is ready, place it on the prepared work surface with the coarse-grit side facing up. This side is often marked with a distinct color or pattern to differentiate it from the finer-grit side.
By properly preparing your diamond whetstone, you will create the ideal surface for sharpening your knife effectively and efficiently. Now that you have prepared the whetstone, you are ready to proceed with sharpening your knife.
Soak the Whetstone in Water
Before you begin sharpening your knife on a diamond whetstone, it’s important to soak the whetstone in water. This step is crucial because it helps to prevent overheating and damage to the knife and the whetstone.
To soak the whetstone, you should place it in a container or sink filled with water and let it sit for about 10 to 15 minutes. This allows the pores of the whetstone to absorb water, which will keep the surface of the stone lubricated during the sharpening process.
Why should you soak the whetstone in water?
Soaking the whetstone in water helps to reduce friction and heat generated during the sharpening process. When the whetstone is dry, the blade of the knife can create too much heat, which can damage the edge and the tempering of the knife. The water acts as a lubricant, helping the blade to glide smoothly across the surface of the whetstone and preventing overheating.
Additionally, soaking the whetstone in water helps to clean the surface and remove any debris or residue that may have built up over time. This ensures that you have a clean surface to work on and that your sharpening process is effective.
How to properly soak the whetstone
When soaking the whetstone, make sure that it is fully submerged in water. You can use a water container or a sink filled with water to soak the stone. Allow enough time for the water to be absorbed into the pores of the whetstone, which typically takes around 10 to 15 minutes.
After the whetstone has been soaked, you can remove it from the water and place it on a flat and stable surface to begin sharpening your knife. Remember to keep the whetstone wet throughout the sharpening process, adding water as needed to maintain a lubricated surface.
Place the Whetstone on a Stable Surface
Before you begin sharpening your knife with a diamond whetstone, it is important to find a stable surface where you can securely place the whetstone. This will ensure that the whetstone remains in place while you sharpen your knife and reduce the risk of accidents or injuries.
Look for a flat and non-slip surface, such as a table or a countertop, to place the whetstone on. Make sure that the surface is clean and free from any debris that could interfere with the sharpening process.
If you don’t have a suitable surface, you can consider using a whetstone holder or a towel to stabilize the whetstone. A whetstone holder is a device specifically designed to hold the whetstone securely in place, while a towel can provide additional grip and stability.
Once you have found a stable surface, place the whetstone on it, making sure that it is positioned securely and does not wobble. This will create a solid foundation for you to work with and make the sharpening process smoother and more effective.
Sharpening the Knife
Once you have set up your diamond whetstone, it’s time to start sharpening your knife. Follow these steps to achieve a sharp edge:
- Prepare the knife: Make sure your knife is clean and dry before starting the sharpening process. This will prevent any debris or dirt from interfering with the sharpening.
- Select the angle: Determine the angle at which you want to sharpen your knife. This will depend on the type of knife and its purpose. A common angle for kitchen knives is around 20 degrees.
- Hold the knife: Hold the knife firmly with your dominant hand. Place your non-dominant hand on the handle for stability.
- Start sharpening: Rest the blade flat on the whetstone at the chosen angle. Apply moderate pressure and move the knife across the stone in a sweeping motion, from heel to tip. Repeat this several times on each side of the blade.
- Check the progress: After a few passes on each side, check the sharpness of the knife. You can do this by carefully feeling the edge with your finger. If it feels sharper, you are on the right track.
- Alternate sides: To ensure an even sharpening, alternate sides after a few passes. This will help maintain a balanced edge.
- Use lighter pressure: As you progress, gradually reduce the pressure while still maintaining the angle. This will help refine the edge and prevent excessive wear on the whetstone.
- Finish with a few lighter strokes: Once you are satisfied with the sharpness of your knife, finish with a few lighter strokes on each side to polish the edge.
- Clean the knife: After sharpening, clean the knife to remove any metal shavings or residue. You can use a cloth or paper towel to wipe it down.
Following these steps will guide you through the process of sharpening your knife using a diamond whetstone. Remember, practice makes perfect, so don’t be discouraged if you don’t achieve a razor-sharp edge on your first try.
Hold the Knife at the Correct Angle
When sharpening your knife with a diamond whetstone, it is crucial to hold the knife at the correct angle. The angle at which you hold your knife will determine the sharpness of the blade and the effectiveness of the sharpening process.
To find the correct angle, you can start by placing the blade against the whetstone at a 90-degree angle. While maintaining this angle, gradually lower the back of the blade until you feel the edge make contact with the stone.
Once you have found the correct angle, it is important to maintain it throughout the sharpening process. This can be challenging, especially if you are new to knife sharpening, but with practice, it will become easier.
Remember to use light pressure and smooth, consistent strokes when sharpening your knife. Applying too much pressure or using erratic movements can result in an uneven edge.
Pro Tip: If you are unsure about the correct angle, you can use an angle guide or a sharpening jig to ensure consistency.
By holding the knife at the correct angle, you can achieve a properly sharpened blade that will be more efficient and safer to use.