Sharpening a knife with an oilstone is a time-honored method that has been used for centuries to keep blades in optimal condition. Whether you are a chef, an outdoor enthusiast, or simply a fan of sharp knives, learning this skill is essential for maintaining your tools.
But how do you do it? The process may seem intimidating at first, but with the right guidance, it can become a simple and rewarding task. In this article, we will walk you through the steps of using an oilstone to sharpen your knife, ensuring it stays sharp and efficient for years to come.
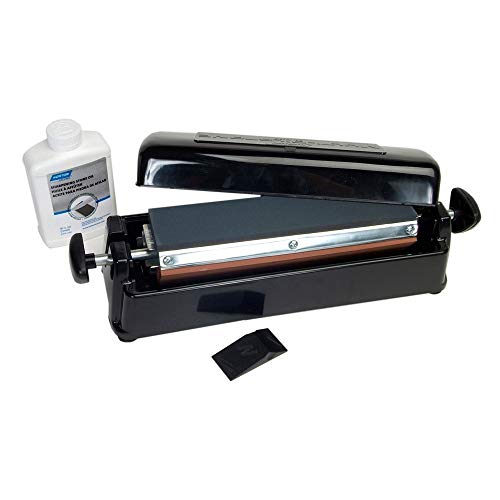
Before you begin, you will need a few essential items. Firstly, you will need an oilstone. There are different types of oilstones available, such as natural stones or synthetic ones. Whichever type you choose, make sure to read the manufacturer’s instructions for proper use and maintenance.
Additionally, you will need some honing oil, which helps to lubricate the stone’s surface and enhance the sharpening process. Lastly, gather a damp cloth or paper towel for cleaning your knife and stone, and a leather strop for honing the blade after sharpening.
Choosing the right oilstone
When it comes to sharpening a knife with an oilstone, selecting the right type of oilstone is essential to achieve the desired results. There are several factors to consider when choosing an oilstone, including grit size, material, and shape.
Grit Size
The grit size of an oilstone determines how coarse or fine the stone’s abrasive surface is. The choice of grit size depends on the condition of the knife’s blade and the desired sharpening goal. Coarser grits, such as 100 or 200, are suitable for reprofiling a dull or damaged blade, while finer grits, ranging from 800 to 3000, are ideal for honing and refining the edge. It is recommended to start with a coarser grit and gradually work your way to finer grits for optimal results.
Material
Oilstones are available in various materials, each with its own advantages and disadvantages. The most commonly used materials for oilstones are natural stones, like Arkansas stone, and synthetic stones, such as aluminum oxide or silicon carbide. Natural stones are known for providing a high-quality edge, but they can be expensive and require more maintenance. Synthetic stones, on the other hand, are more affordable and durable, making them a popular choice among beginners.
| Material | Pros | Cons |
|---|---|---|
| Natural Stones (e.g., Arkansas) | High-quality edge | Expensive, requires more maintenance |
| Synthetic Stones (e.g., Aluminum Oxide, Silicon Carbide) | Affordable, durable | Slightly lower edge quality |
Shape
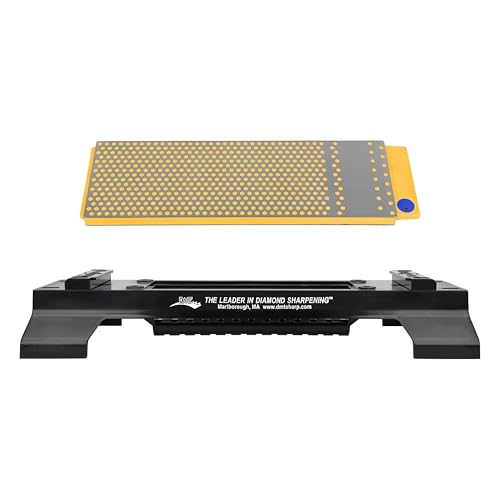
The shape of an oilstone also plays a role in its effectiveness. Oilstones are available in different shapes, such as rectangular, square, or round. Rectangular or square stones provide a larger surface area for sharpening, making them suitable for larger blades or tools. Round stones, on the other hand, are more convenient for sharpening smaller blades or reaching tight areas. Choose a shape that best suits your sharpening needs and preferences.
By considering the grit size, material, and shape of an oilstone, you can make an informed decision and select the right oilstone for sharpening your knife effectively. Remember to properly maintain and store your oilstone to ensure its longevity.
Gathering the necessary tools
Before you begin sharpening your knife with an oilstone, it’s important to gather the necessary tools. Here are the items you will need:
- An oilstone – This is a sharpening stone specifically designed for knife sharpening. It typically consists of a flat surface with abrasive material embedded in it.
- Lubricating oil – To ensure smooth sharpening, it is recommended to use a lubricating oil on the surface of the oilstone. This will help reduce friction and prevent the stone from clogging.
- A towel or cloth – You will need a clean towel or cloth to wipe away any excess oil and keep your workspace tidy.
- A sharpening guide (optional) – If you are new to knife sharpening, a sharpening guide can help you maintain the correct angle while sharpening. This tool can be especially useful for beginners.
- A marker – Before you start sharpening, it can be helpful to mark the edge of your knife with a marker. This will allow you to see your progress as you sharpen and ensure that you are sharpening evenly.
- A knife – Of course, you will need a knife that needs sharpening. Make sure it is clean and free from any debris before you start the sharpening process.
Once you have gathered all of these tools, you will be ready to begin the sharpening process with your oilstone.
Preparing the knife for sharpening
Before you begin sharpening your knife with an oilstone, it’s important to ensure that the knife is clean and free from any debris or rust. Follow these steps to properly prepare your knife:
-
Washing the knife
Start by washing the knife with warm soapy water to remove any dirt or grime. Gently scrub the blade using a non-abrasive sponge or cloth to avoid scratching it. Rinse the knife thoroughly to remove all soap residue.
-
Drying the knife
After washing, pat the knife dry with a clean towel. Make sure to dry both the blade and the handle to prevent any moisture from affecting the sharpening process.
-
Removing rust
If there is any rust on the blade, use a rust eraser or a fine-grit sandpaper to gently remove it. Make sure to be careful and gentle while removing rust to avoid damaging the knife’s edge.
-
Checking the knife’s edge
Inspect the knife’s edge for any chips, nicks, or unevenness. If there are any major imperfections, you may need to first use a coarser grit stone to reshape the edge before proceeding with the oilstone.
By properly preparing your knife before sharpening, you will ensure that you get the best results and maintain the longevity of your knife’s edge.
Sharpening the knife with the oilstone
To sharpen a knife with an oilstone, follow these steps:
Step 1: Prepare the oilstone
Before you begin sharpening the knife, make sure the oilstone is clean and free from any debris or residue. If necessary, use a brush or cloth to remove any dirt or particles.
Step 2: Apply oil to the stone
Apply a few drops of honing oil or mineral oil to the surface of the oilstone. This will help lubricate the stone and prevent the metal particles from clogging the pores.
Step 3: Hold the knife at the correct angle
Hold the knife firmly with one hand and position the blade against the oilstone at a 20-degree angle. This angle will help maintain the knife’s sharpness.
Step 4: Begin sharpening
Starting from the base of the blade, gently move the knife across the oilstone, using light downward pressure. Make sure to maintain a consistent angle as you draw the blade towards yourself.
Step 5: Repeat the process
Continue sharpening the knife by moving it across the oilstone in a smooth motion. Repeat this process for both sides of the blade until you achieve the desired sharpness.
Step 6: Test the sharpness
Once you are satisfied with the sharpness of the knife, test it by slicing through a sheet of paper or a tomato. If the knife glides effortlessly, you have successfully sharpened it.
Sharpening a knife with an oilstone is a skill that takes practice. With patience and proper technique, you can maintain the sharpness of your knives for a long time.
Testing the sharpness of the knife
Once you have finished sharpening your knife with an oilstone, it is important to test its sharpness before using it. Here are a few simple tests you can perform to determine the effectiveness of your sharpening:
Paper Test: Take a piece of paper and try to cut it with the knife. A sharp knife should be able to effortlessly slice through the paper with a clean and straight cut. If the blade tears or struggles to cut through the paper, it is not yet sharp enough.
Tomato Test: Take a ripe tomato and gently press the knife blade into the skin. A sharp knife will easily penetrate the skin without squishing the tomato. If the blade slips off or leaves behind a mushy mess, it needs further sharpening.
Shaving Test: Carefully run the blade of the knife along a hair on your arm or leg, holding the knife at a slight angle. A sharp knife will cleanly shave off the hair without tugging or pulling. If the blade catches or pulls on the hair, it requires additional sharpening.
Fingernail Test: Hold the knife blade at a 90-degree angle to your fingernail and gently try to push the blade across the nail. A sharp knife will effortlessly bite into the nail and create a slight groove. If the blade slides off the nail or fails to create a groove, it is not yet sharp enough.
Caution: When performing these tests, always exercise caution and be aware of the knife’s sharpness to avoid any accidents. Use a light touch and keep your fingers away from the blade to prevent injury.