Having a sharp knife is essential for any cook or chef. A dull knife not only slows down your chopping and slicing but can also be dangerous, as it requires more force to cut through ingredients. While there are many knife sharpening tools available on the market, you may not want to invest in one just yet. The good news is that there are several effective ways to sharpen a knife without buying any special equipment.
One simple and accessible method is to use a honing rod. A honing rod is a long, cylindrical metal rod that can be found in many home kitchens. To sharpen your knife with a honing rod, hold the rod vertically with the tip resting on a stable surface. Hold the knife at a 20-degree angle to the rod, and with light pressure, swipe the blade down the rod in a smooth and controlled motion, starting from the base of the blade to the tip. Repeat this motion on both sides of the blade, alternating until the knife is sufficiently sharp.
If you don’t have a honing rod, you can also sharpen a knife using a ceramic mug. Turn the mug upside down, making sure it is secured on a flat surface. Hold the knife at a 20-degree angle against the bottom edge of the mug. Gently swipe the blade along the edge of the mug, starting from the base to the tip, as if you were slicing a thin layer off the mug. Repeat this motion on both sides of the blade until the knife is sharpened to your desired level.
Another method that can be used to sharpen a knife without buying equipment is the sandpaper method. Simply place a sheet of coarse-grit sandpaper on a flat surface, such as a cutting board or a table. Hold the knife at a 20-degree angle to the sandpaper and move the blade back and forth in a sawing motion. Start from the base of the blade and work your way to the tip. Repeat this motion on both sides of the blade until the knife is properly sharpened.
Remember, safety is paramount when sharpening a knife. Always exercise caution and be mindful of your grip and hand placement to avoid accidents. With these simple methods, you can keep your knives sharp without having to purchase any additional equipment.

Why sharpening knives is important
Sharpening knives regularly is important for several reasons.
Efficiency and Precision
A sharp knife allows you to work more efficiently and with greater precision. When your knife is dull, you may struggle to cut through food, leading to frustration and wasted time. A sharp knife, on the other hand, cuts through ingredients effortlessly, allowing you to prepare your meals with ease.
Safety
A dull knife is more dangerous than a sharp one. When a knife is dull, you may need to use more force or apply uneven pressure, increasing the risk of accidents and slips. A sharp knife, however, cuts smoothly and requires less force, reducing the potential for injuries.
By regularly sharpening your knives, you can maintain their sharpness, ensuring they stay efficient, safe, and ready for any kitchen task.
The benefits of sharpening a knife at home
Sharpening a knife at home has several advantages that make it worth the effort. Here are some of the benefits:

- Cost-saving: Sharpening your knife at home saves you money as you don’t need to buy new knives or take them to a professional sharpener.
- Convenience: You can sharpen your knife at any time without having to rely on the availability of professional sharpening services.
- Extended lifespan: Regularly sharpening your knife at home helps maintain its edge, ensuring a longer lifespan for your knife.
- Improved performance: A sharp blade cuts more efficiently, reducing the effort required to complete tasks in the kitchen or during outdoor activities.
- Customization: Sharpening your knife at home allows you to control the angle and level of sharpness according to your specific needs and preferences.
- Skill development: Sharpening your knife at home provides an opportunity to develop a useful skill that can be applied to various tools and blades.
- Safety: A sharp knife is safer to use as it requires less force to cut, minimizing the risk of accidents caused by slipping or exerting excessive pressure.
With these benefits in mind, learning how to sharpen your knife at home can be a rewarding experience that enhances your knife’s performance while saving you time and money in the long run.
Methods of sharpening a knife without buying equipment
Keeping your knives sharp is essential for efficient and safe cutting in the kitchen. However, you don’t always need fancy sharpening equipment to achieve a sharp edge. Here are some methods you can try using household items:
1. Whetstone or sandpaper: If you have a whetstone or sandpaper with a coarse grit, you can use it to sharpen your knife. Wet the stone or sandpaper and place it on a stable surface. Hold the knife at a 20-degree angle and, using light pressure, move the blade across the stone or sandpaper in a circular motion. Repeat on both sides of the blade until you achieve the desired sharpness.
2. Ceramic mug or plate: In a pinch, you can use the bottom edge of a ceramic mug or plate as a makeshift knife sharpener. Hold the mug or plate firmly against a countertop with one hand. Place the knife at a 20-degree angle on the bottom edge and, using moderate pressure, slide the blade across the ceramic surface in a sweeping motion. Repeat on both sides of the blade.
3. Leather belt or jeans: A leather belt or the rough surface of a pair of jeans can also be used for knife sharpening. Hold one end of the belt or jeans taut and wrap it around a sturdy object. Hold the other end firmly and run the blade across the surface, maintaining a 20-degree angle. Repeat on both sides of the blade until it is sharp.
4. Honing rod or coffee mug: If you have a honing rod or the bottom edge of a coffee mug, you can use it to realign the edge of a slightly dull knife. Hold the rod or mug vertically and, with light pressure, run the blade down the length of the rod or along the edge of the mug at a 20-degree angle. Repeat on both sides of the blade several times to straighten the edge.
5. Steps to keep your knife sharp: To ensure your knife stays sharp, it’s important to take proper care of it. Avoid cutting on hard surfaces, as this can dull the blade. Always hand wash and dry your knife, as the dishwasher can damage the edge. Additionally, storing your knife in a knife block or using a blade guard can help protect the sharp edge.
By following these methods and taking care of your knives, you can maintain a sharp edge without having to invest in pricey sharpening equipment. Remember to exercise caution and focus while sharpening your knife to avoid accidents.
Using a honing rod
A honing rod, also known as a sharpening steel, is a long, cylindrical rod made of steel or ceramic that is used to straighten and realign the edge of a knife. While a honing rod does not actually sharpen the knife by removing material, it helps in maintaining the knife’s sharpness by smoothening out any tiny bends or distortions along the blade.
To sharpen your knife using a honing rod, follow these steps:

- Hold the honing rod vertically, with the tip resting on a sturdy surface.
- Hold the knife in your dominant hand, with the blade facing away from you.
- Position the heel of the knife’s edge against the top of the honing rod, near the handle.
- While maintaining a 15-20 degree angle between the knife and the honing rod, slowly draw the knife down the rod towards the tip, exerting light pressure.
- Repeat this motion for about 5-10 times, both sides of the knife, alternating after each stroke.
- Make sure to keep the honing rod and the knife dry throughout the process.
Remember, using a honing rod regularly can help keep your knife sharp, but it is not a substitute for actual sharpening. If your knife is dull or damaged, it may require proper sharpening using a stone or other sharpening tools.
Using sandpaper or emery cloth
If you don’t have a sharpening stone or any specialized sharpening equipment on hand, you can still sharpen your knife using sandpaper or emery cloth. While this method may require a bit more effort, it can still yield good results.
To sharpen your knife using sandpaper or emery cloth, follow these steps:
Step 1: Choose the right sandpaper or emery cloth
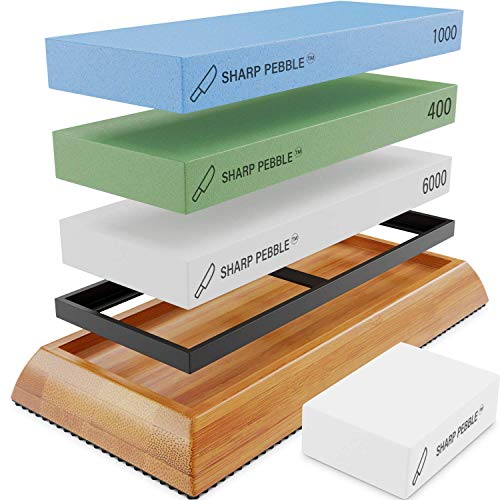
Select sandpaper or emery cloth with a grit between 400 and 1000. The higher the grit number, the finer the abrasive surface and the smoother the sharpening process will be.
Step 2: Secure the sandpaper or emery cloth
Attach the sandpaper or emery cloth securely to a flat surface, such as a table or a piece of wood. Ensure that it doesn’t move during the sharpening process.
Step 3: Lubricate the sandpaper or emery cloth
Apply a few drops of water or honing oil to the surface of the sandpaper or emery cloth. This will help reduce friction and prevent the knife from overheating.
Step 4: Hold the knife at the optimal angle
Hold the knife at a consistent angle of around 20 degrees to the sandpaper or emery cloth. This will help maintain a consistent bevel and ensure an even sharpening.
Step 5: Sharpen the knife with light pressure
Using light pressure, move the knife back and forth along the sandpaper or emery cloth in smooth and controlled motions. Start from the base of the blade and work your way up to the tip. Repeat this process for a few minutes.
Step 6: Test the sharpness
After sharpening, carefully wipe off any residue from the blade and test the sharpness by gently cutting through a piece of paper or a thin sheet of cardboard. If the knife cuts smoothly and effortlessly, it is sharpened correctly. If not, repeat the process.
Remember that sharpening a knife using sandpaper or emery cloth may take longer compared to using dedicated sharpening equipment. It is essential to stay patient and maintain a steady hand throughout the process.
Using a ceramic mug or plate
If you don’t have a knife sharpener or any specific sharpening tools at home, you can still sharpen your knife using a ceramic mug or plate. Ceramic is a harder material than steel, which means it can help realign and sharpen the blade of your knife.
Here’s how you can use a ceramic mug or plate to sharpen your knife:
- Start by finding a ceramic mug or plate with an unglazed bottom or a rough texture. The unglazed surface will provide the necessary abrasiveness to sharpen the blade.
- Hold the ceramic mug or plate firmly on a stable surface, making sure it won’t slip or move during the process.
- With the blade of the knife facing away from you, hold the handle gently and place the heel of the blade at a 20-degree angle on the ceramic surface.
- Apply light pressure and draw the knife towards you, moving it in a sweeping motion from the heel to the tip of the blade. Be sure to maintain a consistent angle and avoid putting too much pressure, as this can damage the blade.
- Repeat this motion, alternating sides of the blade, until you have sharpened the entire edge of the knife. Remember to be patient and take your time during this process.
- After you have finished sharpening, rinse the knife with water to remove any leftover particles and wipe it dry with a clean cloth.
Using a ceramic mug or plate may not give you the same precision as a professional sharpening tool, but it can still help restore your knife’s sharpness in a pinch. However, keep in mind that this method is best suited for basic maintenance and touch-ups rather than heavily dulled knives.
Using a leather belt or strop
A leather belt or strop can be a very effective tool for sharpening a knife without buying any specialized equipment. This method involves using the natural abrasiveness of the leather, combined with some basic techniques, to achieve a sharp edge on your knife.
Here’s how you can use a leather belt or strop to sharpen your knife:
- Get a suitable leather belt or strop: Look for a leather belt or strop that is made of smooth, sturdy leather. Avoid belts or strops that have any rough or damaged areas.
- Prepare the leather: If the leather belt or strop is new, you may need to break it in by rubbing some honing compound or fine grit sandpaper on its surface. This will help create some initial abrasiveness.
- Secure the belt or strop: Attach one end of the leather belt or strop to a stationary object, such as a table leg or a workbench. Make sure it is tightly secured.
- Hold the knife correctly: Hold the knife by the handle, with the blade facing away from you. Make sure you have a firm grip on the handle to maintain control throughout the sharpening process.
- Position the knife: Place the blade of the knife flat against the leather belt or strop, with the sharp edge facing away from you. Angle the blade slightly, around 20 degrees, to create a good cutting edge.
- Sharpen the knife: Using light pressure, draw the knife towards you along the length of the leather belt or strop, maintaining the same angle throughout the process. Repeat this motion several times on each side of the blade.
- Check the sharpness: After sharpening, carefully feel the edge of the knife with your thumb. If it feels sharper than before, you can consider the blade sharpened. If not, repeat the sharpening process a few more times until the desired sharpness is achieved.
Remember to always exercise caution when sharpening a knife, as the blade can be sharp and cause injuries. Take your time and focus on maintaining a consistent angle and applying light pressure to achieve the best results.