A lip knife is an essential tool for anyone who loves makeup and wants to achieve the perfect pout. Over time, though, the blade of the lip knife can become dull and lose its precision. In order to maintain the effectiveness of your lip knife, it is important to know how to sharpen it properly. Sharpening a lip knife may seem like a daunting task, but with the right technique and tools, you can easily restore its sharpness and ensure a flawless application every time.
Step 1: Gather the necessary tools
Before you begin sharpening your lip knife, make sure you have all the necessary tools at hand. You will need a sharpening stone or a diamond file, which can be easily found at most beauty supply stores. Additionally, you will need a soft cloth or tissue to wipe away any excess filings.
Step 2: Understand the blade angle
It is important to understand the angle at which the blade of your lip knife is sharpened. Most lip knives have a beveled edge, which means that the blade tapers down to a point. To achieve the best results when sharpening, it is important to maintain this beveled edge throughout the process.

Step 3: Sharpen the blade
To sharpen the blade of your lip knife, hold the sharpening stone or diamond file firmly in one hand, and the lip knife in the other. Position the blade of the lip knife against the stone or file at the same angle it was originally sharpened, and carefully move the blade across the stone or file in a sweeping motion. Repeat this process several times, making sure to sharpen both sides of the blade evenly.
Step 4: Test the sharpness
Once you have finished sharpening the blade, it is important to test the sharpness of your lip knife. Gently run your finger along the edge of the blade to feel for any roughness or resistance. If the blade feels smooth and glides easily, then it is sharp and ready to be used. If there are any rough spots, continue to sharpen the blade until it is completely smooth.
Remember, practice makes perfect. The more you sharpen your lip knife, the better you will become at maintaining its sharpness. With these simple steps, you can ensure that your lip knife is always ready for precise and flawless application.
Sharpening a Lip Knife: Getting the Perfect Edge
Sharpening a lip knife is essential for maintaining its cutting effectiveness and prolonging its lifespan. A sharp lip knife allows for precise, clean cuts and reduces the risk of accidents. Follow these steps to achieve the perfect edge on your lip knife:
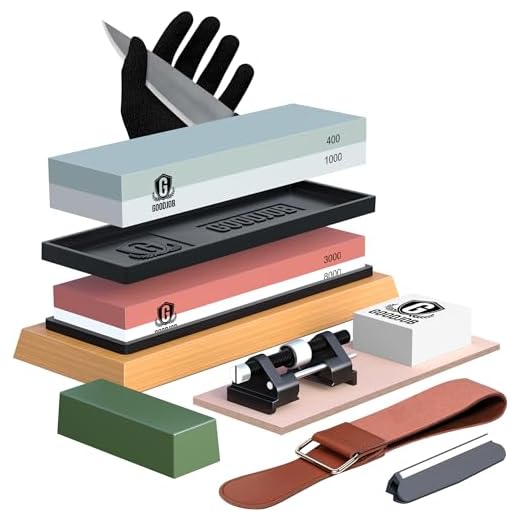
1. Choose the right sharpening tools: You’ll need a sharpening stone or a diamond file, honing oil, and a leather strop. These tools will help you achieve the desired sharpness.
2. Prepare the sharpening stone: Moisten the stone with honing oil to create a lubricating surface. This will prevent the knife blade from overheating and allow for smoother sharpening.
3. Position the lip knife correctly: Hold the lip knife firmly but not too tightly. Position the knife blade at a 20-degree angle on the sharpening stone. This angle will help maintain the knife’s original bevel and shape.
4. Start sharpening: Gently slide the lip knife across the sharpening stone, starting at the base of the blade and moving towards the tip. Maintain consistent pressure and keep the knife at the desired angle. Repeat this motion several times, alternating sides.
5. Test the sharpness: After several passes, test the sharpness of the lip knife by carefully running your thumb along the blade’s edge. Be cautious not to apply too much pressure. The blade should feel noticeably sharper.
6. Use a leather strop for finishing: After sharpening on the stone, use a leather strop to refine the knife’s edge. Stropping removes any remaining burrs or imperfections and gives the blade a polished finish. Slide the lip knife across the leather strop in a smooth, sweeping motion, repeating the process several times on each side.
7. Maintain and clean your sharpened lip knife: Proper maintenance is crucial to keep your lip knife in prime condition. After sharpening, clean the blade with a soft cloth to remove any debris or metal shavings. Apply a thin coat of lubricating oil to prevent rust or corrosion.
Remember that sharpening a lip knife requires practice and patience. Take your time, focus on maintaining the correct angle, and repeat the sharpening process as needed to achieve the perfect edge. With a sharp lip knife, your woodworking, carving, or general cutting tasks will become more efficient and enjoyable.
Step-by-Step Guide: Sharpening your Lip Knife
Keeping your lip knife sharp is essential for ensuring clean and precise cuts. Follow these steps to sharpen your lip knife effectively:
Step 1: Gather the necessary materials
Before you start sharpening your lip knife, make sure you have the following materials:
- A sharpening stone or honing guide
- Lubricating oil or water (depending on the type of stone)
- A soft cloth or towel
Step 2: Prepare the sharpening stone
If you are using a sharpening stone, soak it in water for about 10 minutes before starting. If you are using a honing guide, attach it securely to the stone.
Step 3: Position the knife
Hold the lip knife firmly with one hand, keeping your fingers away from the edge. Position the knife’s blade on the sharpening stone at a 20-degree angle.
Note: It is important to maintain a consistent angle throughout the sharpening process.
Step 4: Begin sharpening
Starting at the tip of the blade, move the knife in a sweeping motion across the sharpening stone, maintaining the 20-degree angle. Apply light pressure and repeat this motion for about 10-15 times on each side of the blade.
Tip: Make sure to sharpen the entire length of the blade evenly, paying attention to any dull areas.
Step 5: Test the sharpness
After sharpening, carefully wipe off any residual oil or water and test the sharpness of your lip knife. You can do this by gently holding a piece of paper and slicing through it. If the knife glides through the paper smoothly and effortlessly, it is sharp and ready to use.
Step 6: Maintain the sharpness
Remember that regular maintenance is important to keep your lip knife sharp. After each use, wipe the blade clean and store it in a protective sheath to prevent dulling. Periodically, check the sharpness and repeat the sharpening process as needed.
By following these steps, you can ensure that your lip knife remains sharp and ready to tackle any cutting task with precision and ease.
Maintaining the Sharpness: Tips for Long-lasting Edge on your Lip Knife
Sharpening a lip knife is essential to ensure optimal performance and cutting efficiency. However, maintaining the sharpness of the knife edge is equally important to prolong its lifespan and prevent unnecessary wear. Follow these tips to keep your lip knife edge sharp for longer:
1. Avoid Cutting on Hard Surfaces
When using a lip knife, it is important to avoid cutting on hard surfaces such as glass or ceramic. These materials can quickly dull the knife edge, resulting in a decreased cutting performance. Instead, use a cutting board or a softer surface that won’t damage the knife edge.
2. Clean and Dry Your Knife After Each Use
After using your lip knife, make sure to clean it thoroughly with mild soap and warm water. Dry the knife completely to prevent any moisture from accumulating on the blade, which can lead to corrosion and dulling of the edge. Additionally, moisture can also promote the growth of bacteria, which is harmful to both the knife and your health.
3. Store Your Lip Knife Properly
Proper storage is crucial for maintaining the sharpness of your lip knife. Avoid tossing it in a drawer or leaving it exposed to other utensils, as this can result in accidental damage or dulling of the edge. Consider using a knife sheath or a knife block to protect the knife blade from any potential harm and keep it sharp for longer.
4. Regularly Hone and Sharpen the Blade
Honing and sharpening are two essential steps in maintaining the sharpness of a lip knife. Honing, done with a honing rod or whetstone, helps to realign the microscopic teeth on the knife edge, while sharpening removes any dull or damaged metal to create a new, sharp edge. Make sure to follow the manufacturer’s instructions for the best results.
| Do’s | Don’ts |
|---|---|
| – Use a cutting board or a softer surface when cutting | – Cut on hard surfaces such as glass or ceramic |
| – Clean and dry your lip knife after each use | – Leave the knife wet or dirty |
| – Store your lip knife in a sheath or knife block | – Toss the knife in a drawer or leave it exposed |
| – Regularly hone and sharpen the blade | – Neglect regular maintenance of the knife |
By following these tips, you can ensure that your lip knife remains sharp and efficient for a longer period of time, making your cutting tasks easier and more enjoyable.