


Wood carving is a beautiful and ancient art form that requires skill, patience, and precision. And when it comes to wood carving, having a sharp knife is crucial. A sharp knife not only makes the carving process easier but also ensures clean and smooth cuts. One of the most popular and reliable wood carving knives is the Mora wood carving knife. But like any other knife, it will eventually require sharpening. In this article, we will guide you through the steps to sharpen your Mora wood carving knife to restore its sharpness and make it as good as new.
Step 1: Gather the necessary materials.
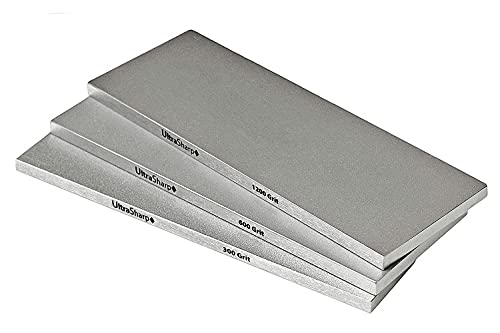
Before you start sharpening your Mora wood carving knife, make sure you have all the necessary materials. You will need a sharpening stone, preferably a fine-grit stone, water or honing oil, a leather strop or a piece of leather, and a flat surface to work on. Ensuring you have these materials ready will make the sharpening process smoother and more efficient.
Remember to exercise caution and work in a well-ventilated area, as sharpening a knife can create metal dust and sharp shards.
Step 2: Prepare the sharpening stone.
An important part of sharpening a Mora wood carving knife is preparing the sharpening stone. If you are using a water stone, soak it in water for about 10-15 minutes. If you are using a honing oil stone, apply a few drops of honing oil to the stone and spread it evenly. This step ensures that the stone is ready for sharpening, allowing the knife blade to glide smoothly across the surface and achieve the desired sharpness.

Step 3: Sharpen the knife blade.
With the sharpening stone prepared, it’s time to sharpen the blade of your Mora wood carving knife. Hold the knife firmly and position the blade against the stone at a 20-degree angle. Using light pressure, draw the blade across the stone in a sweeping motion, moving from the base to the tip of the blade. Repeat this motion on both sides of the blade, maintaining a consistent angle and applying even pressure. Continue this process until the blade is sharp and the desired edge is achieved.
Remember to maintain a steady hand, take breaks if needed, and rinse the knife and stone periodically to remove any build-up.
Step 4: Strop the knife.
Stropping is an essential step in sharpening a Mora wood carving knife as it helps refine the edge and remove any remaining burrs. Take your leather strop or piece of leather and apply a small amount of honing oil or polishing compound to the surface. Hold the knife at a slight angle and slide the blade across the strop, moving away from the cutting edge. Be careful not to apply too much pressure, as stropping is a gentle and precise process. Repeat this motion several times on both sides of the blade until the knife is smooth and polished.
Remember to clean the knife after stropping and check the sharpness before using it again.
By following these steps and taking the time to properly sharpen your Mora wood carving knife, you can ensure that it remains a reliable tool for your wood carving projects. Sharpening your knife regularly will not only improve the quality of your carvings but also prolong the life of your beloved Mora wood carving knife.
How to Sharpen a Mora Wood Carving Knife
A Mora wood carving knife is a versatile tool that requires regular sharpening to maintain its edge. Here are the steps to sharpen your Mora wood carving knife:
1. Gather the necessary materials
Before you begin, make sure you have the following materials:
- A sharpening stone
- A honing guide
- A flat surface
- A lubricant (such as honing oil or water)
2. Prepare the sharpening stone
Place the sharpening stone on a flat surface, such as a table or workbench. Ensure that the stone is securely held in place to prevent any accidents during the sharpening process.
3. Set up the honing guide
Attach the Mora wood carving knife to the honing guide according to the instructions provided with the guide. The honing guide will help you maintain the correct sharpening angle throughout the process.
4. Apply lubricant
Apply a small amount of lubricant, such as honing oil or water, to the surface of the sharpening stone. This will help facilitate the sharpening process and prevent any damage to the knife blade.
5. Start sharpening
Hold the honing guide with the knife attached and position it on the sharpening stone. Begin sliding the knife back and forth across the stone, applying light pressure. Maintain a consistent angle and keep the blade in contact with the stone throughout the process.
6. Check your progress
After a few strokes, stop and examine the edge of the knife for any signs of improvement. If necessary, adjust the angle of the honing guide to ensure an even sharpening across the entire blade.
7. Repeat the process
Continue sharpening the Mora wood carving knife, alternating sides after every few strokes to ensure even sharpening. Repeat this process until you have achieved the desired level of sharpness.
Remember to take breaks and periodically wipe away any metal shavings from the sharpening stone to maintain its effectiveness.
With regular maintenance and proper sharpening, your Mora wood carving knife will remain a reliable tool for your carving projects. Happy carving!
Understanding the Importance of Sharpness
When it comes to wood carving, the sharpness of your knife is paramount. A dull knife not only makes carving difficult, but it can also be dangerous, as it is more likely to slip and cause accidents. Understanding the importance of keeping your Mora wood carving knife sharp is essential for achieving the best carving results.
Here are a few reasons why sharpness is important:
|
Efficiency: |
A sharp knife allows you to carve through wood effortlessly. It enables you to make clean and precise cuts, saving you time and effort. |
|
Safety: |
A dull knife requires more force to carve, which increases the chances of slipping and injuring yourself. A sharp knife reduces the risk of accidents by providing better control and accuracy. |
|
Detailing: |
Sharpness is crucial for achieving fine details in your wood carving. A dull knife will leave ragged edges and uneven surfaces, while a sharp one allows you to create intricate designs and smooth finishes. |
|
Longevity: |
Regularly sharpening your knife helps extend its lifespan. By keeping the blade in optimal condition, you prevent excessive wear and tear, ensuring that your Mora wood carving knife remains effective for years to come. |
Now that you understand the importance of sharpness, it’s time to learn how to sharpen your Mora wood carving knife effectively. Follow the steps in the rest of this guide to keep your knife in top shape and enhance your wood carving experience.
Gathering the Necessary Tools
Before attempting to sharpen your Mora wood carving knife, it is important to make sure you have all the necessary tools. These tools will help you to achieve a precise and effective sharpening process. Here are some essential tools you will need:
- A Mora wood carving knife
- A sharpening stone or whetstone
- A honing guide
- A leather strop
- Honing compound
- A towel or cloth for cleaning
Having these tools prepared and ready will ensure that you can start the sharpening process smoothly and efficiently. The Mora wood carving knife is the main tool that needs sharpening, while the sharpening stone, honing guide, and leather strop will aid in achieving a razor-sharp edge. The honing compound will enhance the sharpening process and the towel or cloth will be helpful for cleaning any debris or excess compound.
Once you have gathered all these tools, you will be ready to proceed with the sharpening process. It is important to be well-prepared to ensure the best possible sharpening results for your Mora wood carving knife.
Preparing the Knife for Sharpening
Before you begin sharpening your Mora wood carving knife, it’s important to prepare the knife and your work area. Follow these steps to ensure a successful sharpening process:
- Clean the knife: Start by cleaning the knife blade thoroughly. Use a mild soap and warm water to remove any dirt, grime, or residue. Dry the blade completely before moving on to the next step.
- Secure the knife: Find a stable work surface and secure the knife in place using a vise or clamp. This will prevent the knife from moving around while you sharpen it and reduce the risk of accidents.
- Protect yourself: Sharpening a knife can be dangerous, so it’s important to take precautions. Wear safety goggles to protect your eyes from any metal particles or debris that may be generated during the sharpening process. You may also consider wearing gloves to protect your hands.
- Gather your sharpening tools: To sharpen your Mora wood carving knife, you will need a set of sharpening stones or a sharpening system. Make sure you have the right grits for your specific sharpening needs. Additionally, you may need a honing compound to finish the sharpening process and a strop to polish the blade.
- Prepare the sharpening stones: If you’re using sharpening stones, soak them in water for the recommended amount of time. This will ensure that they are properly lubricated during the sharpening process.
- Set up your work area: Clear the area of any distractions or clutter. Place a towel or rubber mat underneath your sharpening setup to protect the surface and keep the stones or sharpening system in place.
By taking the time to prepare your knife and your work area, you are setting yourself up for success in sharpening your Mora wood carving knife. Following these steps will help you achieve the best possible results and prolong the life of your knife.
Selecting the Right Sharpening Method
When it comes to sharpening your Mora wood carving knife, there are several methods you can choose from. The right method for you will depend on your personal preferences and the level of sharpening needed.
1. Honing with a Leather Strop: This method is perfect for maintaining the sharpness of your knife. Using a leather strop with polishing compound allows you to remove any burrs or imperfections on the blade’s edge, resulting in a razor-sharp edge.
2. Sharpening with a Whetstone: If your Mora knife has lost its edge and needs significant sharpening, using a whetstone is a great option. A whetstone allows you to remove more material from the blade, resulting in a completely new edge. This method may take more time and skill compared to honing with a leather strop.
3. Using a Sharpening System: If you prefer a guided sharpening experience, a sharpening system is a good choice. These systems typically include a set of guided sharpening stones or diamond plates and help you maintain a consistent angle while sharpening.
4. Ceramic Sharpening Rod: For a quick touch-up on the go, a ceramic sharpening rod can be a handy tool. This method works well when you need to restore the sharpness of your knife quickly. Simply run the blade along the rod a few times, and you’ll have a perfectly sharp Mora knife.
5. Professional Sharpening Services: If you don’t have the time, skills, or equipment to sharpen your Mora knife yourself, you can always seek professional sharpening services. Look for a reputable service that specializes in sharpening woodworking tools to ensure the best results.
In conclusion, the right sharpening method for your Mora wood carving knife depends on your personal preferences and the state of the knife’s edge. Whether you choose honing with a leather strop, using a whetstone, a sharpening system, a ceramic sharpening rod, or professional sharpening services, with the right technique, you can keep your Mora knife sharp and ready for any wood carving project.
Sharpening the Knife
Properly sharpening your Mora wood carving knife is essential for maintaining its effectiveness and ensuring accurate carving. Here, we will discuss a step-by-step guide on how to sharpen your knife effectively.
Step 1: Choose the Right Sharpening Tools
Before starting the sharpening process, gather the necessary tools. You will need a sharpening stone or diamond stone, honing guide, and a leather strop. Ensure that the sharpening stone is correctly sized for your needs.
Step 2: Setting the Angle
Using a honing guide, set the angle of the blade according to your preference. Generally, sharpening a Mora wood carving knife at a 20 to 25-degree angle works well. This ensures a sharp edge without compromising the durability of the blade.
Step 3: Start with the Coarse Grit
Begin the sharpening process by using the coarsest grit of your sharpening stone. Moisten the stone with water and hold the knife against the stone at the set angle. Push the blade away from you, applying moderate pressure. Repeat this process several times, ensuring that the entire blade is sharpened evenly.
Step 4: Progress to Finer Grits
Next, move to finer grits of your sharpening stone to refine the edge of the blade. Repeat the same process as in the previous step, maintaining the angle and sharpening evenly along the entire blade. Using progressively finer grits will result in a sharper and smoother edge.
Step 5: Honing the Blade
To further refine the edge and remove any burrs or slight imperfections, use a leather strop. Apply a small amount of honing compound to the strop and draw the knife along the strop, maintaining the angle. Repeat this motion several times on each side of the blade until it feels sharp and smooth.
Remember to always use caution when sharpening any knife. Pay attention to the blade and your movements to avoid accidents. Regularly maintaining your Mora wood carving knife’s sharpness will ensure optimal carving results and prolong its lifespan.
Testing the Sharpness and Final Touches
Once you have sharpened your Mora wood carving knife, it is important to test its sharpness before using it. To do this, carefully run your finger along the blade’s edge. Be extremely cautious and apply minimal pressure to avoid any accidents, as the blade will be very sharp.
If the blade feels razor-sharp and easily catches on your finger, then your knife is ready for use. However, if the blade feels dull or does not catch on your finger, you will need to repeat the sharpening process.
After testing the sharpness, it is a good idea to make some final touches to ensure your Mora wood carving knife is in optimal condition. You can use a honing stone or a leather strop to refine the edge and remove any burrs that may have formed during the sharpening process.
When honing or stropping, remember to maintain a consistent angle and apply light pressure. Work your way along the entire length of the blade, paying extra attention to the tip and heel areas. This will help refine the edge even further and ensure a uniform sharpness.
Once you are satisfied with the sharpness and edge refinement, wipe the blade clean with a dry cloth or towel. It is important to remove any metal particles or debris that may have accumulated during the sharpening process.
Now that your Mora wood carving knife is properly sharpened and refined, it is ready to tackle any wood carving projects with precision and ease.


