

A sharp knife is an essential tool in the kitchen, making cooking tasks easier and more efficient. However, over time, even the best knives lose their sharpness and become dull. This is where a knife sharpener comes in handy. In this article, we will discuss how to use a coarse and fine knife sharpener to restore your knives to their former sharpness.
Before we get into the details of using a coarse and fine knife sharpener, let’s understand the difference between these two sharpening stones. A coarse sharpening stone is used to repair damaged or very dull edges. It has a rough grit that helps remove metal quickly and effectively. On the other hand, a fine sharpening stone has a finer grit, which is ideal for honing and polishing the knife’s edge.
To begin, make sure your knife sharpener is firmly secured on a sturdy surface. This will prevent any accidents and ensure stability during the sharpening process. Next, hold the knife with your dominant hand and place the heel of the blade on the coarse side of the sharpener at a 20-degree angle. It’s crucial to maintain a consistent angle throughout the sharpening process to achieve optimal results.

Apply light pressure and draw the blade towards you, moving it from the heel to the tip of the blade. Repeat this motion several times, always remembering to maintain the same angle. Once you are satisfied with the results on the coarse side, switch to the fine side of the sharpener. Repeat the same process, this time focusing on honing and polishing the edge of the blade.
In conclusion, using a coarse and fine knife sharpener is a simple and effective way to restore the sharpness of your knives. With a proper technique and consistent angle, you can achieve excellent results and prolong the lifespan of your knives. Remember to handle sharp objects with caution and always follow the manufacturer’s instructions for your specific knife sharpener.
What is a Coarse and Fine Knife Sharpener?
The Coarse Grit
The coarse grit is the first step in the sharpening process and is typically used for repairing a knife with a very dull or damaged blade. It has a rough texture that removes material quickly and helps to create a new, sharp edge. This grit is ideal for fixing chips, nicks, or severely worn blades.
When using the coarse grit, it is important to apply consistent pressure and maintain a proper sharpening angle to ensure an even grind along the entire length of the blade. This grit should be used sparingly to avoid removing too much material from the knife, as excessive sharpening can shorten its lifespan.
The Fine Grit
The fine grit is the second step in the sharpening process and is used to refine and polish the edge created by the coarse grit. It has a smoother texture that helps to remove any remaining burrs or imperfections left by the coarse grit. This grit is perfect for maintaining the sharpness of a well-maintained blade or for putting a final edge on a slightly dull knife.
When using the fine grit, it is important to be patient and take your time to achieve a precise and sharp edge. Light, controlled strokes are recommended to achieve the desired level of sharpness without removing too much material. It is also advisable to regularly clean the sharpening surface to prevent any buildup of metal particles that can affect the sharpening process.
In summary, a coarse and fine knife sharpener is an essential tool for keeping your knives in optimal condition. The coarse grit helps to reshape and repair damaged blades, while the fine grit refines and polishes the edge to achieve a razor-sharp finish. By using both grits in combination, you can ensure that your knives remain sharp, efficient, and safe to use.
Coarse Knife Sharpening
Coarse knife sharpening refers to the initial stage of the sharpening process, where you remove any large nicks, chips, or dull edges from the blade. This stage is essential for restoring the knife’s sharpness and making it ready for fine sharpening.
To begin with, you’ll need a coarse sharpening stone specifically designed for sharpening knives. These stones are made from rough materials like silicon carbide or aluminum oxide, which are highly abrasive and perfect for removing metal quickly.
Step 1: Prepare the Knife
Start by cleaning the blade with soap and water to remove any dirt, grease, or food particles. Once the knife is clean and dry, inspect the blade for any major issues like chips or nicks. If you notice any significant damage, it’s important to address it during the coarse sharpening stage.
Additionally, ensure that your knife’s edge is properly angled. Most knives have a beveled edge, which means that one side of the blade is slightly sloped. To sharpen the blade properly, maintain this angle throughout the process.
Step 2: Lubricate the Stone
Before you begin sharpening, it’s important to lubricate the coarse stone with a few drops of water or honing oil. This lubrication helps minimize friction and heat generation during the sharpening process, ensuring that you won’t damage the blade.
Step 3: Sharpen the Knife
Hold the knife firmly with one hand, ensuring a secure grip. Then, with the other hand, hold the knife’s handle and place the blade against the coarse sharpening stone at the desired sharpening angle.
Using moderate pressure, move the blade across the stone in a sweeping motion. Start at the base of the blade and move towards the tip, ensuring that you maintain a consistent angle throughout the process. Repeat this motion several times, focusing on evenly sharpening both sides of the blade.
It’s essential to sharpen the blade evenly to ensure optimal cutting performance. Pay attention to any areas on the blade that require more attention, such as nicks or chips, and spend extra time sharpening those spots.
Remember to periodically apply more lubrication to the sharpening stone to maintain its effectiveness. Keep sharpening until you’ve achieved the desired level of sharpness.
Once you’ve completed the coarse sharpening stage, you can move on to fine sharpening to refine and polish the blade further.
Fine Knife Sharpening
After you have sharpened your knife using the coarse side of the knife sharpener, it’s time to refine the edge with the fine side. Fine sharpening helps to fine-tune the blade, making it even sharper and more precise.
Follow These Steps for Fine Sharpening:
- Clean the blade: Before starting the fine sharpening process, ensure that your knife blade is clean and free from any debris or residue. You can wipe it with a damp cloth or rinse it under running water and dry it thoroughly.
- Adjust the angle: Similar to coarse sharpening, you need to establish the proper angle for fine sharpening. This will depend on the type of knife and your personal preference. Generally, an angle between 15-20 degrees is recommended.
- Start sharpening: Hold the knife’s handle firmly and place the blade’s edge against the fine side of the sharpener. Using light pressure, move the blade down and across the sharpener, following the natural curve of the knife. Use smooth, controlled strokes and ensure that the entire edge of the blade makes contact with the sharpener.
- Repeat the process: After one or two strokes, check the sharpness of the blade. If necessary, continue the fine sharpening process until you achieve the desired level of sharpness. Be patient and avoid applying too much pressure, as it can damage the blade.
Benefits of Fine Sharpening:
Fine sharpening not only enhances the sharpness of your knife but also improves its overall performance. Here are some benefits of fine knife sharpening:
| Sharper cutting edge: | By using the fine side of the knife sharpener, you can achieve a razor-sharp cutting edge, allowing you to slice through ingredients effortlessly. |
| Better precision: | Fine sharpening helps to refine the blade, resulting in improved precision and control during food preparation tasks. |
| Longer blade lifespan: | Regular fine sharpening helps to maintain the optimal condition of your knife blade, leading to a longer lifespan and reducing the need for frequent replacements. |
With proper care and regular maintenance, using both the coarse and fine sides of a knife sharpener can keep your knives sharp and effective for years to come.
Choosing the Right Grit for Your Knife
When it comes to knife sharpening, using the right grit is essential for achieving the desired results. The grit refers to the coarseness or fineness of the sharpening surface, and it determines how much material is removed from the blade during sharpening.
There are typically two types of grits used in knife sharpening: coarse grit and fine grit.
Coarse Grit:
- A coarse grit is typically used for repairing chipped or damaged blades, as well as reshaping the blade’s edge.
- It removes a significant amount of metal and is best for initial sharpening or when the blade is in bad condition.
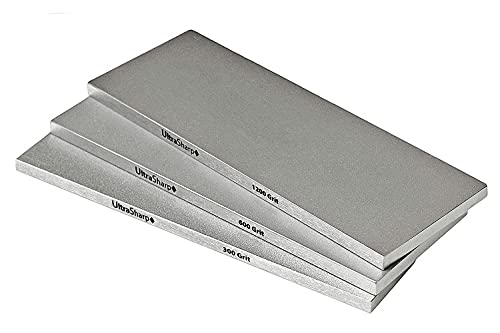
- Coarse grits are usually numbered between 200 and 800, with lower numbers indicating a coarser grit.
Fine Grit:
- A fine grit is used for honing and refining the blade’s edge after using a coarse grit.
- It removes a minimal amount of metal and is ideal for maintaining the sharpness of the blade.
- Fine grits are usually numbered between 1000 and 8000, with higher numbers indicating a finer grit.
Choosing the right grit for your knife depends on its current condition and the level of sharpness you want to achieve. If your blade is dull or damaged, start with a coarse grit to reshape and remove any imperfections. You can then move on to a fine grit to refine the edge and achieve a razor-sharp finish.
It’s important to note that the higher the grit number, the smoother the sharpening surface becomes. So, if you’re looking for a polished and mirror-like finish, a fine grit with a higher number is the way to go.
Remember to always follow the manufacturer’s recommendations and take your time when sharpening your knife. Proper grit selection and technique will ensure you get the best results and extend the lifespan of your blades.
Proper Technique for Sharpening Knives
Sharpening knives requires proper technique in order to achieve the best results. Whether you are using a coarse or fine knife sharpener, here are some steps to follow:
- Start by selecting the appropriate sharpener based on the condition of your knife. If the blade is extremely dull or damaged, begin with a coarse sharpener. If the blade only needs a touch-up, you can use a fine sharpener.
- Hold the knife firmly by the handle and position the blade against the sharpener at the desired angle. The angle will depend on the type of knife and personal preference, but a 20-degree angle is a good starting point.
- With light pressure, draw the knife blade through the sharpener in a sweeping motion. Make sure to maintain a consistent angle as you go. If you are using a coarse sharpener, repeat this step until you have achieved the desired sharpness.
- After using the coarse sharpener, switch to the fine sharpener if necessary. Repeat the same sweeping motion with light pressure, ensuring a consistent angle.
- Check the sharpness of your knife by carefully feeling the blade with your fingers. Be cautious and avoid running your fingers along the sharp edge to prevent injury.
- If the blade is not yet sufficiently sharp, repeat the sharpening process until you achieve the desired sharpness.
Remember to always exercise caution and use appropriate safety measures when sharpening knives. Use a stable surface, maintain control of the knife, and be aware of your surroundings.
Following these steps to sharpen your knives will help to maintain their longevity and ensure that they perform their best in the kitchen.
Tips for Using a Coarse and Fine Knife Sharpener
Using a coarse and fine knife sharpener can be a simple and effective way to keep your knives sharp and ready for use. By following these tips, you can ensure that you get the most out of your sharpener.
1. Understand Your Knife Sharpener
Before using a coarse and fine knife sharpener, it is important to understand how it works. Different sharpeners will have different instructions, so make sure to read the manual or instructions provided with your sharpener. This will help you use it correctly and avoid any potential damage.
2. Start with the Coarse Grit
When using a coarse and fine knife sharpener, it is best to start with the coarse grit. This grit is designed to remove any nicks or dullness from the blade. Hold the knife at a 20-degree angle and slowly draw it through the coarse grit, applying light pressure. Repeat this process several times until you feel the edge becoming sharper.
3. Move to the Fine Grit
After you have used the coarse grit to restore the sharpness of your knife, you can move on to the fine grit. This grit helps to refine and polish the edge, creating a smooth and sharp finish. Again, hold the knife at a 20-degree angle and draw it through the fine grit several times. Be sure to use light pressure and maintain a consistent angle throughout.
4. Test the Sharpness
Once you have finished sharpening your knife, it is important to test the sharpness. Carefully run your finger across the edge of the blade, being cautious not to cut yourself. If the blade feels smooth and easily cuts into a piece of paper, your knife is sharp and ready to use.
5. Regular Maintenance
To keep your knives in optimal condition, it is important to regularly maintain them. This includes regularly sharpening them with a coarse and fine knife sharpener. Depending on the frequency of use, it is recommended to sharpen your knives every few months or as needed. By staying on top of maintenance, you can ensure that your knives remain sharp and efficient for a longer period of time.
Using a coarse and fine knife sharpener can significantly improve the performance of your knives. By following these tips, you can confidently sharpen your knives and keep them in top shape for all your cooking needs.


