
Keeping your kitchen knives sharp is essential for efficient and safe cooking. The IKEA Skarande Knife Sharpener is a user-friendly tool that can help restore a sharp edge to your dull knives. In this article, we will guide you through the process of using the IKEA Skarande Knife Sharpener, step by step.
Step 1: Place the Skarande Knife Sharpener on a stable surface, such as a countertop or cutting board. Make sure the sharpener is secure and won’t slip while in use.
Step 2: Before you begin, check if your knife needs sharpening. Hold the knife by the handle and lightly touch the blade’s edge. If it feels dull or doesn’t easily cut through paper or produce, it’s time to sharpen.
Step 3: Hold the knife by the handle and place the blade into the blade guide of the Skarande Knife Sharpener. Make sure the blade is fully inserted into the guide and rests against the grinding stone.
Step 4: Begin sharpening by pulling the knife towards you, while simultaneously applying light pressure. The Skarande Knife Sharpener’s grinding stone will remove a small amount of metal from the blade, creating a new sharp edge.
Step 5: Repeat the pulling motion, using light pressure, for several passes on each side of the blade. The number of passes will depend on the dullness of your knife, but typically, 5-10 passes per side should be sufficient.
Step 6: After sharpening, carefully wipe the blade of your knife with a clean cloth to remove any metal filings or residue. Your knife is now ready to be used for precise and effortless cutting!
Remember, regularly maintaining your knife’s sharpness with the IKEA Skarande Knife Sharpener will ensure that your kitchen tasks are completed with ease and precision. Happy cooking!
The Importance of Sharp Knives
Sharp knives are essential tools in any kitchen. Whether you are a professional chef or a home cook, having sharp knives makes a significant difference in the quality and efficiency of your cooking experience.
Efficiency: Sharp knives allow you to perform tasks more quickly and effortlessly. With a dull knife, you need to apply more force and spend more time to achieve the desired results. On the other hand, a sharp knife cuts through ingredients smoothly, saving you precious time and energy.
Safety: Contrary to popular belief, sharp knives are safer to use than dull ones. A dull knife requires more force, increasing the risk of slips and accidents. With a sharp knife, you have better control and reduce the chances of cutting yourself unintentionally.
Precision: Sharp knives offer precise control, allowing you to cut, slice, and chop with accuracy. Clean cuts ensure the food’s integrity, preventing it from becoming crushed or compromised in texture and presentation.
Maintaining the quality of ingredients: A sharp knife is less likely to damage food while cutting. When you use a dull knife, you may end up with fruits, vegetables, or meat that look bruised or crushed due to excessive force. A sharp knife preserves the freshness and appearance of your ingredients, resulting in better-looking and more appetizing dishes.
Extend the lifespan of your knives: Regularly sharpening your knives will help maintain their quality and extend their lifespan. Dull knives tend to wear out more quickly, requiring more frequent replacement. By keeping your knives sharp, you reduce the need to replace them frequently, saving you money in the long run.
In conclusion, investing in a good knife sharpener like the IKEA Skärande Knife Sharpener is crucial for maintaining sharp knives in your kitchen. The benefits of sharp knives go beyond efficiency and safety, leading to better results in your cooking endeavors. So, make it a priority to keep your knives sharp and enjoy the advantages they bring to your kitchen.
Benefits of Having Sharp Knives
Having sharp knives in the kitchen is essential for a variety of reasons. Here are some of the benefits of keeping your knives sharp:
| 1. Precision: | Sharp knives allow for more precise cuts, allowing you to have greater control over your ingredients. This is especially important when it comes to delicate tasks like slicing vegetables or deboning meats. |
| 2. Efficiency: | Sharp knives require less effort to cut through food, making your prep work quicker and more efficient. This can save you valuable time in the kitchen, especially when you have a lot of ingredients to chop. |
| 3. Safety: | Contrary to popular belief, sharp knives are actually safer to use than dull ones. Dull knives require more force to cut through food, increasing the chances of slipping and resulting in accidents. Sharp knives, on the other hand, cut through food smoothly and easily, reducing the risk of accidents. |
| 4. Longevity: | Keeping your knives sharp helps to prolong their lifespan. When knives are dull, they tend to get damaged more easily, such as getting dented or chipped. By regularly sharpening your knives, you can maintain their quality and ensure they last for years to come. |
| 5. Cooking Enjoyment: | Sharp knives make cooking more enjoyable and less frustrating. When your knives are sharp, you can easily glide through ingredients, resulting in a smoother and more enjoyable cooking experience. |
Overall, having sharp knives in your kitchen is a game-changer. Not only do they make your food prep tasks easier and more efficient, but they also contribute to a safer and more enjoyable cooking experience. Invest in a good knife sharpener like the IKEA Skärande Knife Sharpener to keep your knives sharp and reap these benefits in your daily cooking endeavors.
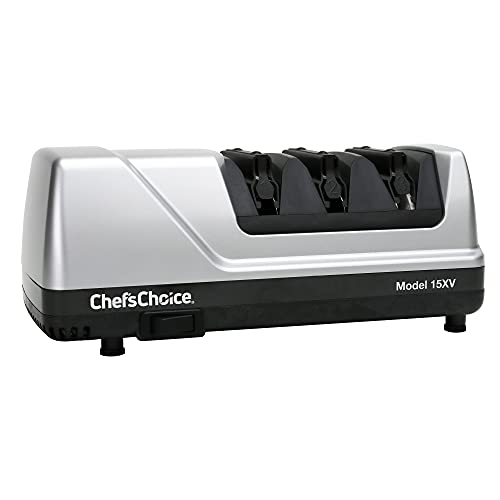
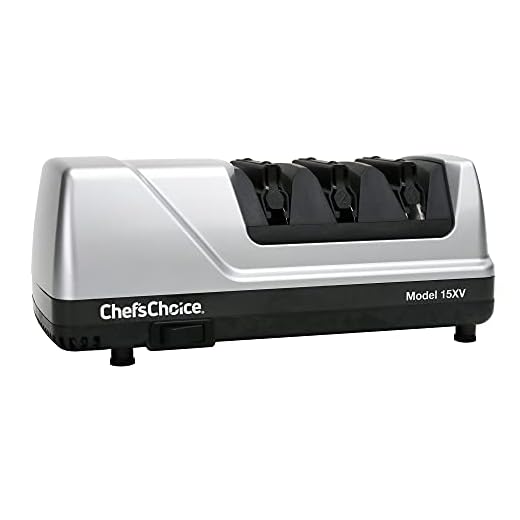
Introducing the Ikea Skarande Knife Sharpener
Are your knives dull and in need of a good sharpening? Look no further than the Ikea Skarande Knife Sharpener! This handy tool is designed to keep your knives sharp and efficient, ensuring that your slicing and dicing tasks are always a breeze.
The Ikea Skarande Knife Sharpener features a user-friendly design that makes it easy to use for both amateur and experienced chefs. Its compact size allows for convenient storage, saving valuable space in your kitchen. And with its durable construction, you can trust that this knife sharpener will withstand the test of time.
Using the Ikea Skarande Knife Sharpener is a simple process. Just hold the handle firmly and run the blade of your knife through the sharpening slot a few times. The sharpener’s ceramic sharpening wheels will do the rest, restoring your knife’s blade to its original sharpness.
It’s important to note that the Ikea Skarande Knife Sharpener is designed for straight-edged knives, so it may not be suitable for serrated or ceramic knives. However, for most household cooking tasks, this versatile sharpener will do the job perfectly.
Keep your kitchen knives in top shape with the Ikea Skarande Knife Sharpener. Say goodbye to dull blades and hello to effortless cutting and chopping. Try it out today and experience the convenience and effectiveness of this fantastic tool!
Step-by-Step Guide on How to Use Ikea Skarande Knife Sharpener
If you’re looking for a convenient and efficient way to sharpen your knives at home, the Ikea Skarande knife sharpener is a great option. This compact and easy-to-use tool can help restore the sharpness of your blades, ensuring that you can make clean and precise cuts in the kitchen. Follow this step-by-step guide to learn how to use the Ikea Skarande knife sharpener effectively.
Step 1: Prepare the Knife Sharpener
- Start by placing the Ikea Skarande knife sharpener on a stable surface, such as a countertop or table.
- Ensure that the sharpener is secured firmly in place to prevent any accidents or slips during the sharpening process.
Step 2: Determine the Sharpening Angle
Before getting started, it’s essential to identify the angle at which your knife should be sharpened. Most kitchen knives have a standard angle of 20 degrees. However, some knives may have different angles.
Step 3: Position the Knife
- Hold the Ikea Skarande knife sharpener with one hand, keeping a firm grip on the handle.
- With your other hand, hold the knife you want to sharpen by the handle.
- Align the knife blade with the sharpening slots on the knife sharpener.
Step 4: Start Sharpening
- Apply light pressure and draw the knife blade through the sharpening slots, away from your body.
- Make sure to maintain a consistent angle throughout the process.
- Repeat this process for both sides of the blade until you achieve the desired sharpness.
Step 5: Test the Sharpness
After sharpening, it’s essential to check the sharpness of the knife. Safely run your finger over the blade’s edge at a slight angle to see if it can easily catch on your skin. Be cautious to avoid any accidents.
Step 6: Clean the Knife
Once you’re satisfied with the sharpness of the blade, thoroughly clean the knife to remove any metal shavings or residue left from the sharpening process. Rinse the knife under running water and pat it dry with a clean towel.
By following these simple steps, you can effectively use the Ikea Skarande knife sharpener to maintain the sharpness of your kitchen knives. Remember to exercise caution during the sharpening process to prevent any injuries. With this handy tool, you can ensure that your knives are always in top-notch condition for all your culinary adventures.
Step 1: Prepare the Knife
Before using the Ikea Skärande Knife Sharpener, it is important to prepare the knife properly. This will ensure that you achieve the best results and prolong the life of your knife.
Here are the steps to prepare your knife:
1. Clean the Knife
Start by cleaning the knife thoroughly. Use warm soapy water and a cloth or sponge to remove any dirt, debris, or food particles from the blade.
Note: Be cautious while handling the knife to avoid any accidents. Always hold the knife by the handle and keep your fingers away from the sharp edge.
2. Dry the Knife
After cleaning, dry the knife completely using a clean towel or paper towel. Make sure there is no moisture left on the blade, as it can affect the sharpening process.
3. Check for Damage
Inspect the knife for any visible damage or signs of wear. Look for chips, dents, or bent edges. It is important to address any damage before sharpening, as using a damaged knife can be unsafe and may compromise the sharpening process.
Tip: If you notice any significant damage to your knife, it may be best to have it professionally repaired before attempting to sharpen it.
By following these preparation steps, you are now ready to use the Ikea Skärande Knife Sharpener effectively and safely.
Step 2: Position the Knife in the Sharpener
Once you have familiarized yourself with the different parts of the IKEA SKÄRANDE knife sharpener, it’s time to position your knife correctly.
First, locate the coarse sharpening slot on the sharpener. This slot is indicated by a label or symbol on the top of the sharpener.
Next, firmly grasp the handle of the knife and hold it at a slight downward angle. Place the heel (thick part closest to the handle) of the knife blade into the coarse sharpening slot.
Make sure that the entire edge of the blade is in contact with the sharpening surfaces inside the slot. The blade should be inserted between the sharpening stones, ensuring that the cutting edge is facing downward.
Hold the knife steady with one hand while using your other hand to support the sharpener.
|
Note: |
Once the knife is properly positioned, you are ready to move on to the next step: sharpening the blade using the IKEA SKÄRANDE knife sharpener.
Step 3: Sharpen the Knife
1. Start by placing the dull blade of your knife into one of the slots on the Skärande knife sharpener. Make sure the blade is inserted firmly and fully into the slot.
2. Hold the handle of the knife sharpener firmly with one hand, while using your other hand to hold the handle of the knife.
3. Using a gentle but firm pressure, slowly and steadily pull the knife towards you, while keeping it in contact with the grinder wheels inside the slot. It is important to maintain a consistent angle and pressure throughout the sharpening process.
4. Repeat this motion for at least 5-10 passes, depending on how dull your knife is. The more passes you make, the sharper the blade will become.
5. After sharpening one side of the blade, flip the knife over and repeat the sharpening process on the other side.
6. Once you are satisfied with the sharpness of your knife, wipe off any residual metal filings or debris from the blade with a clean cloth.
7. Your knife is now sharp and ready to use! Remember to always exercise caution when handling sharp objects.


