


When it comes to hiking, one of the most essential tools you need is a strong and reliable rake. A rake can help you maintain the trails, clear debris, and even assist in creating new paths. However, attaching rakes to hiking cantilevers can be a bit tricky if you’re not familiar with the process. In this article, we will guide you through the steps of attaching rakes to hike cantilevers.
Step 1: Choose the Right Rake
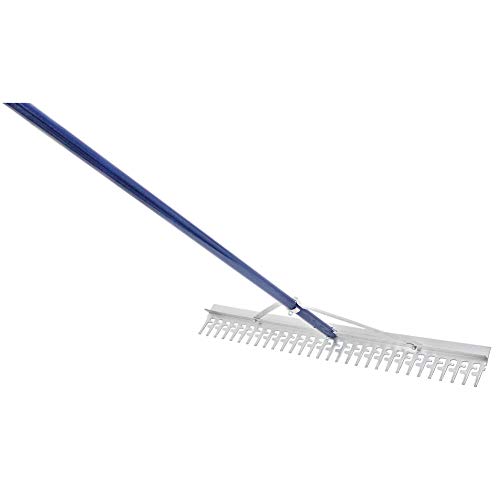
The first step in attaching rakes to hiking cantilevers is to choose the right rake for the job. You’ll want to select a rake with a sturdy handle and durable tines. Look for a rake that is specifically designed for outdoor use and can withstand the rigors of hiking. Additionally, consider the size of the rake and ensure it is compatible with the cantilevers you plan to use.
Step 2: Prepare the Cantilevers
Before attaching the rake, you need to prepare the cantilevers. Make sure they are clean and free from any dirt or debris that could interfere with the attachment process. Inspect the cantilevers for any damage or wear and tear. If you notice any issues, it’s best to replace them before proceeding.

Step 3: Attach the Rake
Now that you have the right rake and prepared cantilevers, it’s time to attach the rake. Position the rake head over the cantilevers and ensure it is aligned correctly. Once aligned, apply downward pressure and slide the rake head onto the cantilevers. You may need to use some force to secure the rake in place. Once attached, give it a firm tug to ensure it’s secure.
Remember, proper attachment of rakes to hiking cantilevers is crucial for your safety and the effectiveness of your hiking tools. Be sure to follow these steps carefully to ensure a secure attachment. Now you’re ready to hit the trails with your trusty rake!
Choosing the Right Rake for Hiking
When it comes to hiking, having the right equipment is crucial. One important tool that every hiker should have is a rake. Rakes can be used for a variety of purposes while hiking, such as clearing trails, removing debris, and leveling uneven ground. However, with so many different types of rakes available, it can be difficult to know which one is the best for hiking. This guide will help you choose the right rake for your hiking adventures.
1. Length
The length of the rake is an important factor to consider. For hiking purposes, a shorter rake is generally more practical and easier to handle. Look for a rake that is around 12 to 18 inches long. This length will allow you to easily maneuver the rake while hiking and will fit comfortably in your backpack.
2. Weight
The weight of the rake is another important consideration. Since you will be carrying the rake with you during your hike, you don’t want it to be too heavy. Look for a rake that is lightweight but still durable enough to withstand outdoor use. A rake made of lightweight materials such as aluminum or carbon fiber is a good option.
3. Handle
The handle of the rake is another important factor to consider. Look for a rake with a comfortable grip that will allow you to easily hold and maneuver the rake while hiking. Some rakes have ergonomic handles that are designed to reduce fatigue and provide a better grip. Consider your personal preference and choose a handle that feels comfortable to you.
4. Head Shape
The shape of the rake’s head is also worth considering. Different head shapes are better suited for different tasks. For hiking purposes, a rake with a wide head and sturdy tines is ideal. This type of rake will be more effective at clearing a trail and removing debris. Avoid rakes with narrow heads or flimsy tines, as they may not be as efficient.
By considering these factors, you can choose the right rake for your hiking needs. Remember to take into account the length, weight, handle, and head shape of the rake. With the right rake in hand, your hiking adventures will be much more enjoyable and efficient.
Understanding the Different Types of Rakes
When it comes to yard work and outdoor maintenance, rakes are an essential tool. They can help clear away leaves, debris, and thatch from your yard or garden. However, not all rakes are created equal. There are several different types of rakes, each designed for specific tasks. Understanding the different types of rakes can help you choose the right one for your needs.
1. Leaf Rakes: Leaf rakes, also known as lawn rakes, are the most common type of rake. They have a fan-shaped head with flexible tines, which makes them perfect for gathering leaves, grass clippings, and other lightweight debris. The tines are usually made of plastic or metal, and they can be flat or curved. Leaf rakes come in different sizes, so you can choose the one that suits your yard.
2. Garden Rakes: Unlike leaf rakes, garden rakes have sturdy, rigid tines. They are designed for heavier-duty tasks, such as leveling soil, spreading mulch, or removing stones and rocks from the ground. The strong tines can also be used to break up clumps of soil or remove weeds. Garden rakes often have a straight-edged head and are available in different widths.
3. Thatch Rakes: Thatch rakes, also known as dethatching rakes or power rakes, have long, sharp tines that are specifically designed to remove thatch from your lawn. Thatch is a layer of dead grass, roots, and other organic matter that can build up on the soil surface and prevent water and nutrients from reaching the roots. Thatch rakes are usually made of metal and are more aggressive than leaf or garden rakes.
4. Bow Rakes: Bow rakes, also known as level head rakes or asphalt rakes, have a wide, flat head with short, rigid tines. They are primarily used for spreading and leveling materials such as soil, gravel, or asphalt. The wide head and short tines allow for efficient and even distribution of the material. Bow rakes are commonly used in construction and landscaping projects.
5. Hand Rakes: Hand rakes, as the name suggests, are smaller rakes designed for working in tight spaces or for more delicate tasks. They have a small head with short tines and are perfect for raking leaves or debris from under shrubs, in flower beds, or around rocks. Hand rakes are also handy for gathering up grass clippings and small piles of dirt.
Each type of rake has its specific purpose and can make your yard work easier and more efficient. By understanding the different types of rakes available, you can choose the right one for your specific needs and achieve the desired results in your outdoor projects.
Evaluating the Material and Design of Rakes
When it comes to attaching rakes to a hike cantilever, it is important to consider the material and design of the rakes. The right material and design can greatly impact the efficiency and effectiveness of the entire system.
Firstly, the material used for the rakes should be strong and durable. It should be able to withstand the weight and pressure placed on it without bending or breaking. Common materials used for rakes include steel, aluminum, and wood. Steel is a popular choice due to its strength and resistance to wear and tear. Aluminum is lightweight and corrosion-resistant, making it suitable for outdoor applications. Wood can also be used, but it may require regular maintenance to prevent rot and warping.
The design of the rakes is also crucial. The length and width of the rake should be appropriate for the specific cantilever system it will be used with. The rake should be long enough to reach the desired depth without causing strain on the hiker. It should also have a sufficient width to efficiently gather debris and leaves. The teeth or tines of the rake should be sharp and evenly spaced to ensure effective raking.
Additionally, the handle of the rake should be comfortable and easy to grip. It should be long enough to provide leverage while raking, but not so long that it becomes cumbersome to handle. The handle material should also be strong and durable, able to withstand the force applied during raking.
To evaluate the material and design of rakes, it can be helpful to compare different options and consider their pros and cons. Assessing the durability, strength, and suitability of the material, as well as the design features, can aid in selecting the best rake for attaching to a hike cantilever.
| Material | Pros | Cons |
|---|---|---|
| Steel | Strong and durable | May be heavy |
| Aluminum | Lightweight and corrosion-resistant | Not as strong as steel |
| Wood | Natural and aesthetically pleasing | Requires regular maintenance |
In conclusion, when attaching rakes to a hike cantilever, it is essential to carefully evaluate the material and design of the rakes. Considering factors such as the material’s strength and durability, as well as the rake’s length, width, teeth, and handle, can help ensure an efficient and effective raking experience.
Exploring the Cantilever Attachment System
The cantilever attachment system is a versatile and effective way to attach rakes to a hiking backpack. This system allows you to easily secure rakes to the sides of your backpack, keeping them readily accessible while you hike. Here is a step-by-step guide on how to use the cantilever attachment system for your rakes:
1. Choose a backpack with compatible attachment points. Look for backpacks that feature loops or daisy chains along the sides or bottom of the pack. These attachment points will serve as anchor points for the cantilever system.
2. Attach the cantilever arms. The cantilever arms are the main components of the system that will hold the rakes. They are usually made of aluminum or another lightweight material and are designed to be adjustable. Hook one end of the cantilever arm onto the attachment point on your backpack and secure it in place.
3. Adjust the cantilever arms. The length and angle of the cantilever arms can be adjusted to accommodate different sizes of rakes and personal preferences. Experiment with different positions to find the one that works best for you.
4. Attach the rakes. Once the cantilever arms are securely attached and adjusted, you can attach the rakes to them. Most cantilever systems feature hooks or loops on the ends of the arms specifically designed to hold rakes. Slide the handles of the rakes into these hooks or loops and make sure they are secure.
5. Test the attachment. Before setting off on your hike, give the attachment system a gentle tug to ensure that the rakes are securely attached and won’t come loose during your hike. Make any necessary adjustments to ensure a tight fit.
By following these steps, you can easily and securely attach rakes to your hiking backpack using the cantilever attachment system. This system is a great way to free up space inside your backpack and keep your rakes easily accessible for trail maintenance or other outdoor activities.
Step-by-Step Guide to Attaching Rakes to Hiking Poles
Hiking poles can be a valuable tool when traversing rough terrain, providing stability and support as you navigate through nature. However, sometimes you may encounter situations where you need additional support, such as when hiking on slippery or steep slopes. Attaching rakes to your hiking poles can help increase stability and traction, allowing you to tackle challenging trails with ease. Follow this step-by-step guide to learn how to attach rakes to your hiking poles.
What You Will Need
- Hiking poles
- Rakes
- Zip ties or strong adhesive
Step 1: Prepare Your Hiking Poles
Before attaching the rakes, make sure your hiking poles are clean and dry. Remove any dirt or debris from the poles to ensure a secure attachment.
Step 2: Position the Rakes
Decide on the desired position for the rakes on your hiking poles. Typically, attaching them near the tips of the poles provides optimal traction and stability. Ensure that the rakes are aligned with the direction of your poles.
Step 3: Attach the Rakes
There are two common methods for attaching rakes to hiking poles: using zip ties or using strong adhesive.
- Using Zip Ties:
- Insert the end of the zip tie through the holes in the rake.
- Wrap the zip tie around the pole tightly, ensuring that the rake is securely attached.
- Trim any excess zip tie length.
- Using Strong Adhesive:
- Apply a generous amount of strong adhesive to the rake.
- Press the adhesive side of the rake firmly against the pole.
- Hold the rake in place for a few minutes to allow the adhesive to set.
Step 4: Test and Adjust
After attaching the rakes to your hiking poles, take them for a test walk in a safe and controlled environment to ensure they are securely fastened. If you experience any issues or notice any instability, readjust the attachment using the previous steps.
Now that you know how to attach rakes to your hiking poles, you can confidently tackle challenging terrain with increased stability and traction. Remember to always exercise caution and use proper hiking techniques to ensure a safe and enjoyable hiking experience.
Tips and Tricks for a Secure and Efficient Rake Attachment
Attaching rakes to a hiking cantilever can be a tricky task if not done properly. It is essential to ensure that the attachment is secure, as a loose or unstable rake can pose a safety risk during hiking. To help you achieve a secure and efficient rake attachment, follow these tips and tricks:
1. Choose a compatible cantilever
Before attaching a rake, make sure that the cantilever you are using is compatible with rakes. Some cantilevers come with pre-installed attachments for rakes, while others may require you to purchase additional accessories. Ensure that the rake attachment you choose is designed to fit your specific cantilever model.
2. Clean and prepare the attachment area
Before attaching the rake, clean and prepare the attachment area on the cantilever. Remove any dirt, debris, or rust that may hinder the attachment process. A clean surface will provide a better grip for the attachment, ensuring a more secure connection.
3. Use the right hardware
When attaching the rake, use the right hardware to ensure a secure and durable connection. Check the manufacturer’s instructions or consult with a hardware specialist to determine the appropriate screws, bolts, or clamps needed for your specific rake and cantilever combination. Using the wrong hardware can result in an unstable attachment that may not hold up during hiking.
4. Follow the manufacturer’s guidelines
Always refer to the manufacturer’s guidelines and instructions when attaching a rake to a hiking cantilever. Each manufacturer may have specific recommendations or steps to follow for a safe and proper attachment. By following these guidelines, you can ensure that the rake is securely attached and will function effectively during your hiking adventures.

5. Check for stability
After attaching the rake, perform a stability check to ensure that it is securely fastened. Gently shake the rake and cantilever to test for any movement or looseness. If you notice any instability, recheck the attachment process, tighten the hardware if necessary, and perform another stability check. It is important to have a secure and stable rake attachment to avoid any accidents or injuries while hiking.
6. Regularly inspect and maintain
Once the rake is attached, it is essential to regularly inspect and maintain the attachment to ensure its continued safety and efficiency. Check for any signs of wear and tear, tighten any loose fasteners, and clean the attachment area as needed. Regular maintenance will help prolong the lifespan of the rake attachment and ensure its reliability during hikes.
By following these tips and tricks, you can achieve a secure and efficient rake attachment to your hiking cantilever. Remember to prioritize safety and always double-check the attachment for stability before hitting the trails. Happy hiking!


