
A circular saw is a powerful tool used for cutting different materials such as wood, metal, and plastic. It consists of a motor, a handle, a base plate, and most importantly, a circular saw blade. Over time, the blade can become dull and ineffective, which requires replacement.
If you are unsure how to replace a circular saw blade, don’t worry! It’s a simple process that anyone can do with a few basic tools and some caution.
First, ensure the safety of yourself and others by disconnecting the saw from the power source. This will prevent any accidental starts and potential injuries. It’s always better to be safe than sorry!
Next, use the provided wrench or a suitable alternative to loosen the arbor nut that holds the blade in place. Turn it counterclockwise to remove it, making sure to keep a firm grip on the blade as you do so. Carefully slide the old blade off the arbor, being cautious not to damage the teeth or yourself in the process.
Steps to replace a circular saw blade:
- Unplug the circular saw from the power source to ensure safety during the blade replacement process.
- Wear protective gloves and safety goggles to protect yourself from any potential accidents or flying debris.
- Locate the blade lock button or lever on the circular saw. This will vary depending on the make and model of the saw.
- Press the blade lock button or engage the blade lock lever to secure the blade in place.
- Using a wrench or a blade changing tool, loosen the arbor bolt that holds the blade in place by turning it counterclockwise. Be sure to hold the blade steady while doing this.
- Once the arbor bolt is loose enough, remove it and take out the old saw blade.
- Inspect the blade arbor and clean it if necessary to ensure smooth operation of the new blade.
- Align the new circular saw blade with the arbor, ensuring that the teeth are facing in the direction of the saw’s rotation.
- Place the arbor bolt back into position and tighten it by turning it clockwise using a wrench or blade changing tool.
- Make sure the blade is secured tightly by giving it a gentle tug and checking for any wobbling or movement.
- Double-check that all the connections and safety mechanisms are properly in place before plugging the circular saw back into the power source.
- Test the circular saw with the new blade in a safe and controlled manner before using it on any woodworking or construction projects.
Remember to consult the manufacturer’s manual for any specific instructions or safety guidelines that may vary for your particular circular saw model.
Preparation for replacing a circular saw blade
Before replacing the circular saw blade, it is important to ensure that you have the necessary tools and equipment on hand. This will help make the process smoother and more efficient. Follow the steps below to prepare for replacing a circular saw blade:
- Make sure the circular saw is turned off and unplugged from the power source. Safety should always be the top priority.
- Gather the required tools, including a wrench or Allen key that fits the arbor nut and a new circular saw blade that is compatible with your saw.
- Find a clean and flat work surface to perform the blade replacement. This will provide stability and prevent any potential accidents.
- Inspect the old circular saw blade for any signs of damage or wear. If the blade is dull, chipped, or bent, it should be replaced.
- Take note of the blade’s rotation direction. This information is often marked on the blade itself or in the user manual. Ensuring that the new blade rotates in the correct direction is crucial for the saw’s safety and performance.
- If necessary, consult the user manual for additional instructions and safety precautions specific to your circular saw model.
By following these preparation steps, you can ensure that you have everything you need and are ready to safely and efficiently replace the circular saw blade.
Removing the old circular saw blade
Before replacing a circular saw blade, it is essential to remove the old blade properly. Follow the steps below to safely remove the old circular saw blade:
| Step 1: | Unplug the circular saw from the power source to avoid accidental start-up. |
| Step 2: | Locate the arbor lock button, which is usually located near the blade guard. Press and hold the arbor lock button to keep the blade from rotating. |
| Step 3: | Position the saw in a way that allows easy access to the blade. |
| Step 4: | Using a wrench or a socket wrench, loosen the bolt that secures the blade to the arbor. Turn the bolt counterclockwise to remove it completely. |
| Step 5: | Carefully lift the old circular saw blade off the arbor and set it aside. |
Once you have successfully removed the old circular saw blade, you can proceed with installing the new blade following the manufacturer’s instructions.
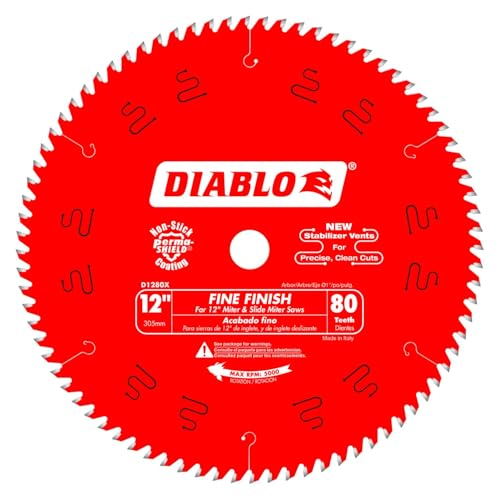
Choosing a new circular saw blade
When it comes to replacing the blade on your circular saw, it is important to choose the right one for the job. The type of blade you select will depend on the material you will be cutting and the desired outcome.
Blade Material: Circular saw blades are typically made from a variety of materials, including carbon steel, high-speed steel, and carbide-tipped. Carbon steel blades are affordable and suitable for cutting softer materials such as wood, but they tend to dull quickly. High-speed steel blades are harder and more durable, making them ideal for cutting metal and plastics. Carbide-tipped blades are the most expensive but offer the best performance and longevity, making them perfect for cutting hard materials like masonry and tile.
Blade Type: The type of blade you need will depend on the specific cutting task. Rip blades are designed for making long, straight cuts along the grain of the wood. Crosscut blades, on the other hand, are better for making cuts across the grain, resulting in smoother edges. Combination blades are versatile and can handle both types of cuts. There are also specialty blades available for specific applications such as cutting laminate flooring or non-ferrous metals.
Blade Size: Circular saw blades come in a variety of sizes, typically ranging from 5 to 12 inches in diameter. The size you choose depends on the size and power of your circular saw. It’s important to select a blade that is compatible with your saw and can handle the depth of cut required for your project.
Teeth Count: The number of teeth on the blade affects the cut quality and speed. Blades with more teeth deliver smoother, cleaner cuts but may cut more slowly. On the other hand, blades with fewer teeth cut faster but can leave rougher edges. For general purpose cutting, a blade with 24 to 40 teeth is typically sufficient, while a higher tooth count is recommended for finer woodworking or precision cuts.
Additional Considerations: Other factors to consider when choosing a circular saw blade include the arbor size (the hole in the center of the blade that fits onto the saw’s spindle), the blade’s kerf (the thickness of the cut), and the blade’s hook angle (the angle at which the teeth are positioned). These factors will vary depending on the saw and the specific cutting application.
By considering the material, type, size, teeth count, and additional factors when selecting a circular saw blade, you can ensure that you have the right blade for the job, making your cutting tasks easier and more efficient.
Installing the new circular saw blade
Once you have removed the old circular saw blade, it’s time to install the new one. Here’s a step-by-step guide to help you:
- Make sure the saw is unplugged or the battery is removed to avoid any accidents.
- Align the new circular saw blade with the arbor, which is the metal shaft that extends from the center of the saw. The teeth of the blade should be facing forward.
- Hold the blade in place with one hand and use the wrench provided with the saw to tighten the arbor nut. Make sure it is securely fastened, but be careful not to overtighten it.
- Double-check that the blade is properly aligned with the saw. It should be parallel to the base plate or shoe of the saw and perpendicular to the line of sight.
- Reconnect the power source or insert the battery and give the saw a quick test run. Listen for any unusual noises or vibrations, which may indicate that the blade is not installed correctly.
- Always wear protective gear such as safety glasses and gloves when using a circular saw. Safety should always be your top priority!
With these simple steps, you should now have successfully installed a new circular saw blade. Remember to always follow the manufacturer’s instructions, as different models may have variations in the installation process.
Testing the new circular saw blade
Once you have successfully replaced the circular saw blade, it is important to test it before using it for any projects. Testing the blade ensures that it is properly installed and working correctly, which is essential for safety and optimal performance.
Here are the steps to test the new circular saw blade:
- Inspect the blade: Before testing the blade, visually inspect it for any damage or irregularities. Make sure it is properly aligned and securely attached to the saw.
- Choose a scrap material: Select a piece of scrap wood or a similar material to test the blade’s cutting performance. It is recommended to choose a material that is similar to what you will be using for your project.
- Set up the saw: Place the scrap material on a stable surface and adjust the saw’s cutting depth and angle according to your needs.
- Perform a test cut: With the saw properly set up, carefully guide the blade into the material and make a test cut. Pay attention to the cutting speed, smoothness, and accuracy of the cut.
- Inspect the cut: Examine the test cut to ensure it meets your expectations. Look for any signs of burning, chipping, or other issues that might indicate a problem with the blade.
- Repeat if necessary: If the test cut is not satisfactory, you may need to adjust the saw settings or check the blade installation again. Repeat the test cut until you are satisfied with the performance.
Testing the new circular saw blade is an essential step to ensure your safety and the quality of the cuts. By following these steps, you can confidently use your circular saw for your woodworking or construction projects.


