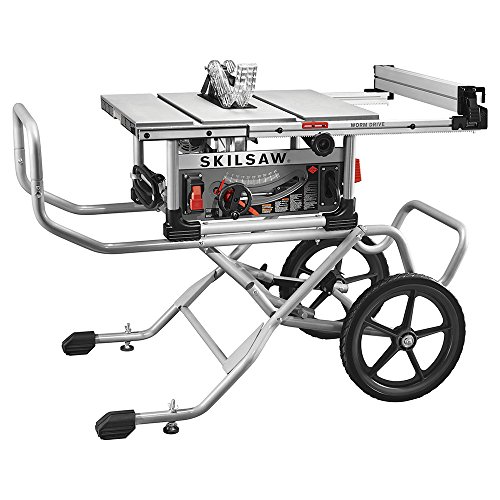
If you are an avid woodworker or a DIY enthusiast, you know the importance of having a table saw in your workshop. A table saw is a versatile and essential tool that can make your woodworking projects easier and more efficient. However, to ensure precise and accurate cuts, it is important to have the right accessories and attachments for your table saw.
One such accessory that can greatly improve the performance of your table saw is a fin. A table saw fin is a small thin piece of metal or plastic that is attached to the rip fence of the table saw. It acts as a guide, preventing the workpiece from twisting or moving during the cutting process. This helps in achieving straighter and more accurate cuts, especially when working with larger or longer pieces of wood.
Adding a fin to your table saw is a relatively simple process that can be done in a few easy steps. In this article, we will guide you through the process of adding a fin to your table saw, explaining each step in detail and providing helpful tips along the way. So, let’s dive in and learn how to add a table saw fin!
Before we begin, it is important to note that there are different types of table saw fins available in the market. Some are designed to be universal and can fit most table saw models, while others are specific to certain brands or models. Therefore, it is important to choose a fin that is compatible with your table saw.
Choosing the Right Table Saw Fin
When it comes to adding a table saw fin, selecting the right one is crucial for achieving accurate and clean cuts. A table saw fin, also known as a splitter or a riving knife, is an essential safety device that helps prevent kickback and keeps the workpiece stable during the cutting process.
The Importance of a Table Saw Fin
A table saw fin serves multiple purposes, and understanding its importance is crucial when choosing the right one for your table saw:
- Safety: A properly installed fin helps prevent kickback, a dangerous situation that occurs when the workpiece gets stuck or binds, causing the spinning blade to forcefully throw the piece back towards the operator.
- Stability: A fin keeps the workpiece aligned and reduces the chance of it moving or vibrating during the cutting process, resulting in cleaner and more accurate cuts.
- Versatility: Depending on the type of fin you choose, it can be adjusted to accommodate different types of cuts, such as through cuts, bevel cuts, or dado cuts.
Types of Table Saw Fins
There are several types of table saw fins available, and each has its own advantages and considerations:
- Standard Splitter: This is the most basic type of fin, typically included with most table saws. It helps prevent kickback and provides general stability during straight cuts.
- Riving Knife: A riving knife moves with the blade, staying in close proximity to it. This type of fin offers more versatile cutting options and is especially useful for bevel cuts.
- Micro-Adjustable Splitter: This type of fin allows for precise adjustments in width, ensuring tight spaces between the fin and the blade. It provides excellent stability and is ideal for cutting thin or narrow materials.
- Guard and Splitter Combination: Some table saws come with a combination of a transparent blade guard and a splitter. This provides both safety and stability, as well as improved visibility during the cutting process.
Before selecting a fin for your table saw, consider the type of cuts you commonly make and the materials you work with. It’s essential to choose a fin that is compatible with your saw and provides the necessary safety and stability for your specific needs.
Remember to always follow the manufacturer’s instructions when installing and adjusting your table saw fin. Proper maintenance and regular inspections are also important to ensure the fin is in good working condition and continues to provide optimal safety and performance.
Consider Safety Features
When it comes to adding a table saw fin, safety should be your top priority. There are several safety features that you should consider before starting any modifications.
Firstly, ensure that your table saw is equipped with a quality blade guard. This will help to protect your hands and fingers from coming into contact with the spinning blade. It is important to keep this guard in place at all times.
Additionally, a riving knife is an essential safety feature to have on your table saw. This thin metal blade is mounted just behind the saw blade and helps to prevent kickback. It keeps the cut material from pinching the blade and getting thrown back at you.
Another important safety feature to consider is a push stick. This is a small tool that you can use to guide the material through the saw, keeping your hands safely away from the blade. Make sure to use a push stick whenever possible to minimize the risk of injury.
Finally, a well-adjusted and properly functioning blade guard and splitter assembly is crucial. This assembly helps to prevent kickback and keeps your hands safe during operation. Regularly check and adjust these safety features to ensure they are working effectively.
Remember, safety should always come first when working with power tools. By taking the time to consider and implement these safety features, you can help to ensure a safe and productive woodworking experience.
Determine the Fin Material
- Consider the project requirements: Before choosing a material for the table saw fin, it is important to first determine the specific requirements of your project. Factors such as the type of wood being cut, the desired finish, and the level of durability needed will play a crucial role in selecting the right material for the job.
- Common materials for table saw fins: There are several common materials used for crafting table saw fins. These include hardwoods such as maple, oak, and walnut, which offer excellent strength and durability. Plywood is also a popular choice due to its affordability and versatility. Additionally, plastic materials, such as acrylic or PVC, can be considered for their lightweight and resistance to moisture.
- Consider budget and availability: When choosing a fin material, it is important to consider your budget and the availability of the material. Hardwood materials tend to be more expensive compared to plywood or plastic. However, if budget allows, hardwoods can provide a higher quality and more aesthetically pleasing finish.
- Test and experiment: If uncertain about the best material for your table saw fin, it is advisable to conduct tests and experiments using different materials. By making small sample cuts with various materials, you can evaluate the performance and durability of each option, ultimately helping you make an informed decision.
By carefully considering the project requirements, available options, and conducting tests, you can determine the most suitable material for your table saw fin.
Learn the Proper Fin Installation Procedure
When it comes to using a table saw, one crucial aspect is the proper installation of the fin. The fin is an essential component that helps to control the workpiece during the cutting process, ensuring accuracy and safety. By following the correct procedure for fin installation, you can enhance your table saw’s performance and reduce the risk of accidents.
Here is a step-by-step guide on how to install the fin on your table saw:
|
Step 1: Turn off and unplug the table saw Before starting the installation process, ensure that the table saw is completely turned off and unplugged from the power source. This precautionary measure will help prevent any accidental starting of the saw during installation. |
|
Step 2: Locate the fin slot Most table saws come with a designated slot for the fin. Locate this slot on the fence or the table saw’s body. The fin slot is usually positioned near the blade, allowing for better control and stability. |
|
Step 3: Prepare the fin Inspect the fin for any damage or irregularities. Ensure that the fin is clean and free from any debris or sawdust. If the fin is damaged or worn out, it is recommended to replace it before proceeding with the installation. |
|
Step 4: Insert the fin Gently insert the fin into the designated slot. Make sure that the fin is properly aligned and seated securely in the slot. Double-check for any obstructions or misalignments that may impede smooth movement during use. |
|
Step 5: Test the fin After installing the fin, turn on the table saw and test its functionality. Move the workpiece through the blade while holding onto the fin to ensure that it provides the desired level of control and stability. If any issues arise, carefully recheck the installation and make adjustments as needed. |
By following these steps, you can install the fin correctly on your table saw, enhancing your woodworking experience and ensuring the safety of your projects. Remember to always prioritize safety and perform regular maintenance checks to keep your table saw in optimal condition.