If you own a Delta table saw, you know how important it is to have a properly adjusted fence. The fence is a crucial component that ensures accurate, straight cuts every time. Over time, however, the fence may need adjustments to maintain its accuracy and precision. In this guide, we will walk you through the steps to adjust your Delta table saw fence for optimal performance.
Step 1: Start by ensuring that your table saw is turned off and unplugged. Safety is paramount when working with power tools.
Step 2: Next, examine the fence for any visible signs of misalignment or looseness. Check for any bent or damaged parts that may affect its performance.
Step 3: If you notice any alignment issues, loosen the mounting bolts that secure the fence to the table saw. Using an appropriate wrench, carefully adjust the position of the fence to align it properly.
Step 4: Tighten the mounting bolts once you have achieved the desired alignment. Be sure not to over-tighten, as this can put unnecessary strain on the fence.
Step 5: After adjusting the fence, test its accuracy by making test cuts on scrap material. Ensure that the cuts are straight and parallel to the blade, indicating a properly aligned fence.
Step 6: If the fence still requires further adjustment, consult the user manual or contact Delta customer support for assistance. They can provide specific instructions based on your model of table saw.
By following these steps, you can easily adjust the fence on your Delta table saw to ensure precise and accurate cuts for all your woodworking projects. Remember to always prioritize safety and take caution when working with power tools.
Please note: This guide is specifically for Delta table saws. If you own a different brand or model, the adjustment process may differ. Always refer to the manufacturer’s instructions for accurate guidance.
Adjusting the Delta Table Saw Fence: A Step-by-Step Guide
The Delta table saw fence is an essential component of the saw that helps to guide and stabilize the workpiece, ensuring accurate and precise cuts. Over time, the fence may become misaligned, affecting the quality of your cuts. Fortunately, adjusting the fence is a straightforward process that can be done in a few steps.
Step 1: Prepare the Table Saw
Before you begin adjusting the fence, ensure that the table saw is turned off and unplugged for your safety. Clear any debris or materials from the table surface to provide a clean and unobstructed workspace.
Step 2: Check Fence Alignment
With a straight piece of wood or a reliable measuring tool, check the alignment of the fence by placing it against the saw blade. Ensure that the fence is parallel to the blade from the front to the back. If you notice any inconsistencies, adjustments are necessary.
Step 3: Loosen Fence Fasteners
Locate the fasteners that secure the fence to the table saw and use the appropriate tools to loosen them. Be careful not to fully remove the fasteners; just loosen them enough to allow movement but still keep the fence in place.
Step 4: Align the Fence
Using the measuring tool or a precise square, align the fence so it is parallel to the saw blade. Adjust the fence position by gently tapping or pushing it in the desired direction. Make small adjustments and periodically check the alignment until it is perfectly parallel to the blade.
Step 5: Tighten Fence Fasteners
Once the fence is properly aligned, tighten the fasteners to secure it in place. Make sure not to overtighten, as this may cause the fence to become misaligned again. Double-check the alignment after tightening to ensure everything is still parallel.
Step 6: Test the Fence
With the fence adjusted and secured, test its alignment by making a few test cuts on scrap wood. Measure the resulting cuts for accuracy and straightness. If needed, minor adjustments can be made following the previous steps until the desired precision is achieved.
By following these simple steps, you can easily adjust the Delta table saw fence and ensure precise cuts in your woodworking projects. Regularly checking and maintaining the alignment of your fence will help to improve the overall performance of your table saw and enhance the quality of your work.
Preparing for Adjustment
Before adjusting the fence on your Delta table saw, it is important to properly prepare and set up your work area. Follow these steps to ensure a successful adjustment:
- Ensure that the saw is turned off and unplugged from the power source. Safety should always be a top priority.
- Clean the table surface and remove any debris or sawdust that may interfere with the adjustment process.
- Inspect the fence and check for any visible damage or wear. If any parts are broken or worn out, they may need to be replaced before attempting to adjust the fence.
- Refer to the user manual or manufacturer’s instructions to understand the specific process for adjusting the fence on your Delta table saw. Different models may have different adjustment methods.
- Gather the necessary tools for the adjustment, such as a wrench or Allen key, as specified in the user manual.
- Find a flat and level surface to place your workbench or table saw. This will ensure stability and accuracy during the adjustment process.
- Take measurements and make note of the current fence position and any misalignments. This will help you determine how much adjustment is needed.
By properly preparing for the adjustment, you will set yourself up for a smoother process and achieve accurate results with your Delta table saw fence.
Understanding the Fence Mechanism
The fence mechanism is a crucial component of the Delta table saw, as it allows for precise and accurate cuts. The fence is a metal guide that runs parallel to the saw blade and can be adjusted to ensure the desired width of the cut. It acts as a reference point for the material being cut and helps to maintain a consistent and straight line throughout the entire cutting process.
Typically, the fence is attached to a fence rail, which is attached to the table of the saw. This rail allows for linear movement of the fence, both towards and away from the blade, ensuring it stays aligned with the blade at all times.
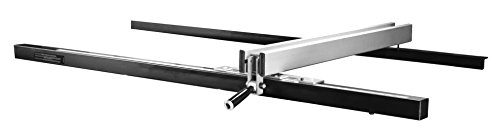
Most Delta table saws come with a T-square style fence, which is known for its accuracy and stability. This type of fence consists of a long, straight bar that slides along the rail. Attached to the bar is a locking mechanism that allows users to secure the fence in place once it has been adjusted to the desired position.
When adjusting the fence, it is important to ensure that it is parallel to the blade, as any misalignment can lead to inaccurate cuts and potential safety hazards. To check the alignment, it is recommended to use a measuring tape or a precision tool, such as a dial caliper, to ensure the fence is equidistant from the blade along its length.
Once the fence has been adjusted and aligned correctly, it is essential to securely lock it in place to prevent any movement during the cutting process. This can be achieved by tightening the locking mechanism, which may be a handle or a lever located on the fence itself. It is important to check the tightness of the lock periodically to ensure it remains secure throughout the entire cutting operation.
By understanding the fence mechanism and properly adjusting it, users can optimize the performance of their Delta table saw and achieve precise and accurate cuts every time.
Evaluating the Current Fence Alignment
Before adjusting the fence on your Delta table saw, it’s important to evaluate its current alignment. This will help you identify any issues and determine the extent of the adjustment required. Follow these steps to evaluate the current fence alignment:
- Start by powering off the table saw and unplugging it from the power source for safety.
- Measure the distance between the blade and the fence at the front and back of the table. Use a reliable measuring tool, such as a tape measure or a dial indicator.
- Record these measurements and compare them. The measurements should be the same, or very close to the same, at both the front and back of the fence. If there is a significant difference, it indicates that the fence is misaligned.
- Next, check the parallelism of the fence to the miter slot. Place a straight edge or a long-level against the fence and extend it to the miter slot. Check if the fence aligns perfectly parallel to the miter slot. Any deviation indicates a misalignment.
- Inspect the overall condition of the fence, ensuring it is clean, free from debris, and in good working condition. Look for any signs of damage, wear, or irregularities.
Evaluating the current fence alignment is a crucial step in adjusting the fence on your Delta table saw. It helps you determine the magnitude of the adjustment required and ensures accurate and safe operation of your table saw.
Making the Necessary Adjustments
Adjusting the fence on a Delta table saw is a crucial step in ensuring accurate and smooth cuts. Here’s how you can make the necessary adjustments:
1. Check the Alignment
Before making any adjustments, it’s important to check the alignment of the fence. Ensure that the fence is parallel to the blade by using a straight edge or a combination square. If the fence is not parallel, you will need to adjust it.
2. Loosen the Fence
To make adjustments, first, loosen the fence by turning the locking handles counterclockwise. This will allow you to move the fence easily.
3. Square the Fence
Place a square against the fence and make sure it is perpendicular to the blade. If it’s not, you will need to adjust it. The adjustment mechanism will vary depending on the model of your Delta table saw, so consult the user manual for specific instructions.
4. Adjust the Fence Parallel to the Blade
Using a combination of measurements and trial and error, adjust the fence to be parallel to the blade. Make small adjustments and recheck the alignment until the fence is parallel to the blade. Lock the fence in place by turning the locking handles clockwise.
5. Test the Alignment
To ensure that the fence is properly adjusted, make a test cut on a scrap piece of wood. Check the quality of the cut and make any further adjustments if necessary.
By following these steps, you can adjust the Delta table saw fence to achieve precise and accurate cuts for your woodworking projects.
Testing and Fine-Tuning the Fence Alignment
Once you have adjusted the fence on your Delta table saw, it is important to test and fine-tune the alignment to ensure accurate and precise cuts. Here are some steps to follow:
Materials Needed:
- Straight board
- Tape measure or ruler
- Pencil
1. Checking Parallel Alignment:
- Make sure the blade is properly aligned with the miter slot and the fence is parallel to the blade.
- Place the straight board against the fence and slide it towards the blade.
- Measure the distance between the board and the blade at the front and back of the blade.
- If the measurements are equal, your fence is parallel to the blade. If not, proceed to the next step.
2. Adjusting Fence Alignment:
- Loosen the fence locking mechanism.
- Using the pencil, mark the direction in which the fence needs to be adjusted (either towards the blade or away from the blade).
- Gently tap the fence in the desired direction using a mallet or hammer.
- Tighten the fence locking mechanism to secure the adjusted position.
3. Rechecking Alignment:
- Repeat the measurement process described in step 1 to check if the fence is now parallel to the blade.
- If necessary, repeat step 2 and continue fine-tuning the fence alignment until the measurements are equal at both the front and back of the blade.
By carefully testing and fine-tuning the fence alignment on your Delta table saw, you can ensure accurate and precise cuts for your woodworking projects.