


Are you looking to expand your woodworking tools without breaking the bank? Building your own mitre saw using a circular saw can be a cost-effective solution.
A mitre saw is a must-have tool for any DIY enthusiast or professional woodworker. It allows you to make precise angle cuts, commonly used in projects such as picture frames, crown moulding, or furniture. While purchasing a standalone mitre saw can be expensive, you can achieve similar results by repurposing a circular saw.

In this guide, we will walk you through the step-by-step process of building your very own mitre saw using a circular saw. With a few basic tools and materials, you’ll be on your way to creating accurate angle cuts for your woodworking projects.
Step-by-Step Guide for Building a Miter Saw with a Circular Saw
Building your own miter saw using a circular saw can be a cost-effective solution that allows you to make precise angled cuts for various woodworking projects. With a few simple materials and tools, you can create your own miter saw setup in no time.
Step 1: Gather the Materials
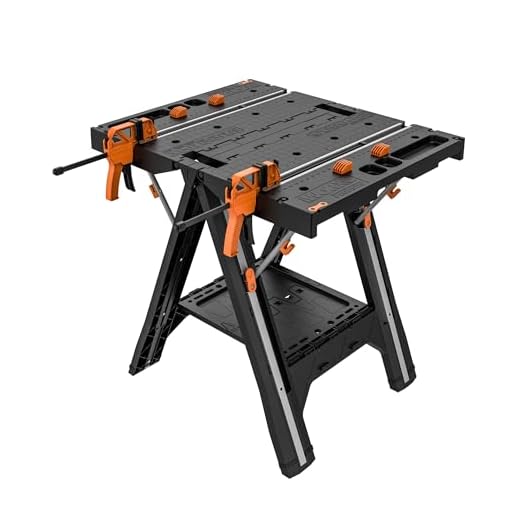
Before you begin, make sure you have all the necessary materials and tools. You will need a circular saw, a sturdy workbench or table, a miter saw stand or a strong plywood base, clamps, a measuring tape, a pencil, screws, and a power drill.
Step 2: Prepare the Base
Start by setting up your workbench or table in a well-ventilated area. If you are using a miter saw stand, follow the manufacturer’s instructions for assembly. If you are using a plywood base, cut it to the desired size and reinforce it with additional supports if needed.
Step 3: Attach the Circular Saw
Position your circular saw on the plywood base or the miter saw stand, making sure it is securely fastened. Use clamps to hold the saw in place if necessary. Make sure the blade is aligned with the edge of the base or stand.
Step 4: Adjust the Angle
Use the measuring tape and pencil to mark the desired angle on your workpiece. Adjust the angle of the circular saw accordingly. Some circular saws have adjustable angles built-in, while others may require you to create a custom jig or bracket to hold the saw at the desired angle.
Step 5: Make the Cut
With everything properly set up and aligned, you are now ready to make the cut. Hold the workpiece firmly against the fence or guide, and slowly lower the saw blade onto the wood. Use a smooth and steady motion to move the saw forward, allowing the blade to make the cut. Take caution and always wear safety goggles and gloves when operating power tools.
Congratulations! You have successfully built your own miter saw using a circular saw. With this setup, you can now make accurate and precise angled cuts for various woodworking projects. Remember to always practice proper safety measures when working with power tools. Happy woodworking!
Materials needed for the project
Before starting the project, it is important to gather all the necessary materials. Here is a list of materials that will be needed:
- A circular saw
- A sturdy workbench or table
- A measuring tape
- A pencil
- A mitre saw box or jig
- A saw blade suitable for cross-cutting
- A safety glasses and ear protection
- Clamps
- Screws or bolts
- A drill
- A screwdriver or wrench
- A combination square
- A straight edge guide
- A speed square
These materials are essential for building a mitre saw using a circular saw. It is important to have all the necessary tools and equipment to ensure the project is completed safely and accurately.
Building the base and guide system
To build a mitre saw using a circular saw, you will first need to create a solid base and a guide system to ensure accurate and consistent cuts. Here are the steps to follow:
Materials needed:
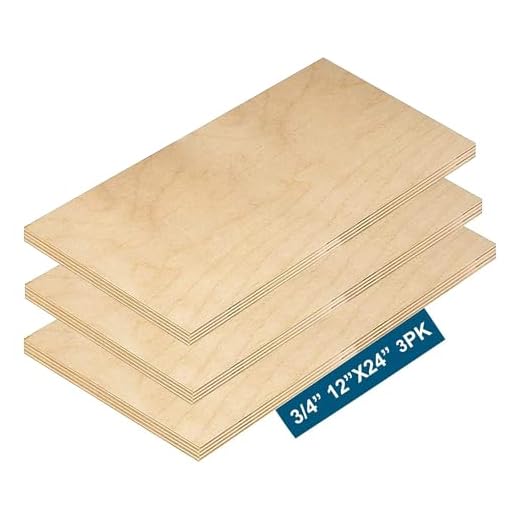
- Plywood sheet (3/4 inch thick)
- 2×4 lumber
- Wood screws
- Mitre saw brackets or metal corner braces
Instructions:
1. Begin by cutting the plywood sheet to the desired size for the base of your mitre saw. A typical size is around 2 feet by 4 feet, but you can adjust the dimensions to fit your needs.
2. Cut two pieces of 2×4 lumber to create the side supports for the base. These pieces should be the same length as the width of the plywood sheet.
3. Attach the side supports to the underside of the plywood sheet using wood screws. Place one support at each end of the plywood, ensuring they are aligned with the edges.
4. Cut two additional pieces of 2×4 lumber to create the front and back supports for the base. These pieces should be the same length as the length of the plywood sheet, minus the thickness of the two side supports.
5. Attach the front and back supports to the underside of the plywood sheet, perpendicular to the side supports, using wood screws. Place one support at each end of the plywood, ensuring they are aligned with the edges.
6. Measure the distance between the side supports and cut a piece of 2×4 lumber to create the fence for the guide system. This piece should be the same length as the distance between the side supports.
7. Attach the fence to the top surface of the side supports using wood screws. Ensure that it is aligned with the edges and centered between the front and back supports.
8. Secure the circular saw onto the base using mitre saw brackets or metal corner braces. Follow the manufacturer’s instructions for attaching the circular saw to the base securely.
9. Test the guide system by making a few practice cuts on scrap wood. Adjust the position of the fence if necessary to achieve accurate and consistent cuts.
Congratulations! You have successfully built the base and guide system for your homemade mitre saw using a circular saw. Now you can start using it for your woodworking projects with confidence.
| Materials needed: | Instructions: |
|---|---|
| – Plywood sheet (3/4 inch thick) | 1. Begin by cutting the plywood sheet to the desired size for the base of your mitre saw. A typical size is around 2 feet by 4 feet, but you can adjust the dimensions to fit your needs. |
| – 2×4 lumber | 2. Cut two pieces of 2×4 lumber to create the side supports for the base. These pieces should be the same length as the width of the plywood sheet. |
| – Wood screws | 3. Attach the side supports to the underside of the plywood sheet using wood screws. Place one support at each end of the plywood, ensuring they are aligned with the edges. |
| – Mitre saw brackets or metal corner braces | 4. Cut two additional pieces of 2×4 lumber to create the front and back supports for the base. These pieces should be the same length as the length of the plywood sheet, minus the thickness of the two side supports. |
Attaching the Circular Saw and Adjusting the Angle
Now that you have prepared the base of your mitre saw, it’s time to attach the circular saw and adjust the angle. Follow these steps:
- Attach the Circular Saw: Place the circular saw on the prepared base, aligning the blade with the previously marked cutting line. Secure the circular saw in place using clamps or screws. Ensure that the saw is firmly attached and won’t move during operation.
- Adjust the Angle: To adjust the cutting angle, locate the angle adjustment knob or lever on the circular saw. Depending on the model, it may be located on the side or at the back of the saw. Loosen the knob or release the lever and adjust the angle according to your desired measurement. Once you have set the desired angle, tighten the knob or secure the lever to lock the saw in place.
It’s important to note that the accuracy of your mitre saw largely depends on the precise adjustment of the angle. Take your time to ensure the angle is set correctly, using a protractor or angle gauge if needed.
Remember to always wear proper safety gear, such as goggles and ear protection, when operating power tools.


