


If you own an Evolution table saw, it is important to know how to change the blade when needed. The blade on a table saw can become dull over time, affecting the quality of your cuts. Additionally, a damaged blade can be dangerous to use. Changing the blade is a simple process that can be done with a few basic tools.
To start, make sure the table saw is unplugged and turned off. Safety should always be the first priority. Once you have done that, locate the blade guard and remove it. The blade guard is designed to protect your hands from accidental contact with the blade. Simply lift it up and away from the blade.
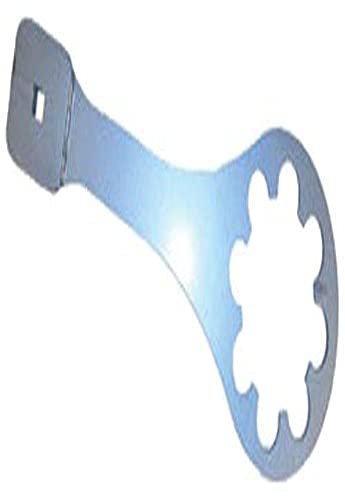
Next, locate the arbor bolt at the center of the blade. This bolt holds the blade in place and needs to be loosened before you can remove the blade. Use a wrench or socket set to loosen the arbor bolt by turning it counterclockwise. Be sure to keep a firm grip on the blade as you loosen the bolt.
Once the arbor bolt is loose, you can slide the old blade off the arbor. Be careful not to touch the teeth of the blade, as they can be sharp. Set the old blade aside and clean any debris from the arbor and surrounding area. This will help ensure a clean and secure fit for the new blade.
To install the new blade, align the center hole of the blade with the arbor, making sure the teeth are facing in the right direction. Once the blade is in position, tighten the arbor bolt clockwise using the wrench or socket set. Make sure the bolt is tightened securely, but be careful not to overtighten.
Finally, replace the blade guard by sliding it back into place. Ensure that it is securely fastened and will provide proper protection during operation. Once everything is in place, plug in the table saw and test the new blade by making a few test cuts on scrap material. If the cuts are clean and precise, you have successfully changed the blade on your Evolution table saw.
Remember, always follow the manufacturer’s instructions and guidelines when working with power tools. If you are uncertain about any step in the process, consult the user manual or seek professional assistance.
Why and When to Change Blade on Evolution Table Saw
Changing the blade on your Evolution table saw is an important maintenance task that you should regularly perform to ensure optimal and safe cutting performance. Here are some reasons why and when you should consider changing the blade:
| Reason | When to Change |
|---|---|
| Dull Blade | When you notice the blade is not cutting smoothly, leaving burn marks, or tearing the material instead of making clean cuts. |
| Damaged Blade | If the blade has chips, broken teeth, or obvious signs of damage that may affect its cutting ability. |
| Wrong Blade for Task | If you are using the wrong type of blade for the material you are cutting, such as using a wood blade for metal cutting. |
| Significant Wear | When the blade has been used extensively and shows signs of significant wear, such as reduced cutting efficiency or uneven cuts. |
| Change of Material | If you are switching from cutting one type of material to another, especially when going from one material that dulls blades quickly to a material that does not. |
It is recommended to inspect your blade regularly and change it when necessary to ensure efficient, safe, and accurate cuts. Always refer to the user manual for specific instructions on how to change the blade on your Evolution table saw.
Safety First: Precautions for Changing the Blade
Changing the blade on your Evolution table saw is a necessary task to maintain its cutting performance. However, it is crucial to prioritize safety when performing this task. By following the proper precautions, you can minimize the risk of accidents and injuries. Here are some important safety measures to observe:
1. Read the Instruction Manual
Before attempting to change the blade, carefully read the instruction manual provided by Evolution. Familiarize yourself with the specific steps and precautions outlined by the manufacturer. This will ensure that you understand the correct procedure and use the necessary tools for changing the blade safely.
2. Disconnect the Power
Always disconnect the power supply before attempting to change the blade. This can be done by unplugging the table saw from the power outlet or turning off the power switch if your table saw is connected directly to a power source. This precaution prevents accidental start-up and keeps you safe during the blade replacement process.
3. Wear the Proper Safety Equipment
Before starting any work on the table saw, wear the appropriate safety equipment. This includes safety goggles or glasses to protect your eyes from debris, gloves to protect your hands, and ear protection if necessary. Safety equipment provides an important layer of protection against potential hazards.
4. Secure the Table Saw
Ensure that the table saw is stable and securely locked before attempting to change the blade. This can be done by engaging the blade lock or using a wrench to secure any blade-locking mechanisms. A stable table saw prevents accidental movements or vibrations that may cause injury during blade replacement.
5. Properly Dispose of the Old Blade
When removing the old blade, handle it with care to avoid any contact with the sharp edges. Place the old blade in a safe container or wrap it with a protective material before disposing of it. Dispose of old blades responsibly and according to your local regulations.
6. Avoid Contact with the Blade
Throughout the blade changing process, be cautious not to come into contact with the blade or any sharp edges. Always handle the new blade by its mounting hole or edges that have been designed for safe gripping. Avoid touching the sharp cutting surfaces to prevent cuts or injuries.
7. Double-Check the Blade Installation
After installing the new blade, double-check that it is securely mounted and properly aligned. Make sure all blade-related components are securely tightened. This will help prevent any potential issues or accidents that may arise from a loose or misaligned blade.
By following these safety precautions, you can confidently change the blade on your Evolution table saw while minimizing the risk of accidents or injuries. Remember, safety should always be a priority when working with power tools.
Step-by-Step Guide: How to Change the Blade on Evolution Table Saw
Changing the blade on your Evolution Table Saw is a simple process that can be done in a few easy steps. Follow this step-by-step guide to safely and effectively replace the blade on your saw.
Tools and Materials You Will Need:
- Evolution Table Saw
- New Blade
- Adjustable Wrench
- Protective Gloves
- Safety Glasses
Step 1: Turn off the Power
Before beginning any work on your table saw, make sure to turn off the power and unplug the cord from the power outlet. This will prevent any accidental starting of the saw during the blade replacement process.
Step 2: Raise the Blade to its Maximum Height
Using the height adjustment wheel, raise the blade on your Evolution Table Saw to its maximum height. This will provide you with better access to the blade and make the replacement process easier.
Step 3: Remove the Blade Guard
Carefully remove the blade guard from your table saw. This can usually be done by loosening a few screws or knobs, depending on the specific model of your saw. Set the blade guard aside in a safe location.
Step 4: Loosen the Arbor Nut
Using an adjustable wrench, loosen the arbor nut that holds the blade in place. Turn the nut counterclockwise to loosen it. Be sure to hold the blade in place with one hand while loosening the nut with the other hand to prevent the blade from spinning.
Step 5: Remove the Blade
Once the arbor nut is loose, carefully remove the blade from the arbor. Lift the blade up and off the arbor, making sure to keep your fingers clear of the sharp teeth. Place the old blade aside in a safe location or dispose of it properly.
Step 6: Install the New Blade
Take the new blade and align the mounting hole in the center of the blade with the arbor on your table saw. Slide the new blade onto the arbor, making sure it is fully seated and the teeth are facing the correct direction for cutting.
Step 7: Tighten the Arbor Nut
Using the adjustable wrench, tighten the arbor nut in a clockwise direction to secure the new blade in place. Make sure the nut is tightened sufficiently, but be careful not to overtighten it, as this can cause damage to the blade or the arbor.
Step 8: Replace the Blade Guard
Once the new blade is securely in place, reattach the blade guard to your table saw. Tighten any screws or knobs to ensure it is properly secured. The blade guard is an important safety feature that should always be in place when using the saw.
Step 9: Test the Blade
After you have completed the blade replacement process, plug in the power cord and turn on your Evolution Table Saw. Check the blade for any wobbling or unusual noises. If everything looks and sounds normal, you can begin using your table saw with the new blade.
Important Safety Tips:
- Always wear protective gloves and safety glasses when working with power tools.
- Make sure to read and follow the manufacturer’s instructions for blade replacement.
- Double-check that the power is off and the cord is unplugged before starting any work on the saw.
- Take your time and work carefully to avoid accidents.
By following this step-by-step guide, you can easily change the blade on your Evolution Table Saw and ensure your saw is in top working condition for your woodworking projects.
Tips and Tricks: Extending the Life of Your New Blade
Once you have successfully changed the blade on your Evolution table saw, you’ll want to ensure that it lasts for as long as possible. Here are some tips and tricks for extending the life of your new blade:
1. Proper blade selection
Choosing the right blade for your specific needs is crucial. Different blades are designed for different materials and cutting applications. Make sure you select a blade that is suitable for the task at hand.
2. Clean cuts
Take the time to set up your saw properly and make clean cuts. Misalignment or forcing the blade through the material can cause unnecessary wear and tear. Make sure the blade is aligned with the saw’s fence and miter gauge, and use a smooth and controlled cutting motion.
3. Use a saw blade lubricant
Using a saw blade lubricant can help reduce heat and friction, which can significantly extend the life of your blade. Apply the lubricant to the blade before making each cut, especially when cutting through hard materials.
4. Avoid overloading the blade
Try not to overload the blade by forcing it to cut through materials that are too thick or dense for its capabilities. If you notice the blade straining or slowing down significantly, stop and readjust your cutting parameters or switch to a more suitable blade.
5. Proper storage
When you’re not using your table saw, it’s important to store the blade properly. Keep it in a clean, dry, and secure location, away from any potential damage or exposure to moisture or temperature extremes.
6. Regular blade maintenance
Perform regular blade maintenance, including cleaning off any resin or debris that may accumulate during use. You can use a blade cleaning solution or a mixture of warm water and mild soap. Dry the blade thoroughly before storing it.
| Tips and Tricks: |
|---|
| 1. Proper blade selection |
| 2. Clean cuts |
| 3. Use a saw blade lubricant |
| 4. Avoid overloading the blade |
| 5. Proper storage |
| 6. Regular blade maintenance |