

If you own a challenger circular saw, you probably know that regular maintenance is essential to ensure its optimal performance. One of the most common tasks you’ll need to perform is changing the blade. Whether you’re replacing a dull blade or switching to a different type for a specific project, this guide will walk you through the step-by-step process.
Step 1: Safety is the first priority when working with power tools. Before changing the blade, make sure the saw is unplugged and the switch is in the “off” position. It’s also a good idea to wear safety goggles and gloves to protect yourself from any potential accidents.
Step 2: Locate the blade lock button on your challenger circular saw. This button is typically located near the blade, and its purpose is to hold the blade in place while you loosen or tighten the mounting bolt. Press and hold the blade lock button to keep the blade from rotating.
Step 3: Use a wrench to loosen the mounting bolt that holds the blade in place. Turn the wrench counterclockwise to loosen the bolt and remove it completely. Be sure to keep a firm grip on the blade as you remove the bolt, as it may fall out once the bolt is removed.
Step 4: Carefully remove the old blade from the saw. It’s important to handle the blade with caution, as the teeth can be extremely sharp. Place the old blade in a safe container or wrap it in a cloth to prevent any accidental injuries.
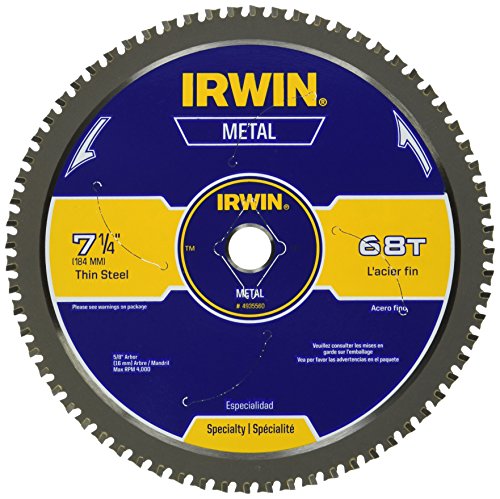
Step 5: Before installing the new blade, make sure it’s compatible with your challenger circular saw. Check the diameter and arbor size to ensure a proper fit. Once you’ve confirmed compatibility, carefully position the new blade on the saw’s arbor, making sure that the teeth are facing in the proper direction.
Step 6: Use the wrench to tighten the mounting bolt, but be careful not to overtighten it. A snug fit is usually sufficient. Once the bolt is tightened, release the blade lock button, and ensure that the blade is secure and doesn’t wobble. If it does, double-check the tightness of the mounting bolt.
With the new blade securely in place, you’re ready to tackle your next cutting project with your challenger circular saw. Remember, always follow safety precautions and refer to your saw’s instruction manual for specific guidelines. Happy sawing!
Steps to change the blade on a challenger circular saw
Changing the blade on a challenger circular saw is a simple process that can be completed in a few easy steps. Follow the instructions below to safely replace the blade on your circular saw:
| Step | Description |
|---|---|
| 1 | Disconnect the saw from its power source by either unplugging it or removing the battery. |
| 2 | Place the saw on a sturdy work surface and ensure that the blade is not touching anything. |
| 3 | Locate the blade lock button on the saw. Press and hold this button to lock the blade in place. |
| 4 | Using the correct size wrench, loosen the arbor nut that holds the blade in place. Turn the nut counterclockwise to loosen it. |
| 5 | Once the nut is loose, remove it completely from the arbor, then carefully slide the old blade off the saw. |
| 6 | Take the new blade and align its center hole with the arbor on the saw. Ensure that the teeth of the blade are facing in the correct direction. |
| 7 | Slide the new blade onto the arbor, making sure it is seated properly. |
| 8 | Replace the arbor nut and tighten it securely by turning it clockwise with the wrench. Ensure that the nut is tight enough to hold the blade in place, but be careful not to overtighten. |
| 9 | Release the blade lock button. |
| 10 | Reconnect the power source to the saw. |
| 11 | Test the saw by making a few cuts to ensure that the new blade is installed correctly and functioning properly. |
By following these steps, you will be able to easily and safely change the blade on your challenger circular saw, allowing you to continue using your saw for various woodworking projects.
Safety Precautions
When changing the blade on a challenger circular saw, it is important to take the following safety precautions:
- Before starting: Always make sure that the saw is switched off and unplugged before attempting to change the blade. This will prevent any accidental starting of the saw while working on it.
- Wear protective gear: Prior to blade replacement, wear safety goggles to protect your eyes from any potential debris. Additionally, wear gloves to ensure a secure grip on the tools and to prevent any accidental cuts.
- Secure the work area: Make sure that the saw is placed on a stable workbench or surface before changing the blade. This will help to prevent any accidents or injuries caused by the saw slipping or tipping over.
- Inspect the saw: Before replacing the blade, carefully inspect the saw for any signs of damage or wear. If you notice any issues, such as a cracked housing or a loose guard, do not proceed with the blade change and consult a professional for assistance.
- Follow the manufacturer’s instructions: Each circular saw may have specific instructions for blade replacement. Be sure to follow the manufacturer’s guidelines for your specific saw model to ensure proper and safe blade installation.
- Properly store the old blade: Once the old blade has been removed, store it in a safe place, such as a designated blade storage container or a protective case. This will help to prevent any accidental injuries caused by mishandling the old blade.
Remember, always prioritize your safety when working with power tools. If you are unsure about how to change the blade on your specific circular saw model, consult the instruction manual or seek assistance from a professional.
Removing the old blade
Before you begin, ensure that the saw is unplugged and the blade has come to a complete stop. Safety should always be your top priority.
To remove the old blade from your Challenger circular saw, you’ll need a few tools:
- A wrench or a blade wrench (usually included with the saw)
- A block of wood or piece of scrap material to immobilize the blade
Step 1: Preparing the saw
Place your saw on a sturdy work surface or workbench, making sure that it is secure and won’t move during the process.
Step 2: Immobilizing the blade
Take the block of wood or scrap material, and firmly press it against the teeth of the blade. This will prevent the blade from rotating while you loosen the blade nut.
Step 3: Removing the blade nut
Using your wrench or blade wrench, turn the blade nut counterclockwise to loosen it. Be sure to hold the block of wood or scrap material securely to prevent any movement.
Once the blade nut is loose, remove it completely and set it aside in a safe place.
Take note of the direction in which the old blade is installed, as you’ll need to install the new blade in the same direction.
Step 4: Removing the old blade
With the blade nut removed, carefully lift the old blade off the spindle and set it aside.
Inspect the old blade for any signs of damage or wear. If necessary, replace it with a new blade that is suitable for your cutting needs.
Remember to properly dispose of the old blade in accordance with local regulations.
Now that you’ve successfully removed the old blade, you’re ready to install a new one and get back to your cutting tasks!
Installing the new blade
Once you have safely removed the old blade from your Challenger circular saw, you can now proceed to install the new blade. Follow these steps carefully to ensure a proper and secure installation:
Step 1: Check the compatibility
Before proceeding, make sure that the new blade you have is compatible with your Challenger circular saw model. Check the blade’s diameter and arbor size to ensure they match the specifications required for your saw.
Step 2: Prepare the saw
Disconnect the saw from the power source to prevent any accidents. Place the saw on a stable and flat surface, making sure it is secure and cannot move during the installation process. This will ensure your safety.
Step 3: Loosen the blade nut
Using the wrench included with your Challenger circular saw, locate the blade nut on the saw’s motor shaft. Turn the wrench counterclockwise to loosen the blade nut. Be sure to hold the blade in place with your other hand to prevent it from spinning.
Step 4: Remove the old blade
Once the blade nut is loose enough, carefully remove it from the motor shaft. Take out the old blade and set it aside. Remember to handle the old blade with caution as it may still be sharp.
Step 5: Install the new blade
Take the new blade and align the center mounting hole on the blade with the motor shaft on the saw. Slide the blade onto the shaft as far as it will go, ensuring that it is positioned straight and centered.
| NOTE | The blade’s teeth should be facing forward and rotating in the correct direction indicated by an arrow on the blade. |
|---|
Step 6: Tighten the blade nut
Using the wrench, turn the blade nut clockwise to tighten it onto the motor shaft. Make sure it is securely tightened, but be cautious not to overtighten as it can damage the blade or the saw.
Step 7: Check the blade’s tightness
After tightening the blade nut, double-check the tightness of the blade. Give it a gentle tug to ensure it is securely fastened. If it moves or wobbles, stop using the saw immediately and tighten the blade nut further.
Once you have successfully installed the new blade and ensured its tightness, you can safely reconnect the saw to the power source and resume your work with a reliable and sharp cutting tool.