Plywood is a versatile material that is commonly used in woodworking projects. Whether you are building shelves, cabinets, or even furniture, being able to accurately cut plywood is essential. One of the most effective ways to cut plywood is by using a table saw. Table saws provide a stable and precise cutting surface, allowing you to make clean and straight cuts. In this article, we will guide you through the process of cross cutting plywood on a table saw.
Step 1: Set up your workspace
Before you begin, make sure you have a suitable workspace for cutting plywood. A sturdy workbench or table is ideal. Clear any clutter and ensure that your table saw is clean and in good working condition. Make sure you have all the necessary safety equipment, such as safety goggles and ear protection.
Step 2: Measure and mark your plywood
Using a tape measure and a pencil, measure and mark the dimensions of the cut you want to make on the plywood. Double-check your measurements to ensure accuracy. The marked line will serve as a guide during the cutting process.
Step 3: Adjust the table saw
Before you start cutting, it is important to adjust the table saw to the correct settings. Set the blade height so that it is slightly higher than the thickness of the plywood. This will prevent the blade from binding and causing kickback. Adjust the fence so that it aligns with your marked line on the plywood.
Step 4: Make the cut
Once your table saw is properly set up, carefully position the plywood against the fence and push it through the blade, keeping your hands a safe distance away from the blade. Use a push stick or push block to guide the plywood through the cut, ensuring your safety.
Step 5: Check your cut
After making the cut, inspect it to ensure that it is straight and clean. If any adjustments need to be made, carefully realign the plywood and repeat the cutting process.
By following these steps and practicing caution, you can effectively cross cut plywood on a table saw. Remember to always prioritize safety and take your time to ensure accurate and precise cuts.
Guide to Cross Cutting Plywood
Cross cutting plywood can be a challenging task, but with the right technique and tools, you can achieve precise and clean cuts. Follow this step-by-step guide to learn how to cross cut plywood effectively on a table saw.
Step 1: Measure and Mark
Start by measuring the desired width of the plywood piece you need to cut. Use a tape measure and a pencil to mark the measurements on both sides of the plywood to ensure accuracy.
Step 2: Set the Table Saw
Adjust the table saw to the correct height. The blade should be slightly higher than the thickness of the plywood to avoid tear-out. Additionally, set the fence to the desired width, aligning it with the marked measurements.
Step 3: Safety First
Before proceeding, ensure that you are wearing appropriate safety gear, including safety glasses and ear protection. It is also important to keep your hands a safe distance away from the blade at all times.
Step 4: Support the Plywood
When cutting large plywood sheets, it is essential to provide adequate support. Use additional infeed and outfeed support, such as sawhorses or roller stands, to prevent the plywood from sagging or falling during the cutting process.
Step 5: Make the Cut
Position the plywood against the table saw fence, ensuring it is securely in place. Start the table saw and slowly push the plywood through the blade, letting the blade do the cutting. Keep a steady and controlled pace throughout the cut.
Step 6: Check for Quality
Once the cut is complete, inspect the plywood for any tear-out or imperfections. If needed, sand the edges to smooth out any roughness.
Step 7: Repeat if Necessary
If you need to make multiple cuts, repeat the process using the marked measurements. Take your time and stay focused to achieve consistent and accurate cuts.
By following these steps, you can confidently cross cut plywood on a table saw and obtain precise results. Remember to prioritize safety and maintain a cautious approach throughout the entire cutting process.
Safety Precautions
When cutting plywood on a table saw, it is important to prioritize safety to prevent accidents and injuries. Here are some essential safety precautions to follow:
1. Wear Personal Protective Equipment (PPE)
Always wear the appropriate personal protective equipment (PPE) before operating a table saw. This includes safety glasses to protect your eyes from flying debris, ear protection to reduce the noise level, and a dust mask to avoid inhaling dust particles.
2. Use a Push Stick or Push Block
When cutting smaller pieces of plywood or narrow strips, always use a push stick or push block to keep your hands a safe distance from the blade. This will help prevent accidental contact with the blade, reducing the risk of injury.
3. Maintain a Safe Distance from the Blade
Ensure that you maintain a safe distance from the moving blade at all times. Avoid reaching over the table saw while it is running and keep your hands and fingers away from the blade’s path. Remember to use the fence or a guide to keep your cuts straight and stable.
4. Keep the Workspace Clean and Free of Clutter
Before starting, clear the table saw and surrounding area of any unnecessary clutter or debris. This will minimize the risk of accidents and allow for better visibility of the cutting process. Ensure that the wood is properly supported and stable on the table.
5. Familiarize Yourself with the Table Saw
Before making any cuts, take the time to familiarize yourself with the specific features and controls of the table saw you are using. Read the user manual and understand how to adjust the blade height and angle, as well as how to use the safety features such as blade guards and riving knives.
By following these safety precautions, you can ensure a safe and successful plywood cutting experience on a table saw.
Setting up the Table Saw
Before you begin cutting plywood on a table saw, it is important to properly set up the saw to ensure accurate and safe cuts. Follow these steps to set up your table saw:
1. Adjust the Blade Height
Start by adjusting the height of the saw blade. The blade should be set to the height that allows the teeth to extend about 1/8 inch above the surface of the plywood. This will help reduce splintering and ensure a clean cut.
2. Set the Rip Fence
The rip fence is used to guide the plywood through the saw, ensuring straight cuts. Measure the desired width of the plywood and position the rip fence accordingly. Make sure the fence is parallel to the blade to prevent binding and kickback.
It is also important to consider the width of the kerf, or the width of the blade, when positioning the rip fence. The kerf should be taken into account when measuring and setting the fence to ensure accurate dimensions.
3. Adjust the Miter Gauge
The miter gauge is used to make angled cuts on the table saw. If you plan on making cross cuts at an angle, adjust the miter gauge to the desired angle. Ensure that it is securely locked in place to prevent any movement during the cut.
4. Install a Zero-Clearance Insert
A zero-clearance insert is a custom-cut throat plate that reduces the gap around the blade, providing better support for the plywood and reducing tear-out. Install a zero-clearance insert onto the table saw to improve the quality of your cuts.
5. Check Safety Features
Before you start cutting, make sure all safety features of the table saw are functioning properly. Check that the blade guard and riving knife are in place and properly adjusted. This will help prevent accidents and protect your fingers during the cutting process.
| Common Issues | Solutions |
|---|---|
| Blade not cutting straight | Check that the rip fence is parallel to the blade and adjust it if necessary. Ensure the blade is properly aligned and not dull or damaged. |
| Excessive tear-out | Ensure that a zero-clearance insert is installed and use sharp blades. Consider using a sacrificial backing board to reduce tear-out. |
| Difficulty moving plywood through the saw | Apply a lubricant like wax or use a roller stand to help glide the plywood smoothly over the table saw surface. |
| Kickback | Keep your hands and body clear of the path of the blade during the cut. Use a push stick or push block to guide the plywood through the saw. |
Choosing the Right Blade
When it comes to cutting plywood on a table saw, choosing the right blade is crucial for achieving clean, smooth cuts. Here are some factors to consider when selecting a blade:
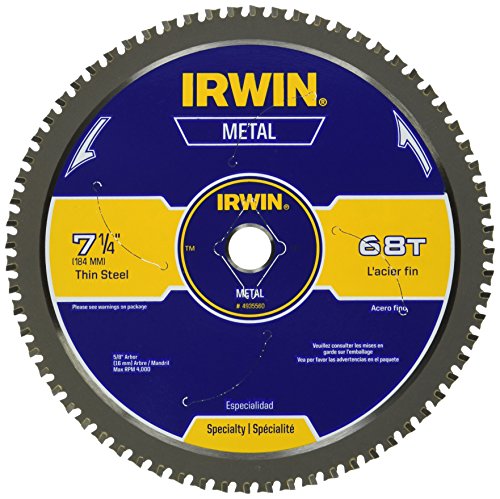
| Tooth Count | A blade with a higher tooth count will generally deliver smoother cuts. For cutting plywood, a blade with 60 to 80 teeth is recommended. |
| Tooth Configuration | Alternate top bevel (ATB), triple chip grind (TCG), or combination tooth configurations are suitable for cutting plywood. ATB blades are versatile and provide clean cuts, while TCG blades are more durable for cutting laminated plywood. Combination blades offer a balance between both types. |
| Tooth Material | Carbide-tipped blades are the most common choice for cutting plywood due to their durability and sharpness. They are designed to withstand the abrasive nature of plywood and provide long-lasting performance. |
| Blade Diameter | Choose a blade with a diameter that matches your table saw’s arbor size. Common sizes for table saws are 10-inch and 12-inch blades. Ensure the blade is properly aligned and secure before making any cuts. |
| Kerf Width | The kerf width refers to the thickness of the cut made by the blade. A thinner kerf width results in less material waste and requires less power from the saw. Look for blades with a kerf width of around 0.1 inches for cutting plywood. |
Remember to always prioritize safety when using a table saw. Wear protective gear, such as safety glasses and hearing protection, and follow all manufacturer’s instructions for your specific table saw and blade. Take your time and make sure to feed the plywood steadily and smoothly through the blade for the best results.
Proper Technique for Cross Cutting Plywood
Cross cutting plywood on a table saw can be a challenging task if not done properly. The key to achieving clean and accurate cuts is to follow the right technique. Here are some steps to help you accomplish this:
1. Set Up Your Workstation
Start by ensuring that your table saw is set up properly. Check that the blade is at a 90-degree angle to the table and adjust if necessary. It’s important to have a sharp and clean-cutting blade for this task, so make sure to install an appropriate plywood-cutting blade.
2. Measure and Mark
Take accurate measurements of the desired cut on the plywood. Use a measuring tape or ruler and mark the cut line with a pencil. Double-check your measurements to avoid any mistakes.
3. Support the Plywood
Plywood can be large and heavy, making it challenging to cut without proper support. Use sawhorses or a workbench to provide stable support for the plywood. Ensure that the plywood is fully supported and doesn’t sag or move during the cutting process.
4. Use a Guide
Using a guide is crucial for achieving straight and precise cuts. Attach a long piece of straight wood or a guiding fence to the table saw’s rip fence. This guide will help you keep the plywood in line and prevent any wandering or deviation during the cut.
5. Safety First
Before starting the cut, make sure to wear protective gear, including safety glasses and hearing protection. Keep your hands away from the cutting area and maintain a firm grip on the plywood. Use a push stick or push block to push the plywood through the blade, keeping your fingers safe from any potential accidents.
6. Make the Cut
Position the plywood against the guiding fence and push it through the blade, using steady and even pressure. Maintain control of the plywood throughout the cut, keeping it flat and aligned with the guide. Avoid forcing the plywood or going too fast, as this can result in a rough and inaccurate cut.
7. Check the Cut
Once the cut is complete, carefully inspect the results. Examine the edge to ensure it is smooth and free of any tear-out or splintering. If necessary, use sandpaper or a router to clean up any imperfections.
By following these steps and practicing the proper technique, you can achieve clean, straight, and accurate cross cuts on plywood with a table saw. Remember to prioritize safety and take your time to ensure the best possible results.
Tips for Clean and Accurate Cuts
When it comes to cross cutting plywood on a table saw, getting clean and accurate cuts is essential for a successful project. Here are some tips to help you achieve the best results:
- Choose the right blade: Use a fine-toothed crosscutting blade with at least 40 teeth to ensure clean and precise cuts. A blade with a high tooth count will minimize chipping and tear-out.
- Measure and mark: Take accurate measurements and use a straight edge or a square to mark the cut line on the plywood. This will serve as a guide for your table saw blade.
- Support the plywood: To prevent splintering and ensure a clean cut, support the plywood on both sides of the cut line. You can use sawhorses or a table saw extension to provide added support and stability.
- Take it slow: When cutting plywood, it’s important to feed it through the table saw at a slow and steady pace. Pushing too hard or rushing the cut can cause the blade to deflect, resulting in an inaccurate cut.
- Use a zero-clearance insert: Installing a zero-clearance insert on your table saw can help minimize tear-out by providing support right up to the blade. This will help keep the plywood fibers from splintering as the blade cuts through.
- Use a push stick or push block: To keep your hands safe, use a push stick or push block to guide the plywood through the table saw. This will also help keep the material flat and prevent kickback.
- Check for square: After making the cut, double-check for squareness by measuring the diagonals of the plywood piece. If the measurements are equal, then your cut is square and accurate.
By following these tips, you can ensure clean and accurate cuts when cross cutting plywood on a table saw. Remember to always prioritize safety and take your time to achieve the best results.