When it comes to making precise angled cuts, a circular saw is a versatile tool that can get the job done quickly and efficiently. One common use of a circular saw is cutting mitered corners, which are often used in carpentry and woodworking projects. Whether you’re building a picture frame or installing trim, learning how to cut mitered corners with a circular saw is a valuable skill that will elevate the quality of your work.
To begin, it’s important to understand what a mitered corner is. A mitered corner is created by cutting two pieces of material at a 45-degree angle and fitting them together to form a 90-degree corner. This type of joint is aesthetically pleasing and provides a seamless connection between two pieces of material. With the right technique and some practice, you can achieve clean and precise mitered corners with your circular saw.
First, you’ll need to set up your circular saw properly. Make sure the blade is sharp and securely fastened. Adjust the cutting depth to slightly deeper than the thickness of the material you’re working with. Next, use a combination square or a protractor to mark a 45-degree angle on the edge of the material. It’s crucial to measure and mark accurately to achieve a perfect mitered corner.
Once the angle is marked, firmly hold the material in place, and guide the circular saw along the marked line. Move the saw slowly and steadily, applying even pressure to ensure a smooth cut. It’s important to keep your hands clear of the cutting line and wear appropriate safety gear, including safety glasses and ear protection.
After making the first cut, flip the material over and repeat the process on the other end. This will create two matching mitered ends that can be fitted together to form a perfect 90-degree corner. Use clamps or a vice to hold the pieces securely in place while you connect them with nails, screws, or adhesive. Finally, sand the cut edges to remove any roughness and apply a finish or paint to complete the mitered corner.
Learning how to cut mitered corners with a circular saw takes practice, but with the right technique and attention to detail, you can achieve professional-looking results. Remember to always prioritize safety and take your time to ensure accuracy. Whether you’re a seasoned woodworker or a DIY enthusiast, mastering the art of cutting mitered corners will enhance your craftsmanship and open up a world of possibilities in your projects.
Choosing the right saw
When it comes to cutting mitered corners, choosing the right saw is crucial to achieve clean and accurate cuts. There are several saw options available, but not all of them are well-suited for this type of cut. Here are a few key factors to consider when selecting a saw:
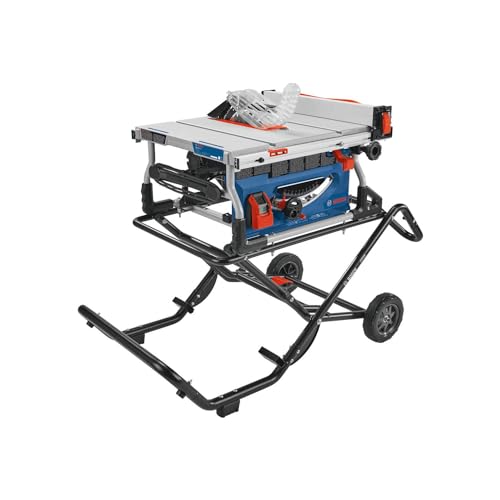
- Circular Saw: Circular saws are versatile and commonly used for various cutting tasks. They are an excellent choice for cutting mitered corners due to their ability to make precise angle cuts. Look for a circular saw with a tilt or bevel adjustment feature to achieve the desired miter angle.
- Miter Saw: As the name suggests, miter saws are specifically designed for making miter cuts. They provide exceptional accuracy and allow for quick and efficient cutting of mitered corners. Miter saws usually have a rotating base that allows you to set specific angles easily.
- Jigsaw: A jigsaw is another option for cutting mitered corners, especially if you need to make intricate or curved cuts. While jigsaws provide flexibility in terms of angles and curves, they may not deliver the same level of precision as circular or miter saws.
The choice of saw ultimately depends on the specific requirements of your project. Consider factors such as the type of material, the complexity of the cut, and the level of precision you need. Additionally, ensure that you have the necessary safety equipment, such as safety goggles and gloves, when operating any saw.
By selecting the right saw for the job, you can ensure that your mitered corners are cut cleanly and accurately, resulting in a professional finish for your project.
Preparing the materials
Before you start cutting mitered corners with a circular saw, it’s essential to gather all the necessary materials. Here is a list of what you’ll need:
1. Circular saw
The circular saw is the main tool you’ll be using to make the mitered cuts. Make sure it is in good working condition and that the blade is sharp.
2. Safety equipment
When working with power tools like a circular saw, safety should be your top priority. Wear protective goggles to shield your eyes from any flying debris, as well as ear protection to reduce noise levels.
3. Measuring tools
Accurate measurements are crucial when cutting mitered corners. Use a tape measure or a combination square to measure and mark the dimensions on your materials.
4. Workbench or sawhorses
You’ll need a stable surface to support the materials while cutting. A sturdy workbench or sawhorses will provide a safe and secure place to work.
5. Clamps
Clamps can be used to secure the materials in place, preventing any movement during the cutting process. This will help ensure clean and accurate cuts.
6. Pencil or marker
Marking the areas to be cut is essential for accuracy. Use a pencil or marker to clearly indicate where the mitered cuts will be made.
Once you have gathered all the necessary materials, you’ll be ready to move on to the next steps of cutting mitered corners with a circular saw.
Cutting the mitered corners
Once you have measured and marked the correct angle for your mitered corners, it’s time to make the cuts with your circular saw. Follow these steps to ensure clean and accurate mitered corners:
Step 1: Set up the circular saw
Start by making sure that your circular saw is properly set up and adjusted. Check that the blade is securely in place and tightened, and adjust the cutting depth to the appropriate level for your material.
Step 2: Secure the workpiece
Place the workpiece securely in a clamp or on a stable surface to prevent it from moving during the cutting process. This will help you achieve more precise and controlled cuts.
Step 3: Align the saw
Align the circular saw blade with the marked line on the workpiece for the mitered corner cut. Double-check the angle to ensure accuracy before proceeding.
Step 4: Make the cut
Hold the saw firmly with both hands and begin cutting along the marked line. Keep a steady pace and apply even pressure to the saw as you move it across the workpiece.
For clean cuts, make sure the blade is cutting through the material smoothly without any wobbling or deviation. If necessary, adjust the saw or your cutting technique to maintain a straight and accurate line.
Step 5: Repeat for the other corners
Once you have completed one mitered corner, repeat the steps for the remaining corners of the workpiece. Take your time and ensure that each cut is performed with the same precision and accuracy.
Always prioritize safety during the cutting process. Wear appropriate protective gear, such as safety glasses and gloves, and be aware of your surroundings to prevent accidents.
- Double-check the angle before making the cut
- Maintain a steady pace and even pressure
- Check for smooth cuts without wobbling
- Repeat the process for all corners
Finishing touches
After you have made the mitered cuts with your circular saw, there are a few finishing touches you should consider to ensure a professional-looking result.
Sanding the edges
Using sandpaper, gently sand the cut edges of the wood to remove any roughness or imperfections. This will create a smooth and polished finish.
Applying wood filler
If there are any gaps or holes in the corners, you can use wood filler to fill them in. Apply the filler with a putty knife, making sure to smooth it out and remove any excess. Allow the filler to dry completely before moving on to the next step.
By sanding down the wood filler, you can create a seamless transition between the filler and the wood surface.
These finishing touches will help elevate your mitered corners to the next level, making them look clean and professional. Remember to take your time and pay attention to detail to achieve the best results.