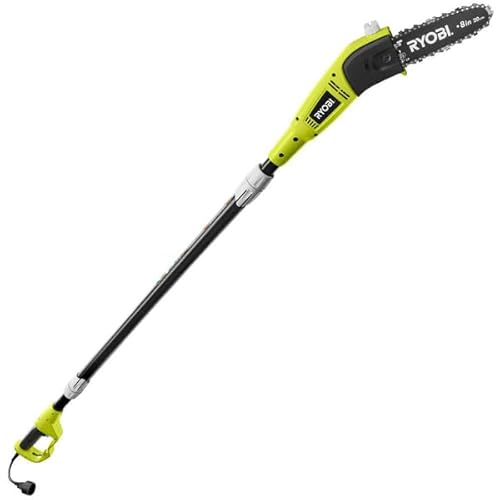
Are you wondering how to disassemble your Ryobi pole saw? If you are, then you’ve come to the right place. Disassembling your pole saw can be quite daunting, especially if you’ve never done it before. However, with the right guidance and a little bit of patience, you’ll be able to take apart your Ryobi pole saw with ease.
Before you begin disassembling, it’s important to gather all the necessary tools. You’ll need a socket wrench, a screwdriver, and possibly a pair of pliers. Make sure that you have these tools handy before you start, as they will make the disassembling process much smoother.
Once you have your tools ready, you can begin the disassembling process. Start by removing the chain from the saw. This can usually be done by loosening the tensioning screw and sliding the chain off the guide bar. Be careful while removing the chain, as it may still be sharp.
Next, you can disconnect the pole from the motor. Look for the connection point between the pole and the motor, and use your socket wrench to loosen any screws or bolts that are securing them together. Once the connection is loose, you should be able to separate the pole from the motor.
Continue disassembling the various parts of the pole saw, such as the handle, guard, and any other additional attachments. Each part may have its own specific way of detaching, so be sure to read the user manual or consult online resources if you’re unsure of how to proceed.
By following these steps and using the right tools, you’ll be able to disassemble your Ryobi pole saw easily. Remember to take your time and work carefully to avoid any accidents or damage. With a little bit of effort, you’ll have your pole saw disassembled and ready for maintenance or repairs in no time.
Preparation for Disassembling Ryobi Pole Saw
Before you disassemble your Ryobi pole saw, there are a few steps you should take to ensure a smooth and successful disassembly process. Follow these preparation steps to prepare your pole saw for disassembling:
-
Gather the necessary tools: Before starting the disassembly process, make sure you have all the necessary tools on hand. This may include wrenches, screwdrivers, pliers, and other tools specific to your model of Ryobi pole saw.
-
Turn off and unplug the pole saw: Before working on any power tool, it is essential to turn off the power and unplug the tool from the electrical outlet. This step ensures your safety during the disassembly process.
-
Clear the work area: Find a suitable workspace where you can comfortably disassemble the pole saw. Ensure that the area is clean and free from any clutter that may interfere with the disassembly process.
-
Read the instruction manual: Take some time to review the instruction manual provided with your Ryobi pole saw. Familiarize yourself with the disassembly instructions and any specific precautions or recommendations given by the manufacturer.
-
Identify and label parts: Before disassembling the pole saw, it can be helpful to label or mark the different parts to ensure easy reassembly later. Use a marker or tape to label each part or take pictures to assist you during the reassembly process.
-
Wear safety gear: Always prioritize your safety when working with power tools. Wear appropriate safety gear, such as safety goggles, gloves, and protective clothing, to protect yourself from any potential hazards during the disassembly process.
By following these preparation steps, you will be well-equipped and ready to disassemble your Ryobi pole saw effectively and safely.
Required Tools for Disassembling Ryobi Pole Saw
Disassembling a Ryobi pole saw requires a few specific tools to ensure a smooth and safe process. Here are the essential tools you will need:
1. Screwdriver Set
A set of screwdrivers with multiple sizes and types will be useful for removing screws and fasteners. Make sure you have both flathead and Phillips head screwdrivers to accommodate different types of screws on the pole saw.
2. Allen Wrench Set
Many parts of the Ryobi pole saw are secured using Allen screws. An Allen wrench set, also known as a hex key set, will allow you to loosen and remove these screws effectively.
3. Pliers
Pliers are helpful for gripping and holding parts securely, especially when dealing with stubborn or tight fasteners. They can also be used to bend or shape certain components during disassembly.
4. Pruning Saw
Since the pole saw is mainly used for pruning and trimming high tree branches, it is useful to have a regular pruning saw for cutting through thicker branches that cannot be dismantled easily. This will make the disassembly process smoother.
5. Safety Equipment
Prioritize your safety during the disassembly process by wearing protective gear such as safety goggles, gloves, and ear protection. These will help protect your eyes, hands, and ears from any potential hazards.
Having these tools readily available will make the disassembly of your Ryobi pole saw much easier and more efficient. Remember to exercise caution and refer to the manufacturer’s instructions as you disassemble the saw.
Safety Precautions before Disassembling Ryobi Pole Saw
When disassembling your Ryobi pole saw, it is essential to prioritize safety. Follow these precautions to prevent accidents and ensure your well-being:
1. Wear Protective Gear
Before starting the disassembling process, put on the necessary protective gear. This includes safety glasses or goggles, gloves, and ear protection. These items will help protect you from flying debris, accidental cuts, and excessive noise.
2. Disconnect Power Source
Prior to any disassembly, ensure that the pole saw is turned off and unplugged from the power source. This will eliminate the risk of accidental starts and electrocution. If you are working with a cordless model, remove the battery to prevent any unintentional activation.
3. Work in a Well-Ventilated Area
Disassembling a pole saw may involve exposure to sawdust, lubricants, and other substances. To minimize the risk of inhaling harmful particles, perform the disassembly in a well-ventilated area. If working indoors, use ventilation fans or open windows to maintain adequate airflow.
4. Follow the Manufacturer’s Instructions
Always consult the manufacturer’s manual or instructions before starting the disassembly process. They will provide you with specific guidelines and safety information for your particular Ryobi pole saw model. These instructions will help you disassemble the saw correctly and prevent any damage or injury.
5. Work on a Stable Surface
Ensure that you disassemble your pole saw on a flat and stable surface. This will prevent the saw from tipping over or falling, reducing the risk of injury. If needed, use clamps or other methods to secure the pole saw during the disassembly process.
6. Take Your Time
Disassembling a pole saw requires patience and attention to detail. Rushing the process can lead to mistakes and accidents. Take your time, and carefully follow each step in the disassembly instructions. If you encounter any difficulties, consult the manual or seek assistance from a professional.
7. Handle Sharp Blades and Parts with Care
When removing sharp blades or other components during the disassembly, exercise caution. Wear gloves and handle these items carefully to avoid cuts and injuries. Use appropriate tools and techniques to safely remove and store these parts.
By following these safety precautions, you can reduce the risk of accidents and ensure a smooth and safe disassembly process for your Ryobi pole saw.
| Disclaimer: |
|---|
| The information provided in this article is for educational purposes only. Always refer to the official manufacturer’s instructions and guidelines for your specific pole saw model. |
Removing the Blade Assembly from Ryobi Pole Saw
If you are looking to disassemble your Ryobi pole saw and remove the blade assembly, follow these steps:
- Start by disconnecting the pole saw from any power source to ensure safety.
- Place the pole saw on a stable surface, such as a workbench or the ground, ensuring it won’t move during the disassembling process.
- Inspect the blade assembly to locate the retaining screws. These screws are typically found near the base of the blade, securing it to the pole saw.
- Using an appropriate screwdriver or wrench, carefully remove the retaining screws by turning them counterclockwise. Set the screws aside in a safe place.
- After removing the retaining screws, the blade assembly should be loosened. Take caution as the blade may still be sharp. Slowly slide the blade assembly off the pole saw, keeping your hands away from the cutting area.
- Once the blade assembly is removed, you can proceed with any necessary maintenance or replacement tasks.
Remember to exercise caution and wear appropriate safety gear, such as gloves and goggles, when working with power tools or sharp blades. Always refer to the user manual or seek professional assistance if you are unsure about any disassembly procedures.
Steps to Remove Blade Assembly
To disassemble your Ryobi pole saw, follow these steps to remove the blade assembly:
Step 1: Ensure that the saw is turned off and the power cord is disconnected.
Step 2: Locate the blade guard covering the blade assembly.
Step 3: Using a Phillips head screwdriver, remove the screws securing the blade guard in place.
Step 4: Carefully lift the blade guard off of the saw, exposing the blade assembly.
Step 5: Locate the bolt or nut that is securing the blade assembly to the saw’s shaft.
Step 6: Using an appropriate sized wrench or socket, loosen and remove the bolt or nut.
Step 7: Once the bolt or nut is removed, carefully slide the blade assembly off of the saw’s shaft.
Step 8: Gently clean the blade assembly, removing any debris or build-up.
Step 9: If needed, replace the blade assembly with a new one, following the manufacturer’s instructions.
Step 10: When reassembling the saw, ensure the blade assembly is securely fastened to the saw’s shaft.
Step 11: Replace the blade guard and secure it with the screws.
Step 12: Reconnect the power cord and turn on the saw to test the blade assembly.
By following these steps, you will be able to successfully remove the blade assembly from your Ryobi pole saw.
Detaching the Motor Section from Ryobi Pole Saw
Removing the motor section from your Ryobi pole saw is a crucial step when disassembling the tool. It allows for easier access to the internal components and ensures safer handling during repairs or maintenance.
Step 1: Preparing the Pole Saw
Before detaching the motor section, ensure that the Ryobi pole saw is powered off and unplugged. This will prevent any accidental injuries or damage to the motor and other parts.
Step 2: Removing the Motor Housing Cover
Locate the screws or bolts securing the motor housing cover to the pole saw’s body. Use an appropriate screwdriver or wrench to carefully remove these fasteners. Place them in a safe location to avoid misplacement.
Step 3: Disconnecting the Motor Wires
Once the motor housing cover is removed, you will see the motor wires connected to the main unit. Carefully disconnect these wires by removing the connectors or using a wire cutter if necessary. Take note of their positions and connections to ensure proper reassembly later.
Step 4: Removing the Motor Section
With the motor wires disconnected, you can now detach the motor section from the pole saw’s body. Gently pull or slide the motor unit out, taking care not to damage any surrounding parts or wires.
Once the motor section is removed, you can proceed with further disassembly or perform the necessary repairs or maintenance tasks. Remember to handle all parts with care and refer to the Ryobi pole saw’s manual for specific instructions or precautions.
Procedure to Detach Motor Section
To disassemble the Ryobi pole saw and detach the motor section, please follow the steps below:
Step 1: Ensure Safety
Prior to beginning any disassembly work, make sure the pole saw is turned off and unplugged from the power source. This ensures your safety and prevents any potential accidents.
Step 2: Remove the Chain Cover
Start by removing the chain cover located on the motor section. Use a screwdriver to remove the screws securing the chain cover in place. Once the screws are removed, lift the cover off and set it aside.
Step 3: Disconnect the Power Cord
Locate the power cord connected to the motor section. Carefully disconnect the power cord from the main body of the pole saw. Take note of how the cord is connected to help with reassembly later.
Step 4: Remove the Motor Section
With the chain cover and power cord detached, you can now remove the motor section from the pole saw. Make sure the pole saw is stable and use a firm grip to disconnect the motor section from the rest of the unit. Lift the motor section straight up and set it aside in a safe location.
Step 5: Reassemble When Needed
If you need to reassemble the pole saw, follow the steps in reverse order, ensuring that all connections are secure and the chain cover is properly reattached. Be cautious when handling the saw and make sure it is turned off and unplugged before reassembly.
| Parts Removed: | Chain cover |
|---|---|
| Tools Required: | Screwdriver |
| Additional Notes: | Handle with care and be cautious of sharp parts during disassembly. |
Disassembling the Handle of Ryobi Pole Saw
If you need to disassemble the handle of your Ryobi pole saw for maintenance or repairs, follow these steps:
1. Start by unplugging the pole saw from the power source to ensure your safety.
2. Locate the screws or bolts that are holding the handle in place. They are typically found near the base of the handle.
3. Using an appropriate screwdriver or wrench, carefully remove the screws or bolts. Keep them in a safe place to avoid losing them.
4. Once the screws or bolts are removed, gently separate the handle from the rest of the pole saw. Be cautious not to damage any wires or cables connected to the handle.
5. If there are any wires or cables attached to the handle, disconnect them by carefully unplugging or unfastening them. Take note of their positions for easy reassembly later.
6. You should now have the handle completely detached from the pole saw. Inspect it for any damages or worn-out parts that may need replacement.
7. If you need to disassemble the handle further, such as removing the trigger or the grip, refer to the user manual or specific disassembly instructions provided by Ryobi.
8. When you are done with the necessary repairs or maintenance, reassemble the handle by following the steps in the reverse order. Make sure all the wires and cables are properly connected and secured.
9. Finally, reattach the screws or bolts to secure the handle in place. Ensure they are tightened securely, but be careful not to overtighten them.
By following these steps, you can disassemble the handle of your Ryobi pole saw safely and efficiently. Always refer to the user manual or seek professional assistance if you are unsure or uncomfortable with any step of the process.