

If you are a woodworking enthusiast and want to take your skills to the next level, building your own bench saw can be a rewarding and cost-effective project. A bench saw, also known as a table saw, is a versatile tool that allows you to make accurate and clean cuts on various materials. While there are many bench saw models available on the market, building your own allows you to customize it to suit your specific needs and budget.
One of the key components of a bench saw is the circular saw. A circular saw is a handheld power tool with a rotating blade that can cut through different types of materials. By mounting a circular saw upside down onto a sturdy work surface, you can transform it into a powerful bench saw. This DIY project requires basic woodworking skills and access to a few tools and materials.
Before starting the construction of your bench saw, it is important to ensure your safety. Always wear protective gear such as safety goggles, gloves, and ear protection when working with power tools. Additionally, ensure you have a well-ventilated workspace and follow all safety guidelines provided by the manufacturer of the circular saw and other tools you will be using.
Step 1: Gather Materials
Before you can start building your bench saw with a circular saw, you will need to gather the necessary materials. Here is a list of what you will need:
- A circular saw
- A thick plywood sheet
- Measuring tape
- A straight edge or a straight piece of wood
- A pencil or marking tool
- Screws
- A drill or screwdriver
- A sawhorse or workbench
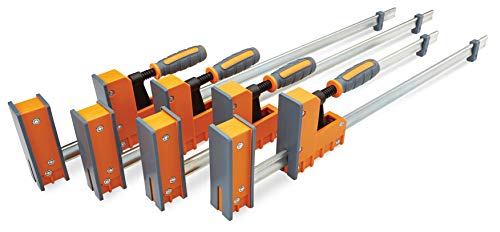
- Clamps
- Safety goggles
- Ear protection
Make sure you have all these materials before moving on to the next step. It’s important to have everything ready to ensure a smooth construction process.
Step 2: Measure and Mark
Once you have gathered all the necessary materials and tools, it’s time to start building your bench saw. The first step is to measure and mark the pieces of plywood that you will need for the base and the top of the saw.
Using a tape measure, measure the desired dimensions of your bench saw. Typically, the base should be around 4 feet long and 2 feet wide. Mark these dimensions on a piece of plywood using a pencil.
Next, measure and mark the dimensions for the top piece of plywood. This piece should be slightly larger than the base, with dimensions of around 4.5 feet long and 2.5 feet wide.
Make sure the marked lines are straight and accurate, as these will serve as the guidelines for cutting the plywood. Use a framing square to check for 90-degree angles and ensure that the lines are perpendicular.
Double-check your measurements and marks before proceeding to the next step. Accurate measurements are essential for a successful bench saw construction.
Step 3: Cut the Wood
Once you have chosen the appropriate wood for your bench saw, it’s time to cut it to the desired measurements. Before you start cutting, measure and mark the dimensions on your wood using a tape measure and a pencil.
Tools and Materials Needed:
- Circular saw
- Tape measure
- Pencil
- Clamps
- Safety goggles
Make sure to use the appropriate safety precautions before operating the circular saw. Put on your safety goggles to protect your eyes from any flying debris.
Once you are ready, secure the wood firmly with clamps, ensuring it is stable and won’t move during the cutting process.
Adjust the depth of the circular saw blade to ensure it cuts through the wood but doesn’t go too deep. This will help prevent any potential accidents or damage to your work surface.
Hold the saw firmly, position the blade along your marked line, and start cutting. Move the saw along the marked line at a steady pace, applying gentle pressure to guide the saw smoothly through the wood.
Continue cutting until you have completed all the required cuts for your bench saw. Take your time and double-check your measurements to ensure accuracy.
Once all the cuts are made, remove any excess debris and reposition the wood as needed for the next cuts.
Remember to always prioritize safety and follow the manufacturer’s instructions for operating the circular saw. If you’re unsure or inexperienced, consider seeking guidance from a professional or someone experienced in using power tools.
Step 4: Assemble the Frame
Now that you have all the necessary materials prepared, it’s time to assemble the frame of your bench saw. Follow the steps below:
- Attach the legs: Place two of the 2×4 boards parallel to each other, about 2 feet apart. These will be the legs of your bench saw. Secure them together using wood screws.
- Add the horizontal support: Take another 2×4 board and place it between the legs, about 2 feet from the bottom. This will provide additional support for the saw. Secure it to the legs using wood screws.
- Install the top: Place the plywood board on top of the legs and the horizontal support. Make sure it’s centered and flush with the edges of the legs. Use wood screws to secure the plywood to the legs and support.
By following these steps, you will have a sturdy frame for your bench saw. Make sure to double-check all the screws and connections to ensure everything is secure before moving on to the next step.
Step 5: Install the Circular Saw
To create a bench saw with a circular saw, you will need to install the circular saw onto your workbench. Follow these steps to get started:
- Begin by removing any guards or safety accessories from the circular saw.
- Position the circular saw on the workbench, ensuring that the blade is aligned with the guide rails.
- Secure the circular saw to the workbench using clamps or screws, making sure it is stable and won’t move during use.
- Adjust the depth of the circular saw blade to the desired cutting depth by turning the depth adjustment knob or lever.
- Check the alignment of the circular saw blade with a straight edge or ruler to ensure it is perpendicular to the workbench.
- Attach a dust collection system or dust bag to the circular saw to minimize sawdust and debris.
- Double-check all the connections and make any necessary adjustments before starting to use the bench saw.
Once you have installed the circular saw onto the workbench, you are now ready to start using your bench saw for various woodworking projects.
Step 6: Test and Adjust
After completing the construction of your bench saw with a circular saw, it’s time to test its functionality and make any necessary adjustments.
1. Safety First
Before testing the bench saw, ensure that you are wearing proper safety gear, including safety goggles and gloves. Keep the work area clean and free from any potential hazards.
2. Check Alignment
Start by checking the alignment of the saw blade. Adjust the blade position if necessary to ensure that it is perpendicular to the table surface. This will ensure clean and accurate cuts.
Also, check the alignment of the fence. Make sure it is parallel to the saw blade to prevent any binding or uneven cuts. Adjust the fence if needed.
3. Test the Cutting Capacity
Next, test the cutting capacity of your bench saw. Start with a scrap piece of wood and make a few test cuts. Check if the saw easily cuts through the wood and if the depth of cut is consistent.
If the saw struggles to cut through or the cut is uneven, you may need to adjust the blade height or check the blade sharpness. Make the necessary adjustments and retest.
4. Measure Accuracy
Measure the accuracy of your bench saw by cutting various pieces to specific measurements. Use a tape measure or a square to ensure the cuts are accurate and straight.
If you notice any inconsistencies, make the necessary adjustments to the table saw and retest until you achieve the desired accuracy.
5. Fine-tune the Fence
If the fence is not perfectly aligned, you can fine-tune it to improve its accuracy. Loosen the bolts holding the fence and gently tap it into the desired position. Tighten the bolts once you are satisfied with the alignment.
Repeat the test cuts and measurements to confirm that the fence is now aligned and providing accurate cuts.
6. Maintenance and Cleaning
Lastly, ensure that your bench saw remains in good working condition by performing regular maintenance and cleaning. Clean the sawdust from the table, fence, and blade. Lubricate any moving parts as recommended by the manufacturer.
Regular maintenance will help prolong the lifespan of your bench saw and ensure its optimal performance.
Following these steps will ensure that your homemade bench saw with a circular saw is safe to use and provides accurate and consistent cuts for your woodworking projects.


