Making a chop saw table is a great way to improve your woodworking experience. A chop saw table provides a stable and secure work surface for cutting wood and other materials with precision. Plus, it allows you to make angled cuts easily and safely. Whether you are a professional woodworker or a DIY enthusiast, having a chop saw table in your workshop can greatly enhance your productivity and the quality of your projects.
To make a chop saw table, you will need a few basic materials and tools. The most important component of the table is the top surface, which should be made of a sturdy and flat material like plywood or MDF. You will also need some lumber to build the frame and legs of the table, as well as screws or nails to secure the different parts together.
Before you start building the chop saw table, it’s important to plan out the size and dimensions of the table. Consider the size of your chop saw and the space available in your workshop. You want to make sure that the table is large enough to accommodate your chop saw and the materials you will be working with, but not so large that it takes up too much space in your workshop.
Once you have planned out the size and dimensions of the chop saw table, you can start building the frame and legs. Use a tape measure to measure and mark the lengths of the lumber, and then use a saw to cut the pieces to size. Assemble the frame and legs using screws or nails, making sure that everything is sturdy and secure.
What is a chop saw table?
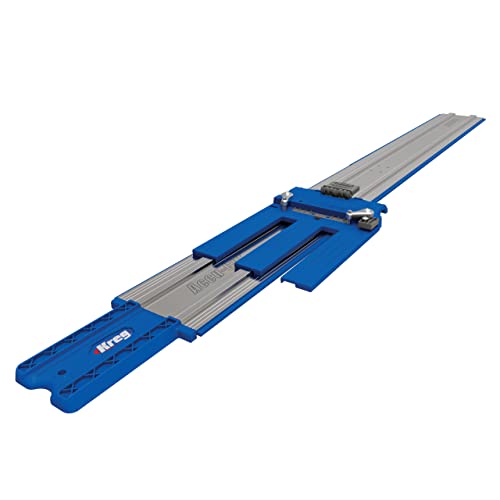
A chop saw table, also known as a miter saw table or a benchtop saw stand, is a tool used for supporting and stabilizing a chop saw or a miter saw. It is specifically designed to provide a stable and safe work surface for cutting wood, metal, or other materials.
Chop saw tables typically consist of a sturdy frame made of metal or wood, with adjustable legs for leveling on uneven surfaces. They also feature a large flat work surface, often made of plywood or MDF, with dimensions that can accommodate different sizes of saws. The table surface may have guide rails or fences, which assist in aligning the material being cut and ensuring straight and accurate cuts.
Chop saw tables help improve safety and efficiency in woodworking and metalworking projects. They provide a stable platform for the saw, reducing the risk of accidental slips or falls during operation. The table’s large surface area and guide rails help to position and hold the material securely, preventing it from moving while cutting.
Some chop saw tables are portable and foldable, allowing for easy transportation and storage. This makes them suitable for both professional carpenters and hobbyists who work in limited spaces or need to move their equipment frequently.
Benefits of using a chop saw table:
1. Increased stability and safety during cutting operations.
2. Improved accuracy and precision in cuts.
3. Enhanced productivity and efficiency in woodworking and metalworking projects.
4. Versatility in accommodating different sizes and types of saws.
Conclusion
A chop saw table is an essential tool for anyone working with a chop saw or a miter saw. It provides a stable and secure work surface, improving safety, accuracy, and productivity in cutting operations. Whether you are a professional or a DIY enthusiast, a chop saw table can greatly enhance your woodworking or metalworking experience.
| Benefits | Features |
|---|---|
| Increased stability | Sturdy frame |
| Improved accuracy | Guide rails or fences |
| Enhanced productivity | Large work surface |
| Versatility | Adjustable legs |
Benefits of using a chop saw table
A chop saw table is a valuable tool for anyone who works with wood or metal. It provides numerous benefits that can enhance efficiency, accuracy, and safety in your projects.
Increased stability and safety
One of the key benefits of using a chop saw table is increased stability. The table provides a solid and secure surface to work on, reducing the risk of accidents and injuries. It minimizes the chances of the chop saw moving or tipping over, allowing you to focus on your work with peace of mind.
Improved accuracy and precision
Another notable advantage of a chop saw table is improved accuracy and precision. The table’s flat and level surface ensures that your material is properly supported and aligned, resulting in cleaner and more accurate cuts. With a chop saw table, you can easily achieve straight, smooth, and square cuts every time.
The table usually includes measurement scales and guides that help you make accurate and repeatable cuts. These features enable you to work more efficiently by eliminating the need for constant measuring and marking of your material.
Enhanced productivity and efficiency
Using a chop saw table can significantly enhance your productivity and efficiency. The table provides a designated workspace where you can set up your tools, accessories, and materials in an organized manner. This allows for quicker and easier access to everything you need, reducing time wasted on searching and setting up.
Furthermore, a chop saw table often includes additional features such as extensions, clamps, and material supports. These features can help you handle larger or longer materials with ease, enabling you to tackle a wider range of projects. They also ensure that your material is properly secured and supported during cutting, further enhancing safety and accuracy.
Versatility and adaptability
A chop saw table is a versatile tool that can be customized to suit your specific needs. Many tables come with adjustable fences, stops, and angles, allowing you to make various types of cuts, including bevels and miters. This versatility makes the table suitable for a wide range of projects and materials.
Additionally, the table can be easily integrated into your existing workspace or workshop layout. It can be portable or permanently mounted, depending on your requirements. Its compact design also makes it easy to store when not in use, saving valuable space in your workspace.
| Benefits of using a chop saw table: |
|---|
| Increased stability and safety |
| Improved accuracy and precision |
| Enhanced productivity and efficiency |
| Versatility and adaptability |
Materials needed to make a chop saw table
Building your own chop saw table can be both a cost-effective and convenient solution for your woodworking projects. However, before you start the construction process, it is important to gather all the necessary materials. Here is a list of the materials you will need:
1. Plywood
You will need a sheet of plywood to serve as the main tabletop of the chop saw table. Make sure to choose plywood of suitable thickness that can withstand the weight and pressure exerted by the chop saw.
2. Lumber
Lumber will be used to construct the frame and legs of the chop saw table. Opt for sturdy and durable lumber that can provide adequate support for the tabletop.
3. Screws and Nails
Screws and nails are essential for securing the different components of the chop saw table together. Make sure to choose the appropriate size and type of fasteners for a secure and stable construction.
4. Angle Iron
Angle iron will be used to reinforce the corners and edges of the tabletop. This will provide added strength and stability to the chop saw table.
5. Leveling Feet
Leveling feet are important to ensure that your chop saw table is stable and level. These adjustable feet will allow you to fine-tune the height and balance of the table.
6. Wood Glue
Wood glue will be used to enhance the bond between the different wooden components. Opt for a high-quality wood glue that dries clear and provides a strong adhesive bond.
7. Sandpaper
Sandpaper will be essential for smoothing and finishing the wooden surfaces of the chop saw table. Choose different grits of sandpaper to achieve a smooth and polished finish.
8. Safety Equipment
Lastly, don’t forget to gather the necessary safety equipment, such as goggles, gloves, and ear protection. These will ensure your safety while working with power tools and during the construction process.
By gathering all these materials, you will be well-prepared to construct your own chop saw table. Remember to carefully follow the instructions and take the necessary safety precautions throughout the construction process.
Step-by-step guide to building a chop saw table
Building a chop saw table can greatly enhance your woodworking projects by providing a stable surface and precise cuts. Here is a step-by-step guide on how to build a chop saw table:
Step 1: Gather the necessary materials and tools. You will need a sheet of plywood, a chop saw, screws, a power drill, a measuring tape, and a pencil.
Step 2: Measure and mark the dimensions for your chop saw table on the plywood. Typical dimensions are around 4 feet long and 2 feet wide, but you can adjust them based on your needs.
Step 3: Cut the plywood according to your marked dimensions using the chop saw. Make sure to wear appropriate safety gear, such as goggles and gloves, when operating power tools.
Step 4: Attach support beams to the underside of the plywood using screws and the power drill. These beams will provide stability and reinforce the table’s structure.
Step 5: Place the plywood on a flat surface and position the chop saw in the desired location. Make sure the saw is aligned with the plywood’s edges.
Step 6: Use the power drill to secure the chop saw to the plywood by drilling screws through its base into the plywood.
Step 7: Test the stability of the chop saw table by making a few practice cuts. Ensure that the table does not wobble or move during operation.
Step 8: Optional: Add additional features to your chop saw table, such as a measuring guide or storage compartments, to enhance its functionality.
Step 9: Apply a protective finish, such as varnish or paint, to the plywood to prevent moisture damage and prolong the lifespan of your chop saw table.
Building your own chop saw table can be an enjoyable and rewarding project. By following these steps, you can create a sturdy and efficient workspace for all your woodworking needs.
Tips and tricks for using a chop saw table
Using a chop saw table can greatly improve your woodworking projects, providing a stable and accurate surface for cutting materials. To make the most of your chop saw table, follow these tips and tricks:
1. Safety first: Always wear appropriate safety gear, including safety glasses and ear protection, when using a chop saw table. Make sure to read and understand the safety instructions provided by the manufacturer.
2. Secure the materials: Before making any cuts, ensure that the materials you are working with are securely clamped or otherwise fixed in place. This will prevent them from shifting during the cutting process.
3. Measure twice, cut once: Double-check your measurements before making any cuts. This will help ensure that your cuts are accurate and minimize the amount of material wasted.
4. Use the appropriate blade: Different materials require different blades. Make sure you are using the correct blade for the material you are cutting to achieve the best results.
5. Adjust the chop saw table: Most chop saw tables have adjustable angles and heights. Take the time to adjust the table to the appropriate angle and height for your specific project. This will help you achieve precise and clean cuts.
6. Support longer pieces: When cutting longer pieces, use additional supports or roller stands to help maintain stability and prevent the material from sagging or moving during the cut.
7. Mind your fingers: Keep your hands a safe distance away from the cutting area and the spinning blade. Use push sticks or other appropriate tools to guide the material through the cutting process.
8. Clean up regularly: Sawdust and debris can accumulate on the chop saw table, potentially affecting the accuracy of your cuts. Regularly clean the table to maintain optimal performance.
9. Practice and patience: Like any woodworking tool, using a chop saw table takes practice. Take your time, go through the necessary adjustments, and practice on scrap materials before working on your final project.
By following these tips and tricks, you can maximize the benefits of using a chop saw table and achieve precise and professional-looking cuts for your woodworking projects.