
Keeping your tools in good condition is crucial to ensure their longevity and effectiveness. One of the tools that often require maintenance is a saw blade. A dull saw blade can lead to poor cutting results and can be dangerous to use. Instead of spending money to have your saw blade sharpened by a professional, you can make your own homemade saw blade sharpening jig using simple materials.
A saw blade sharpening jig is a device that holds the saw blade securely in place while allowing you to sharpen its teeth. By using this jig, you can easily restore the sharpness of your saw blade and extend its lifespan. Creating your own homemade jig is a cost-effective and practical solution for woodworkers and DIY enthusiasts.

To make a homemade saw blade sharpening jig, you will need some basic materials, such as a piece of plywood, a combination square, clamps, screws, and sandpaper. The process involves cutting and shaping the plywood to create the base and the guides for the saw blade. By following a few simple steps and using the right measurements, you can create a functional jig that will help you sharpen your saw blade with precision.
With your homemade saw blade sharpening jig, you will be able to maintain the sharpness of your saw blade easily and conveniently. By regularly sharpening your saw blade, you can ensure clean and precise cuts, save money on replacing blades, and improve your overall woodworking experience. So why spend money on professional sharpening services when you can make your own jig and do it yourself?
Importance of Saw Blade Sharpening
Properly sharpened saw blades are essential for efficient and safe woodworking. Here are some reasons why regular sharpening is important:
1. Cutting Performance
A sharp saw blade will provide clean and precise cuts. It will effortlessly slice through the wood, reducing the chances of splintering or tear-out. This ensures that you achieve the desired results in your woodworking projects.
2. Efficiency
Sharpened saw blades require less effort and force to cut through materials, saving you time and energy. Dull blades, on the other hand, require more force and can cause the wood to burn or damage the blade itself due to excessive heat buildup.
3. Safety
A dull saw blade can be dangerous to work with, as it increases the risk of kickback. Kickback occurs when the blade gets stuck in the material and violently throws it back towards the operator. Regular blade sharpening reduces the chances of kickback and provides a safer working environment.
4. Blade Longevity
Regular maintenance and sharpening extend the lifespan of your saw blades. By removing the dull edges, you prevent excessive wear and tear, ensuring that the blades last longer. This saves you money in the long run by reducing the frequency of blade replacements.
In conclusion, saw blade sharpening is crucial for maintaining cutting performance, improving efficiency, ensuring safety, and prolonging the life of your blades. By investing time in sharpening, you will achieve better woodworking results and minimize the risk of accidents.
Tools Needed for Making a Home Made Saw Blade Sharpening Jig
When it comes to making a homemade saw blade sharpening jig, you will need a few essential tools to get the job done right. Here are the tools you will need:
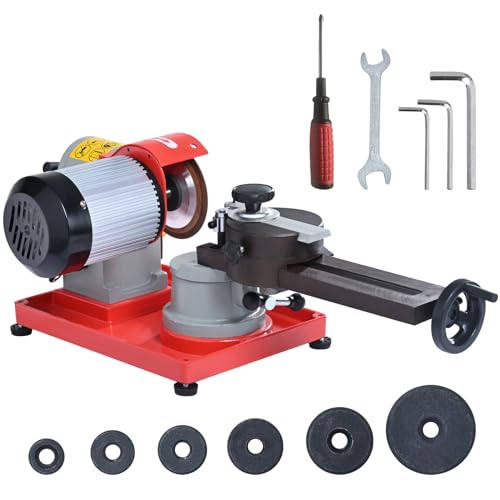
1. Bench Grinder
A bench grinder is the main tool you will need for this project. It’s used to sharpen the saw blade by removing any dullness or imperfections. Make sure you have a steady and well-mounted bench grinder for a smooth sharpening process.
2. Angle Grinder
An angle grinder is optional but can be helpful in some cases. It can be used to reshape the teeth if necessary, as well as to remove any excess material. If you don’t have an angle grinder, you can still successfully sharpen the saw blade with just a bench grinder.
3. Files or Grinding Wheels
Files or grinding wheels are essential for sharpening the teeth of the saw blade. They allow you to remove material and reshape the teeth to achieve the desired sharpness. It’s recommended to have multiple files or grinding wheels with different sizes or coarseness to accommodate various types of saw blades.
4. Safety Equipment
Ensure you have the necessary safety equipment to protect yourself during the sharpening process. Safety glasses or goggles are a must to shield your eyes from any sparks or debris. Additionally, wearing gloves and a face shield can provide extra protection.
These tools should be sufficient for making a homemade saw blade sharpening jig. Remember to always exercise caution and follow safety guidelines when using power tools. With the right tools and proper technique, you can successfully sharpen your saw blade and enhance its cutting performance.
Step-by-Step Guide to Make a Home Made Saw Blade Sharpening Jig
Sharpening your own saw blades can be a cost-effective way to keep your tools in top condition. With a homemade saw blade sharpening jig, you can easily restore the cutting edges of your blades and prolong their lifespan. In this step-by-step guide, we will show you how to make your own jig using simple materials and tools.
Materials:
- 1/2 inch plywood
- Angle iron
- Wood screws
- Washers
- Nuts
- Two sharpening stones (coarse and fine grit)
- Measuring tape
- Pencil
- Drill
Instructions:
Step 1: Measure and Cut the Plywood
Start by measuring and marking the dimensions of your saw blade on the plywood. Then, use a saw to cut the plywood to the appropriate size for your jig.
Step 2: Attach the Angle Iron
Position the angle iron along one of the edges of the plywood and mark the screw hole locations. Use a drill to make pilot holes, and then attach the angle iron to the plywood using screws, washers, and nuts.
Step 3: Secure the Sharpening Stones
Place your coarse grit sharpening stone onto the plywood, aligning it with the angle iron. Mark the stone’s position, and drill holes for securing it with screws, washers, and nuts. Repeat this step for the fine grit sharpening stone.
Step 4: Adjust the Angle
Measure the angle at which you want to sharpen your saw blades. Use a protractor or angle measuring tool to determine the desired angle and mark it on the plywood. Adjust the angle iron accordingly to match the marked angle.
Step 5: Test and Adjust
Before using the jig, it’s essential to test its effectiveness. Place a dull saw blade onto the jig and secure it in place. Apply a small amount of lubricant to the sharpening stone and slowly move the blade back and forth across the stone. Check the blade for improved sharpness and adjust the angle or stone position if necessary.
Step 6: Fine-Tune the Jig
If you find that your saw blades are not sharpening evenly or to your desired level of sharpness, you can fine-tune the jig. This may involve adjusting the angle or using different sharpening stones with varying grit levels.
Step 7: Regular Maintenance and Cleaning
Once you have successfully sharpened your saw blades, it’s important to clean the jig and stones regularly to maintain their effectiveness. Remove any debris or metal shavings and wipe the stones clean after each use.
By following these step-by-step instructions, you can create your own homemade saw blade sharpening jig and keep your saw blades sharp and ready for use. Remember to take proper safety precautions when working with tools and always wear protective gear.


