Using a circular saw to make cross cuts is a fundamental skill that every woodworker should learn. Whether you are a beginner or an experienced DIY enthusiast, knowing how to make accurate and clean cross cuts is essential for a wide range of projects.
Step 1: Prepare the workspace
Before you start making cross cuts, it’s important to ensure that you have a clean and clear workspace. Remove any clutter or debris that could hinder your movements or compromise your safety. Make sure you have a sturdy and stable workbench or sawhorse to support your workpiece.
Step 2: Measure and mark the cut
Next, take precise measurements and mark the cut line on your workpiece. Use a tape measure and a pencil to ensure accuracy. If you are making multiple cross cuts, it’s a good idea to use a speed square or a miter gauge to ensure consistent measurements.
Step 3: Set up the saw
Now it’s time to set up your circular saw. Adjust the cutting depth based on the thickness of your workpiece. Make sure the blade is properly aligned and tightened. If you are working with a particularly thick or dense material, consider using a blade with a higher tooth count for cleaner cuts.
Note: Always wear appropriate personal protective equipment, such as safety glasses and ear protection, when operating a circular saw.
Step 4: Make the cross cut
Position the saw at the beginning of the cut line, aligning the blade with the mark. Grip the saw firmly with both hands and squeeze the trigger to start the saw. Move the saw steadily and smoothly along the cut line, applying gentle pressure. Avoid forcing the saw or pushing it too fast, as this can lead to inaccurate cuts or kickback.
Step 5: Finishing touches
Once you have completed the cross cut, inspect the quality of the cut. If necessary, use sandpaper or a file to smooth out any rough edges. Clean up the workspace and store the saw properly.
With practice, you will become more comfortable and proficient in making cross cuts with a circular saw. Remember to prioritize safety and take your time to ensure accurate and clean cuts. Happy woodworking!
Understanding Circular Saw Basics
A circular saw is a versatile power tool that is commonly used for making straight cuts in various materials such as wood, plastic, and metal. It consists of a round, rotating blade that cuts through the material as it moves across the surface. Understanding the basics of how a circular saw works and how to use it safely is essential for any DIY enthusiast or professional carpenter.
Here are some key points to understand about circular saws:
Blade Types: Circular saw blades come in different sizes and with different tooth configurations. The blade you choose will depend on the material you are cutting and the type of cut you want to make. For example, a blade with more teeth is ideal for making clean and precise cuts in wood.
Depth of Cut Adjustment: Most circular saws have a feature that allows you to adjust the depth of cut. This means you can control how deep the blade cuts into the material. It is important to set the depth correctly to ensure safety and accuracy of your cuts.
Safety Features: Circular saws come with various safety features to protect the user. These may include blade guards, trigger locks, and anti-kickback mechanisms. Always familiarize yourself with the safety features of your particular saw and follow the manufacturer’s instructions for safe operation.
Proper Technique: To get the best results with a circular saw, it is important to use the proper technique. This includes holding the saw firmly with both hands, keeping the blade guard in place, and guiding the saw along the cutting line. Practice your technique on scrap material before tackling important projects.
Maintenance and Care: Like any tool, a circular saw requires regular maintenance and care to ensure its optimal performance. This may include keeping the blade clean and sharp, lubricating moving parts, and storing the saw in a clean and dry place. Always refer to the manufacturer’s instructions for specific maintenance guidelines.
By understanding these basic principles of circular saws, you can confidently use this powerful tool for a variety of cutting tasks. Remember to prioritize safety and practice proper technique to achieve accurate and professional-looking results.
Choosing the Right Blade
When it comes to making cross cuts with a circular saw, choosing the right blade is crucial. There are various types of blades available, and selecting the correct one can greatly impact the quality of your cuts and the overall performance of your saw.
Firstly, consider the material you will be cutting. Different materials require different types of blades. For example, if you are cutting wood, you should use a blade specifically designed for wood cutting. These blades typically have larger teeth with wider gaps between them, allowing for efficient cutting through the wood fibers.
If you are cutting through plastic or laminate materials, consider using a blade with fine teeth. These blades have smaller, closely spaced teeth that provide cleaner and smoother cuts on these types of materials.
Additionally, it is important to consider the thickness of the material you will be cutting. Thicker materials require blades with bigger diameters and larger teeth. This ensures that the blade can easily penetrate through the material and reduces the risk of kickback.
It is also worth noting the number of teeth on the blade. Generally, blades with more teeth produce smoother cuts, while blades with fewer teeth are better suited for rough cuts. If you are looking for clean and precise cross cuts, a blade with a higher tooth count is recommended.
Lastly, always make sure that the blade you choose is compatible with your circular saw. Check the manufacturer’s recommendations to ensure that the blade can be safely and properly attached to your saw.
By carefully choosing the right blade for your specific cutting needs, you can achieve accurate and professional-looking cross cuts with your circular saw.
Selecting the Appropriate Blade for Cross Cuts
When making cross cuts with a circular saw, it’s important to use the right blade for the job. The choice of blade can affect the quality of the cut, the speed of the cut, and the overall safety of the operation. Here are some factors to consider when selecting the appropriate blade for cross cuts:
Type of Material
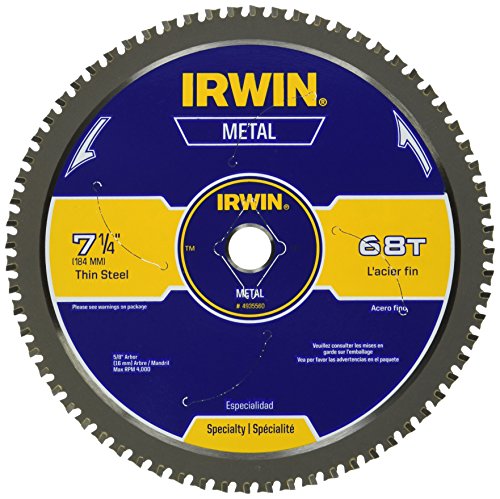
The type of material you are cutting will determine the type of blade you should use. For cross cuts on wood, a general-purpose blade with a high tooth count is recommended. These blades have smaller teeth that are designed to make smoother cuts on wood. If you are cutting metal or other materials, you will need a blade specifically designed for that material.
Teeth Count
The number of teeth on the blade will also affect the quality of the cut. More teeth generally result in a finer cut, but they can also slow down the cutting speed. For cross cuts on wood, a blade with around 24 to 40 teeth is typically sufficient. If you need a faster cut, you can opt for a blade with fewer teeth, but keep in mind that the cut may not be as clean.
Blade Thickness and Kerf
The thickness of the blade and the width of the cut it creates (known as the kerf) are also important factors to consider. Thicker blades tend to be more stable and durable, but they also create wider cuts. For general cross cuts on wood, a blade with a thickness of around 1.6 to 2.4 millimeters and a kerf of around 2.2 to 3.2 millimeters is recommended.
| Type of Material | Blade Type | Teeth Count | Blade Thickness (mm) | Kerf (mm) |
|---|---|---|---|---|
| Wood | General-purpose | 24-40 | 1.6-2.4 | 2.2-3.2 |
| Metal | Metal-cutting | 60-80 | 1.5-2.0 | 1.8-2.5 |
| Plastic | Plastic-cutting | 80-100 | 1.2-1.8 | 1.6-2.2 |
Remember to always follow the manufacturer’s recommendations for blade selection and safety guidelines when using a circular saw for cross cuts. Selecting the appropriate blade will help you achieve accurate and efficient cuts, while ensuring your safety and the longevity of your tools.
Preparing Your Workpiece
Before making any cuts with a circular saw, it is important to properly prepare your workpiece. This will ensure that the cut is accurate and clean, and that you maintain a safe working environment.
1. Measure and Mark
Start by measuring the length or width of the material that needs to be cut. Use a ruler or tape measure to ensure your measurements are accurate. Once you have determined the length or width, use a pencil or marker to mark the starting and ending points of the cut on the workpiece. This will help guide your saw blade.
2. Secure the Workpiece
Next, make sure your workpiece is securely fastened before making any cuts. Use clamps or other appropriate methods to secure the material to a workbench or sawhorse. This will prevent the workpiece from moving or vibrating during the cutting process, ensuring a straight and precise cut.
Additionally, if you are working with large or heavy materials, it may be helpful to have a second person assist you in holding and maneuvering the workpiece while you make the cut.
By taking the time to properly prepare your workpiece, you can ensure that your cross cuts with a circular saw are accurate, clean, and safe.
Measuring and Marking for Accurate Cross Cuts
To make precise cross cuts with a circular saw, it is crucial to accurately measure and mark your material beforehand. By properly measuring and marking, you can ensure that your cuts will be straight and aligned exactly where you want them to be.
Materials Needed
Before you begin measuring and marking for your cross cuts, gather the following materials:
- Tape measure
- Straight edge or ruler
- Pencil
Step-by-Step Guide
Follow these steps to measure and mark your material for accurate cross cuts:
- Measure the length you want your cross cut to be using a tape measure. Make sure to measure from the edge of your material.
- Use the straight edge or ruler to draw a straight line across your material at the measured length.
- Extend the line past the edge of your material by about an inch or two to ensure the cut will be accurate.
- Repeat steps 1-3 on the opposite edge of your material to create a guide line for the circular saw.
- Align the guide line with the blade of the circular saw.
- Secure your material firmly before making the cross cut.
By following these steps and taking the time to measure and mark accurately, you will be able to make clean and precise cross cuts with your circular saw.
Executing the Cross Cut
Now that you have prepared all the necessary tools and materials, you are ready to execute the cross cut using your circular saw. Follow these steps to ensure a smooth and accurate cut:
- Measure and mark: Use a measuring tape and pencil to measure and mark the desired length on your workpiece. Double-check your measurements to ensure accuracy.
- Set the saw: Set the depth of the circular saw blade according to the thickness of your workpiece. Adjust the blade angle if necessary, depending on the type of cut you want to make.
- Secure the workpiece: Make sure the workpiece is firmly secured on a stable work surface or workbench. Use clamps if needed to prevent any movement while cutting.
- Position the saw: Hold the circular saw with both hands, keeping a firm grip on the handle and the auxiliary handle (if available). Position the saw blade at the edge of the marked cutline.
- Start the saw: Before starting the saw, make sure the blade is not touching the workpiece. Press the power trigger, and allow the saw blade to reach its full speed before beginning the cut.
- Execute the cut: Maintain a steady and controlled motion as you guide the circular saw along the marked cutline. Keep both hands on the saw’s handles throughout the cut, and let the saw do the work.
- Complete the cut: Continue cutting until the blade has passed completely through the workpiece. Once the cut is complete, release the power trigger and wait for the blade to come to a complete stop before setting the saw down.
Remember to always prioritize safety when working with power tools. Wear appropriate safety gear, such as safety glasses and ear protection, and follow the manufacturer’s instructions for your specific circular saw model. Practice cutting on scrap pieces of wood before attempting any precision cuts. With practice and the right technique, you’ll become more comfortable and confident in executing cross cuts with your circular saw.
Setting Up the Circular Saw for a Cross Cut
Before making a cross cut with a circular saw, it’s important to properly set up the tool. Taking the time to prepare the circular saw will ensure accurate and safe cuts.
Step 1: Choose the Right Blade
Start by selecting the appropriate blade for the cross cut you want to make. A blade with fine teeth is ideal for clean and precise cuts, while a blade with larger teeth is better for rough cuts. Make sure the blade is sharp and in good condition before using it.
Step 2: Adjust the Cutting Depth
Next, adjust the cutting depth of the circular saw. The depth should be set to slightly deeper than the thickness of the material you are cutting. To do this, loosen the depth adjustment lever or knob, and move the base plate up or down until the desired cutting depth is achieved. Once set, tighten the lever or knob to secure the depth.
Note: It’s important to ensure that the blade is not fully exposed below the material, as this can cause kickback and result in an unsafe cutting situation.
Step 3: Check the Blade Alignment
Proper blade alignment is crucial for accurate cross cuts. Take a moment to inspect the position of the blade in relation to the saw’s base plate. The blade should be parallel to the plate, and there should be no angle or tilt. If the blade is not aligned correctly, use a wrench or an adjustment tool to gently tweak the blade until it is straight.
Step 4: Secure the Workpiece
Before making the cross cut, make sure the workpiece is securely fastened in place. This can be done using clamps or other appropriate fixtures to prevent the material from moving during cutting. Securing the workpiece will help maintain the accuracy of the cut and reduce the risk of accidents.
Remember: Safety should always be a top priority when operating a circular saw. Read the manufacturer’s instructions, wear appropriate safety gear, and make sure the saw is in good working condition before use.