


If you are a woodworking enthusiast who loves the timeless beauty and strength of finger joints, but don’t have access to a table saw, don’t worry! There are still ways to achieve those perfectly interlocking fingers without the use of this powerful tool. While a table saw is indeed a convenient and efficient method for making finger joints, there are alternative methods that can produce equally impressive results. In this article, we will explore a few techniques that can help you create those beautiful, strong, and durable finger joints without a table saw.
1. Router Method: One of the most popular ways to make finger joints without a table saw is by using a router. This versatile tool can create precise cuts and allows for easy adjustment of the joint size. With the help of a finger joint jig and a router, you can achieve clean and accurate finger joints. The jig acts as a guide for the router, ensuring straight and consistent cuts. Just make sure to secure the workpiece firmly, and follow safety guidelines when operating the router.
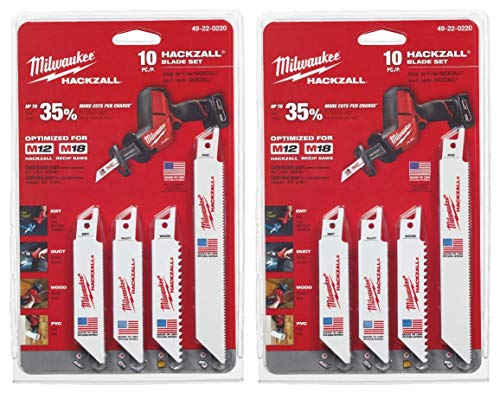
2. Dado Blade on a Circular Saw: If you have a circular saw with a dado blade, you can also use it to make finger joints. A dado blade, with its multiple cutting edges, can remove material quickly and accurately. To make finger joints using this method, you will need to carefully adjust the blade height and width, ensuring a perfect fit between the mating pieces. Additionally, using a finger joint jig or a sled can help you control the cuts and achieve the desired results.

3. Hand Tools: While power tools like routers and circular saws can make the job easier and faster, you can also create finger joints using traditional hand tools. Hand saws, chisels, and a mallet can be used to achieve the desired joint shape and size. Although this method requires more time and effort, it can be a rewarding experience for those who enjoy the craftsmanship and precision of hand tool woodworking.
Remember, no matter which method you choose, practice makes perfect. Take your time to learn and understand the techniques involved, and always prioritize safety when working with any tools. With patience, practice, and the right tools, you can create beautiful finger joints that will add a touch of elegance to any woodworking project.
What are finger joints and their application
Finger joints, also known as box joints, are a type of joint used in woodworking to create strong and decorative corners. Their name comes from the way they interlock, resembling interlaced fingers. These joints are commonly used in constructing boxes, drawers, and other wooden furniture pieces.
The finger joint consists of a series of fingers or tabs cut into the end of one board that interlock with corresponding fingers cut into the end of another board. When assembled, the fingers provide increased gluing surface area, making the joint exceptionally strong and resistant to pulling apart. The tight interlocking design also ensures that the joint remains square and secure.
This type of joint is highly versatile and can be used for various woodworking projects. From small jewelry boxes to large cabinets, finger joints add both strength and aesthetic appeal to the finished piece. Additionally, finger joints can be seen as a decorative element in visible corners, creating an interesting visual feature. The precision and craftsmanship required to create finger joints make them popular among experienced woodworkers.
Benefits of using finger joints
Finger joints offer several advantages over other types of joints:
- Strength: The interlocking design of finger joints provides excellent strength and durability, making them ideal for projects that require sturdy joints.
- Aesthetics: Finger joints can be visually appealing, especially when used in visible corners. The interlocking pattern adds a touch of craftsmanship and detail.
- Increased gluing surface area: The many fingers in a finger joint result in a larger gluing surface, ensuring a strong bond between the pieces of wood.
- Resistance to pulling apart: Thanks to the tight fit, finger joints are less likely to break or pull apart under pressure, making them suitable for heavy-duty applications.
- Alignment: Finger joints help maintain alignment during assembly, ensuring that the joint remains square and secure.
Conclusion
Finger joints are a versatile and popular type of joint used in woodworking. They provide excellent strength, aesthetics, and resistance to pulling apart, making them suitable for various projects. Whether you’re a seasoned woodworker or an enthusiast, mastering the art of creating finger joints can elevate the quality and durability of your woodworking creations.
Understanding the Concept of Finger Joints and Their Utility
Finger joints, also known as box joints, are a type of woodworking joint widely used for joining two pieces of wood at right angles. They are called finger joints because the interlocking fingers on the ends of each piece resemble the fingers of clasped hands.
These joints are known for their strength and durability, making them a popular choice for constructing drawers, cabinets, and boxes. The interlocking fingers create a tight bond, providing added stability to the joint.
Finger joints are made by cutting a series of evenly spaced slots or channels on the edges of two pieces of wood. The width and depth of these slots match each other, allowing them to fit together snugly. The result is a visually striking joint with a strong mechanical connection.
Traditionally, finger joints are cut using a table saw, which offers precise control and ease of cutting. However, it is possible to create finger joints without a table saw by using alternative tools such as a router, a jigsaw, or a handheld chisel.
If using a router, you can create finger joints by using a straight bit and a finger joint template. The template guides the router along the wood, ensuring accurate cuts. A jigsaw can be used to create finger joints by making multiple parallel cuts and then removing the excess material. Handheld chisels can also be employed to manually shape the joints, although this method requires more time and precision.
Regardless of the method chosen, it is crucial to measure and mark the location of the slots accurately to ensure a proper fit. Additionally, taking the time to practice on scrap wood before attempting the final joint will help improve accuracy and confidence.
In conclusion, finger joints are a versatile woodworking joint known for their strength and durability. While a table saw is commonly used to create finger joints, alternative tools such as routers, jigsaws, and chisels can be used in their absence. By understanding the concept of finger joints and practicing the necessary techniques, it is possible to create visually appealing and structurally sound woodworking projects without the need for a table saw.
Tools required to make finger joints without a table saw
To make finger joints without a table saw, you will need the following tools:
1. Jigsaw: A jigsaw is a versatile power tool that can be used to make curved and straight cuts in various materials. It is an essential tool for cutting out the individual finger joints.
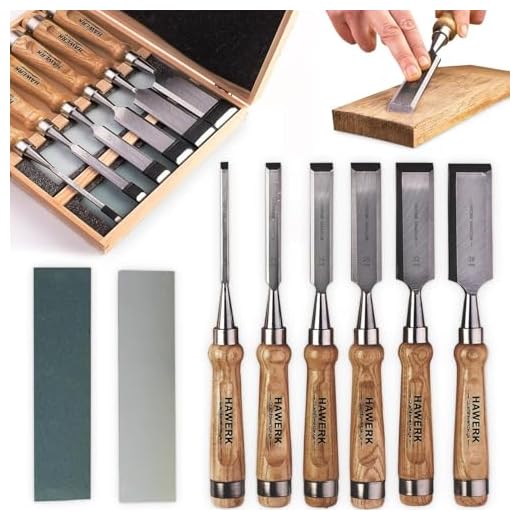
2. Chisel: A chisel is used for fine-tuning the finger joints after cutting them with a jigsaw. It helps to achieve precise and clean cuts, ensuring a tight-fitting joint.
3. Mallet: A mallet is used in combination with a chisel to gently tap and remove excess material during the chiseling process. It provides controlled force without damaging the workpiece.
4. Router: A router with a straight bit is used to create a channel or groove along the length of the finger joint. This helps to remove the bulk of the waste material, making it easier for the chisel to clean up the joint.
5. Clamps: Clamps are necessary to hold the workpiece securely in place while cutting and shaping the finger joints. They ensure stability and accuracy during the entire process.
6. Marking tools: Marking tools such as a pencil or a marking gauge are used to mark the positions for the finger joints on the workpiece. These marks serve as guidelines for accurate cutting and shaping.
7. Safety equipment: It is essential to wear safety equipment such as safety goggles and hearing protection when using power tools like a jigsaw and router. This ensures protection against potential hazards and noise.
With these tools, you can confidently create finger joints without a table saw and achieve precise and professional-looking results.
Essential tools needed for creating finger joints
Creating finger joints without a table saw requires the use of a few essential tools to ensure accuracy and efficiency. Here are the key tools you will need:
1. Hand Router
A hand router is an essential tool for cutting the finger joints. It allows you to make precise and clean cuts in the wood, giving your finger joints a professional finish. Make sure to choose a hand router that comes with a set of finger joint bits for optimal results.
2. Chisels
Chisels are necessary for removing the excess wood from the finger joints. They come in various sizes, so it’s important to have a set of different chisels to match the size of your finger joints. A sharp chisel will make the task easier and more accurate.
3. Measuring and Marking Tools
Accurate measurement is crucial when creating finger joints. You will need measuring and marking tools such as a tape measure, marking gauge, and combination square to ensure precision in your cuts. These tools will help you mark the exact locations for your finger joints and ensure that they line up correctly.
4. Clamps
Clamps are essential for gluing and clamping the finger joints together. They will hold the pieces securely in place while the glue dries, ensuring a strong and solid joint. Make sure to have an assortment of clamps in different sizes to accommodate various project sizes.

With these essential tools in hand, you’ll be well-equipped to create finger joints without a table saw. Remember to always prioritize safety and precision when working with these tools.
Step-by-step guide to making finger joints without a table saw
Creating finger joints is a popular woodworking technique that joins two pieces of wood together with interlocking fingers. While a table saw is often used for this process, it is possible to create finger joints without one. Below is a step-by-step guide to help you make finger joints without a table saw.
Step 1: Gather the necessary tools and materials
To create finger joints without a table saw, you will need:
- A circular saw or a handheld saw
- A chisel set
- A marking gauge
- A mallet
- An accurate measuring tool
- Wood glue
- Clamps
Step 2: Measure and mark the wood
Measure the wood pieces that you want to join together and mark the areas where you want the finger joints to be created. Use a marking gauge to ensure accuracy and consistency in your markings.
Step 3: Make the first cut
Using the circular saw or handheld saw, carefully make the first cut along the marked lines. It is important to be precise and stay within the marked areas.
Step 4: Remove the waste
Use a chisel to carefully remove the waste wood between the cuts. Take your time and work slowly to avoid any mistakes or accidents. Use the mallet to gently tap the chisel if needed.
Step 5: Test the fit
Once the waste wood is removed, test the fit of the joint by connecting the two pieces together. The joints should fit snugly without any gaps. Take your time to make any necessary adjustments until you achieve a perfect fit.
Step 6: Glue and clamp
Apply wood glue to the joints and connect the pieces together. Use clamps to hold them in place and allow the glue to dry according to the manufacturer’s instructions.
Step 7: Finishing touches
Once the glue is fully dried, you can sand and finish the jointed wood pieces according to your desired look and finish.
By following these step-by-step instructions, you can successfully create finger joints without a table saw. Practice and patience will help you improve your technique over time. Enjoy the satisfaction of creating beautiful and strong finger joints using alternative tools!
Clear instructions on creating finger joints without a table saw
Creating finger joints can be a challenging task when you don’t have access to a table saw. However, with a few simple tools and techniques, you can still achieve precise and clean finger joints. In this article, we will provide step-by-step instructions on how to create finger joints without a table saw.
Tools and materials you will need:
- Hand saw
- Chisel
- Mallet
- Marking gauge
- Square
- Pencil
- Safety goggles
- Clamps
Step 1: Mark the finger joint locations
Measure and mark the locations where you want the finger joints to be on both pieces of wood. Use a pencil and a square to ensure accurate markings.
Step 2: Set the marking gauge
Set the marking gauge to the width of the fingers you want for your joint. This will ensure consistent and precise cuts.
Step 3: Take safety precautions
Before starting any cutting, put on your safety goggles to protect your eyes from any flying wood particles.
Step 4: Make the cuts
Using a hand saw, carefully cut along the marked lines. Take your time to ensure straight and clean cuts.
Step 5: Remove waste material
Use a chisel and a mallet to remove the waste material between the cut fingers. Start by making small cuts along the marked lines, and then gradually deepen the cuts. Be careful not to remove too much material at once.
Step 6: Test the fit
After removing the waste material, test the fit of the finger joints by assembling the two pieces of wood together. The joints should fit snugly without any gaps.
Step 7: Fine-tune the fit
If the joints are too tight, use a chisel to remove a small amount of material from the sides of the fingers. If the joints are too loose, you can add small wooden shims to tighten the fit.
Step 8: Secure the joints
Once you are satisfied with the fit, use clamps to secure the joints while the glue dries. Apply wood glue to the surfaces of the fingers and press the joint together. Wipe off any excess glue with a damp cloth.
By following these clear instructions, you can successfully create finger joints without a table saw. Remember to take your time and work carefully to achieve precise and professional-looking joints.