
Making rip cuts with a table saw is an essential skill for any woodworker or DIY enthusiast. Whether you are building furniture, installing hardwood flooring, or working on any woodworking project, knowing how to make accurate and clean rip cuts is crucial.
A rip cut is a straight cut made parallel to the grain of the wood. It involves cutting along the length of the board, rather than across its width. This type of cut is commonly used to create narrower boards, trim, or to remove uneven edges.
To make rip cuts with a table saw, you will need to adjust the fence, which is a guide that runs parallel to the saw blade. The fence helps you maintain a consistent and straight cut throughout the length of the board. It is important to set the fence at the desired distance from the blade and make sure it is securely locked in place.
Always remember to wear appropriate safety gear, such as safety glasses and hearing protection, when operating a table saw. Additionally, ensure that the saw blade is sharp and in good condition before making any cuts. A dull blade can cause the wood to burn or kickback, resulting in an unsafe and inaccurate cut.
Choosing the right table saw for rip cuts
When it comes to making rip cuts with a table saw, having the right tool for the job is essential. Here are some factors to consider when choosing a table saw for rip cuts:
Type of table saw
There are several types of table saws available, including contractor table saws, hybrid table saws, and cabinet table saws. Each type has its own advantages and disadvantages when it comes to rip cuts.
- Contractor table saws are portable and affordable, but may lack the power and precision needed for large rip cuts.
- Hybrid table saws combine the advantages of both contractor and cabinet table saws, offering better power and precision than contractor saws.
- Cabinet table saws are heavy-duty machines that provide the highest level of power and precision, making them ideal for professional woodworkers.
Horsepower
The horsepower of the table saw motor plays a crucial role in making smooth and precise rip cuts. For most rip cuts, a table saw with at least 1.5 to 2 horsepower is recommended. However, if you plan on cutting hardwood or large stock, a more powerful motor may be necessary to maintain consistent cutting speed.
Fence system
A reliable and accurate fence system is another important consideration for rip cuts. Look for a table saw with a sturdy and easy-to-adjust fence that stays parallel to the blade. A T-square-style fence is commonly preferred for its stability and precision.
Blade size
The size of the table saw blade also affects the quality and efficiency of rip cuts. Most table saws use 10-inch blades, which are suitable for most rip cutting tasks. However, if you frequently work with thicker stock, a table saw with a larger blade capacity may be necessary.
By considering these factors, you can choose the right table saw for rip cuts that suits your needs and budget, ensuring accurate and efficient cuts every time.
Setting up your table saw for rip cuts
Before you start making rip cuts on your table saw, it’s important to properly set it up to ensure accurate and safe cuts. Follow these steps to set up your table saw for rip cuts:
- Check the blade alignment: Make sure the blade is parallel to the rip fence. You can use a table saw alignment tool or a combination square to check the alignment.
- Adjust the rip fence: Position the rip fence so that it’s parallel to the blade and the desired width of the cut. Use the measurement scale on the table saw to ensure accurate positioning.
- Set the blade height: Adjust the blade height so that it’s slightly higher than the thickness of the material you’re cutting. This will help reduce the risk of kickback and ensure a clean cut.
- Install a push stick or push block: When making rip cuts, it’s important to use a push stick or push block to keep your hands away from the blade. Securely attach it to the material you’re cutting to maintain control and safety.
- Clear the table surface: Remove any debris or obstacles from the table surface to prevent interference with the material or the cutting process.
- Wear safety gear: Always wear safety glasses and hearing protection when operating a table saw. Consider wearing a dust mask as well to minimize the inhalation of sawdust.
By following these steps, you’ll be able to set up your table saw properly for rip cuts, ensuring accurate and safe results. Remember to always take your time and double-check your setup before making any cuts.
Performing rip cuts with a table saw
When it comes to making rip cuts with a table saw, it is important to follow proper safety precautions and use the right techniques. Here are some steps to help you perform rip cuts effectively and safely:
Step 1: Wear safety equipment
Prior to starting any cutting operation, it is essential to put on safety equipment, including safety goggles, ear protection, and depending on the situation, a face shield and a dust mask.
Step 2: Set up the table saw
Ensure the table saw is properly set up for the rip cut. This includes adjusting the blade height to the appropriate level and setting the fence to the desired width of the rip cut.
Step 3: Measure and mark the board
Measure and mark the board to indicate the starting and ending points of the rip cut. Use a measuring tape and a pencil to ensure accuracy.
Step 4: Position the board
Place the board flat on the table, ensuring that it is stable and secure. Make sure it is positioned with the section to be cut between the blade and the fence.
Step 5: Start the cut
Turn on the table saw and allow the blade to reach its full speed before making contact with the board. Gently push the board forward, keeping it against the fence and maintaining a steady pace throughout the cut.
Step 6: Complete the cut
Continue pushing the board forward until the entire length of the cut is complete. Be mindful to keep your hands away from the blade and maintain a firm grip on the board.
Remember, it is crucial to always concentrate on the task at hand and avoid any distractions while operating a table saw. Additionally, familiarize yourself with the specific guidelines provided in the manufacturer’s manual for your table saw model.
By following these steps, you will be able to perform rip cuts effectively and safely using a table saw.
Tips for achieving smooth and accurate rip cuts
When it comes to making rip cuts with a table saw, getting clean and precise results is essential. Here are some tips to help you achieve smooth and accurate rip cuts:
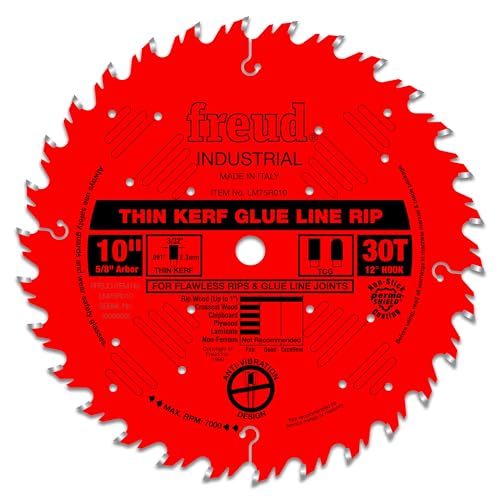
1. Use a sharp and appropriate blade: Before starting any rip cuts, make sure you are using a sharp blade specifically designed for ripping. Dull or incorrect blades can lead to rough cuts and potential safety hazards.
2. Adjust the blade height: The height of the blade should be set just above the thickness of the material you are cutting. This will help minimize tear-out and ensure a cleaner cut.
3. Check the fence alignment: The fence plays a crucial role in guiding the material during rip cuts. Check that it is parallel to the blade and securely locked in place. This will help prevent the material from drifting and ensure straight cuts.
4. Use a push stick: Always use a push stick to feed the material through the blade, particularly when the stock is narrow or short. This will keep your hands a safe distance from the blade and help maintain control over the material.
5. Take it slow and steady: When making rip cuts, avoid rushing the process. Maintain a consistent feed speed and let the blade do the work. Pushing the material too quickly can result in rough cuts and potential kickbacks.
6. Maintain proper positioning: Stand to the side of the blade, slightly behind the material being cut. This position allows you to have a clear view of the cut and keeps you out of the potential path of flying debris.
7. Consider using a featherboard: A featherboard can help hold the material firmly against the fence, reducing the chances of it drifting during the cut. This can result in a cleaner and more accurate rip cut.
8. Keep the workspace clean: To ensure smooth and accurate rip cuts, it’s important to keep the workspace free from sawdust and debris. Regularly clean the area around the saw to prevent any potential interference during the cutting process.
By following these tips, you’ll be well on your way to achieving smooth and accurate rip cuts with your table saw. Remember to prioritize safety and always wear appropriate protective gear when operating power tools.


