
If you’re looking to give your kitchen or bathroom cabinets a fresh and timeless look, consider making shaker cabinet doors. Shaker style cabinets are known for their clean lines, simplicity, and versatility. The best part is, you don’t need a table saw to make them!
Traditionally, shaker cabinet doors are made using a table saw to cut precise measurements. However, not everyone has access to this specialized tool. Luckily, there are alternative methods that allow you to achieve the same professional results using more accessible tools.
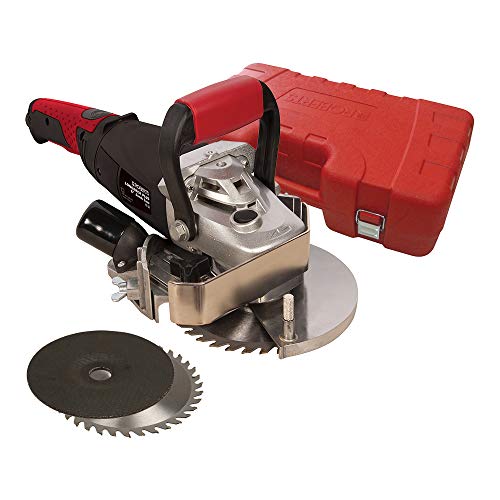
One of the easiest ways to make shaker cabinet doors without a table saw is by using a circular saw and a router. A circular saw can be used to make straight cuts, while a router can be used to create the shaker profile. With these tools, you’ll be able to make custom-sized shaker cabinet doors that fit perfectly in your space.
Overview
In this article, we will discuss how to make shaker cabinet doors without a table saw. Shaker cabinet doors are a popular choice for kitchen cabinets due to their clean and simple design. While using a table saw is the most common method for making shaker cabinet doors, not everyone has access to one. Fortunately, there are alternative methods that you can use to achieve the same result.
In this tutorial, we will focus on two methods: using a circular saw and using a router. Both methods have their pros and cons, so you can choose the one that suits your needs and tools availability.
Method 1: Using a Circular Saw
If you have access to a circular saw, this method can be a viable option. Here are the steps:
- Measure and mark the dimensions of your cabinet door on a sheet of plywood or MDF.
- Secure the plywood or MDF to a workbench or sawhorses.
- Set the depth of the circular saw to slightly more than the thickness of the plywood or MDF.
- Cut along the marked lines using the circular saw.
- Measure and mark the dimensions for the inner panel of the cabinet door.
- Cut out the inner panel using the circular saw.
- Smooth out the rough edges using sandpaper or a router.
- Attach the cabinet door hardware and install the door on your cabinet.
Method 2: Using a Router
If you have a router or access to one, this method can give you more precise and professional-looking results. Here are the steps:
- Measure and mark the dimensions of your cabinet door on a sheet of plywood or MDF.
- Secure the plywood or MDF to a workbench or sawhorses.
- Set up a straight edge guide on the plywood or MDF, so you can follow a straight line with the router.
- Use a straight bit with a bearing on the router to cut along the marked lines.
- Measure and mark the dimensions for the inner panel of the cabinet door.
- Cut out the inner panel using a straight bit or a decorative profile bit with the router.
- Smooth out the rough edges using sandpaper or a router with a chamfer bit.
- Attach the cabinet door hardware and install the door on your cabinet.
By following these methods, you can make shaker cabinet doors without a table saw. Remember to always prioritize safety by wearing protective gear and using the tools correctly. Good luck with your cabinet door making project!
Tools and Materials
To make shaker cabinet doors without a table saw, you will need:
- Measuring tape: to accurately measure the dimensions of the cabinet doors.
- Miter saw: for cutting the wood at precise angles.
- Router: to create the shaker style groove.
- Drill: for pre-drilling holes and attaching the hinges.
- Clamps: to hold the wood in place while cutting and routing.
- Screwdriver: for attaching the hinges and handles.
- Sandpaper: to smooth the wood surfaces before finishing.
- Wood glue: for extra stability when joining the pieces together.
- 2×2 or 2×3 wood: for the frame of the cabinet doors.
- 1×6 wood: for the panel of the cabinet doors.
- Shaker style router bit: to create the groove in the wood.
- Hinges and handles: for attaching the cabinet doors to the cabinet.
- Paint or stain: for finishing the cabinet doors.
Make sure to gather all of these tools and materials before starting the project. Having everything on hand will make the process smoother and more efficient.
Essential Tools for Making Shaker Cabinet Doors
When making shaker cabinet doors without a table saw, it’s important to have the right tools to achieve professional-looking results. While a table saw is a common tool for this project, there are alternative tools that can be used. Here is a list of essential tools you will need:
| Tool | Description |
|---|---|
| 1. Circular Saw | A circular saw is essential for making straight cuts on your cabinet door panels. Make sure to use a sharp and high-quality blade. |
| 2. Clamps | Clamps are necessary for securing your workpieces in place while cutting and assembling the cabinet doors. They will help ensure accuracy and safety. |
| 3. Router | A router is used to create the shaker-style profiles on the edges of the cabinet door panels. It is important to choose the appropriate router bit for the desired profile. |
| 4. Chisel | A chisel is required for removing excess material and fine-tuning the corners and edges of the shaker-style profiles. |
| 5. Drill | A drill will be needed for making pilot holes and installing hinges and knobs on the cabinet doors. |
| 6. Sandpaper | Sanding is an important step in achieving a smooth and finished look on your cabinet doors. Choose a variety of grits to achieve the desired level of smoothness. |
| 7. Safety Equipment | Don’t forget to wear safety glasses and ear protection while working with power tools. It is also recommended to have a dust mask to protect yourself from wood dust. |
With these essential tools, you can create beautiful shaker cabinet doors without a table saw. Make sure to always follow proper safety precautions and take your time to ensure accurate cuts and smooth finishes.
Step-by-Step Guide
Follow these simple steps to make shaker cabinet doors without a table saw:
1. Measure and cut the door panels: Measure the dimensions of the cabinet opening and subtract 1 inch from the height and width. This will ensure a proper fit for your doors. Use a circular saw or a handheld jigsaw to cut the door panels from a sheet of plywood or medium-density fiberboard (MDF).
2. Cut the rails and stiles: Determine the desired width for the rails and stiles of your shaker doors. Rip the plywood or MDF into strips of the appropriate widths using the circular saw or jigsaw. Make sure the rails (horizontal pieces) are the same length as the width of the door panels, and the stiles (vertical pieces) are the same length as the height of the door panels.
3. Assemble the door frames: Lay the rails and stiles on a flat surface, forming the frame of the shaker door. Apply wood glue to the ends of each piece and join them together at the corners to create a rectangular shape. Use bar clamps to hold the pieces in place until the glue dries.
4. Attach the door panel: Apply a thin layer of wood glue to the backside of the door frame. Place the door panel on top of the frame, ensuring it is centered and flush with the edges. Use a brad nailer or finish nails to secure the panel to the frame. Repeat this step for all the remaining doors.
5. Sand and finish the doors: Use sandpaper or a sanding block to smooth out any rough edges or surfaces on the doors. Apply a coat of primer and let it dry, then finish with your choice of paint or stain for a professional-looking finish.
6. Install the doors: Attach the hinges to the doors and then align the doors with the cabinet opening. Use a screwdriver to secure the hinges to the cabinet frame. Make any necessary adjustments to ensure the doors hang straight and operate smoothly.
By following these steps, you can easily make shaker cabinet doors without a table saw and elevate the look of your kitchen cabinets or other furniture pieces.
Measurements and Cutting the Wood
Before you start making the shaker cabinet doors, it’s important to have accurate measurements of the cabinet openings. Measure the height and width of each opening and record the dimensions.
Next, you’ll need to choose the type of wood you want to use for your cabinet doors. Popular options include plywood, MDF, or solid wood. Once you have the wood, mark the measurements on the wood panels using a pencil and a straight edge.
To cut the wood, you have a few options if you don’t have a table saw. One option is to use a circular saw with a straight edge guide. Attach the guide to the wood and set the saw depth to match the thickness of the wood. Carefully make the cuts along the marked lines using the circular saw.
Another option is to use a jigsaw. Clamp the wood to a work surface and use the jigsaw to follow the marked lines and cut out the panels. This method may be slightly slower than using a circular saw, but it can still produce accurate cuts.
After cutting all the panels, use a sander or sandpaper to smooth out any rough edges or uneven surfaces. This will help ensure a professional-looking finish for your cabinet doors.
Remember to wear safety goggles and take proper precautions when working with power tools. Always double-check your measurements and make sure the wood is secure before making any cuts.
Now that you have the panels ready, you can move on to assembling the shaker cabinet doors.
Joinery Techniques for Shaker Cabinet Doors
When making shaker cabinet doors without a table saw, it is essential to have a good understanding of joinery techniques. Joinery is the art of connecting pieces of wood together to create a strong and durable structure. Here are three joinery techniques commonly used for shaker cabinet doors:
Mortise and Tenon Joints:
The mortise and tenon joint is a classic woodworking joint that provides exceptional strength and stability. It involves creating a rectangular slot (mortise) in one piece of wood and a corresponding projection (tenon) on the other piece of wood. The tenon is inserted into the mortise and secured with glue or dowels. This joint is commonly used for connecting the stiles and rails of shaker cabinet doors.
Dowel Joints:
Dowel joints are an excellent alternative to mortise and tenon joints, especially when you don’t have a table saw. This technique involves drilling matching holes in the connecting pieces of wood and inserting dowels to join them together. Dowel joints are relatively easy to create and provide a strong bond. They are often used to connect the stiles and rails of shaker cabinet doors.
Biscuit Joints:
Biscuit joints are another option for joining shaker cabinet door components. This technique involves using a biscuit joiner to cut matching slots in the connecting pieces of wood. A biscuit, which is a small, oval-shaped piece of wood, is then inserted into the slots and secured with glue. Biscuit joints are quick to create and offer decent strength. They are commonly used for connecting the stiles and rails of shaker cabinet doors.
When using any of these joinery techniques, it is important to ensure precise measurements, proper alignment, and a strong adhesive. It is advisable to practice on scrap pieces of wood before attempting to join the cabinet door components. With the right technique and attention to detail, you can create beautiful and sturdy shaker cabinet doors without a table saw.
Assembling and Finishing the Doors
Once you have all the individual pieces for your shaker cabinet doors, it’s time to assemble and finish them. Here are the steps to follow:
- Start by laying out the stiles and rails on a flat surface in the desired door configuration. Make sure the grooves and tenons align properly.
- Apply wood glue to the ends of the rails and insert them into the corresponding grooves in the stiles. Use clamps to hold the pieces together while the glue dries.
- After the glue has dried, remove the clamps and sand the assembled door to smooth out any rough edges or imperfections.
- Fill any nail holes or gaps with wood filler and let it dry. Sand the surface again to ensure a smooth finish.
- Apply a primer coat to the doors to seal the wood and provide a base for the paint or stain.
- Once the primer is dry, sand the doors lightly again to remove any raised grain. This will help achieve a professional-looking finish.
- Apply the final coat of paint or stain to the doors, following the manufacturer’s instructions. Allow each coat to dry completely before applying the next one.
- Once the doors are fully dry, reattach the hinges and install the doors on the cabinet frame. Adjust the hinges as needed to ensure a proper fit.
- Finally, attach the knobs or handles to the doors, using a drill or screwdriver.
- Your shaker cabinet doors are now ready to be enjoyed! They will add a timeless, classic look to your kitchen or any space where they are installed.
Remember to take your time during the assembly and finishing process to achieve the best results. Enjoy the satisfaction of completing this DIY project and admire the beautiful, custom-made doors you have created!
Tips and Tricks
Creating shaker cabinet doors without a table saw can be challenging, but with these tips and tricks, you can achieve professional-looking results:
1. Measure twice
Before starting the project, make sure to measure the dimensions of your cabinet opening accurately. Double-check your measurements to ensure that your shaker doors fit properly.
2. Use a circular saw
If you don’t have a table saw, a circular saw can be a suitable alternative. Set the depth of the saw blade slightly deeper than the thickness of the wood to ensure clean and precise cuts.
3. Invest in a track guide
A track guide can help you achieve straight and accurate cuts. Attach the guide to your workpiece to guide the circular saw along the desired cutting line.
4. Clamp your workpiece
To prevent your workpiece from moving during cutting, use clamps to secure it firmly to a stable surface. This will ensure consistent and precise cuts.
5. Practice with scrap wood
If you’re new to using a circular saw, practice cutting on scrap wood before working on your actual shaker doors. This will help you get comfortable with the tool and improve your cutting skills.
6. Sand and finish
After cutting your shaker cabinet doors, use sandpaper to smooth any rough edges. Apply a finish of your choice, such as paint or stain, to protect the wood and enhance its appearance.
7. Install quality hardware
The hardware you choose for your shaker cabinet doors can greatly impact their overall look and functionality. Invest in quality handles or knobs that complement your kitchen or furniture style.
8. Seek assistance when needed
If you’re unsure about any step or technique, don’t hesitate to seek advice from experienced woodworkers or browse online tutorials. Learning from others’ experiences can help you avoid common pitfalls.
Remember, practice makes perfect. With patience, attention to detail, and the right tools, you can create beautiful shaker cabinet doors without a table saw.


