
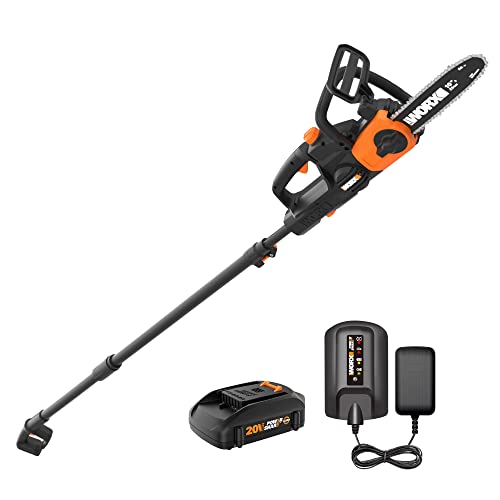
Is your Black and Decker pole saw’s chain worn out or damaged? Don’t worry, replacing the chain is a simple and straightforward process that you can do yourself. In this guide, we will walk you through the step-by-step process of replacing the chain on your Black and Decker pole saw.
Step 1: Safety First
Before you begin, it is important to ensure your safety. Make sure the pole saw is turned off and the battery is removed or disconnected. Wear protective gloves and safety goggles to protect yourself from any potential injuries.
Step 2: Remove the Old Chain
With the pole saw turned off and the battery removed, locate the chain tensioning screw on the side of the pole saw. Loosen the tensioning screw using a screwdriver or the tool provided with your pole saw. This will release the tension on the chain and allow you to remove it from the guide bar.
Step 3: Install the New Chain
Take the new chain and place it onto the guide bar, ensuring that the teeth are facing in the correct direction. Make sure the chain is properly seated in the grooves of the guide bar. Once the chain is in place, tighten the tensioning screw using the screwdriver or tool. This will tension the chain, but make sure not to overtighten it.
Step 4: Check the Tension
After tightening the tensioning screw, check the tension of the chain. It should be snug against the guide bar, but still able to move freely. If the chain is too tight or too loose, adjust the tensioning screw accordingly until the desired tension is achieved.
Step 5: Test the Chain
Once you have adjusted the tension, turn on the pole saw and test the chain’s performance. Make sure it runs smoothly and does not come off the guide bar while in use. If you notice any issues, repeat the previous steps to adjust the tension until the chain operates properly.
By following these simple steps, you can easily replace the chain on your Black and Decker pole saw and get back to cutting with ease. Remember to always prioritize safety and consult the user manual for your specific model if you have any questions or concerns.
Replacing the chain on your Black and Decker pole saw
Over time, the chain on your Black and Decker pole saw may become dull or damaged, reducing its cutting performance. Fortunately, replacing the chain is a relatively simple process that can be done in a few easy steps.
Before you begin, make sure you have the correct replacement chain for your specific model of Black and Decker pole saw. Refer to the user manual or contact the manufacturer if you are unsure.
Here’s how to replace the chain on your Black and Decker pole saw:
- Turn off the pole saw and unplug it from the power source. Safety should always be your top priority when working with power tools.
- Locate the chain tensioning screw. This is usually located near the base of the saw’s blade. Use a wrench to loosen the tensioning screw and relieve the tension on the chain.
- Remove the old chain from the guide bar. Carefully lift the chain off the guide bar, ensuring you don’t damage the bar or the chain itself.
- Install the new chain onto the guide bar. Ensure that the teeth of the chain are facing in the correct direction – they should be pointing towards the front of the pole saw.
- Adjust the chain tension. Use the chain tensioning screw to tighten the chain until there is just a small amount of slack. Be careful not to overtighten the chain.
- Test the chain tension. With the pole saw still turned off, manually pull the chain away from the guide bar. It should move freely, but there should be no excessive sagging or slackness.
- Tighten the chain tensioning screw. Once you are satisfied with the chain tension, use the wrench to tighten the chain tensioning screw.
And there you have it – your Black and Decker pole saw is now equipped with a new chain and ready to tackle your cutting tasks with precision and efficiency. Remember to always follow safety guidelines and consult the user manual for specific instructions for your model.
Step 1: Preparing for Chain Replacement
Replacing the chain on your black and decker pole saw is a simple and straightforward process. Before starting the replacement, it is important to ensure that you have all the necessary tools and equipment. Here are the steps to prepare for chain replacement:
1. Safety First
Before you begin, it’s essential to prioritize safety. Make sure you are wearing heavy-duty gloves and safety goggles to protect yourself from any potential injuries. Additionally, ensure that the pole saw is turned off and disconnected from any power source.
2. Inspect the Pole Saw
Take a close look at your black and decker pole saw to assess the condition of the chain. Look for any signs of damage, such as dull or broken teeth, loose links, or excessive wear. If you notice any significant issues, it is recommended to replace the entire chain rather than attempting to repair it.
It’s also a good idea to clean the pole saw and remove any debris or dirt that may have accumulated. This will help ensure smooth operation and extend the life of the new chain. You can use a brush or a cloth to clean the saw, avoiding any contact with the sharp edges.
3. Gather the Necessary Tools
Before proceeding with the chain replacement, gather all the tools you will need. Depending on the specific model of your black and decker pole saw, you may require a wrench or a screwdriver to remove the chain cover and access the chain.
In addition to the tools, you will also need a replacement chain that is compatible with your pole saw. It is essential to choose the correct chain size and type recommended by the manufacturer to ensure proper fit and safe operation.
Once you have gathered all the necessary tools and the replacement chain, you are ready to proceed with replacing the chain on your black and decker pole saw.
Step 2: Removing the Old Chain
After ensuring that the pole saw is turned off and unplugged, you can proceed to remove the old chain. This is done by following the steps outlined below:
|
1. Locate the chain tensioning screw located on the side of the pole saw. 2. Use an appropriate wrench or screwdriver to loosen the chain tensioning screw. 3. Once the chain tension is released, carefully remove the chain from the guide bar. |
|

It is important to handle the chain with caution as it may still have oil residue or could be sharp. Make sure to wear protective gloves during this process to avoid any injuries.
Step 3: Installing the New Chain
Once you have removed the old chain from your Black and Decker pole saw, it’s time to install the new chain. Follow these steps to properly install the new chain:
1. Positioning the Chain
Before installing the new chain, make sure that the chain bar is clean and free from any debris or obstructions. Align the cutting teeth of the chain with the groove on the chain bar. Hold the chain with one hand while using the other hand to position the chain bar.
Tip: It’s important to ensure that the chain is facing the correct direction. The cutting teeth should be pointing away from the saw body.
2. Attaching the Chain
With the chain and chain bar aligned, carefully guide the chain onto the sprocket at the end of the pole saw’s bar. Make sure that the chain properly engages with the sprocket. Slowly rotate the chain around the bar to ensure that it is properly set and aligned with the groove in the chain bar.
Note: Take care to not pinch your fingers or accidentally touch the sharp cutting teeth of the chain.
3. Adjusting the Chain Tension
Once the chain is properly attached, it’s important to check and adjust the chain tension. A properly tensioned chain should be snug on the chain bar, but still allow for easy rotation of the chain around the bar. Refer to the manufacturer’s instructions for your specific model to determine the proper tension for your chain.
Important: An improperly tensioned chain can affect the performance and safety of your pole saw.
Once you have installed and adjusted the new chain, you are ready to use your Black and Decker pole saw for your cutting needs. Remember to follow all safety guidelines and wear appropriate protective gear while operating the pole saw.
Step 4: Adjusting the Chain Tension
Once you have replaced the chain on your Black and Decker pole saw, it is important to properly adjust the chain tension before using the saw. Incorrect chain tension can lead to decreased performance and increased risk of accidents.
To adjust the chain tension, follow these steps:
| Step | Action |
| 1 | Turn off the pole saw and unplug it from the power source. |
| 2 | Locate the chain tensioning mechanism on the side of the pole saw. |
| 3 | Using a screwdriver or the provided tensioning tool, turn the tensioning screw clockwise to tighten the chain or counterclockwise to loosen the chain. |
| 4 | Check the tension of the chain by gently pulling on it. The chain should have a slight amount of slack. If it is too loose, repeat step 3 to further tighten the chain. If it is too tight, repeat step 3 to loosen the chain. |
| 5 | Once the chain tension is properly adjusted, secure the chain tensioning mechanism according to the instructions in your Black and Decker pole saw manual. |
| 6 | Inspect the chain to ensure it is properly aligned and seated on the guide bar. |
| 7 | You are now ready to use your Black and Decker pole saw with the newly installed and properly tensioned chain. |
Remember to always wear appropriate safety gear, such as goggles and gloves, when operating the pole saw to protect yourself from any potential injuries.
Step 5: Testing the Chain Replacement
After replacing the chain on your Black and Decker pole saw, it is important to test it before using it for any cutting tasks. Follow these steps to ensure that the chain replacement was successful:
- Secure the pole saw: Make sure that the pole saw is securely fastened and stable. This will prevent any accidents or injuries during the testing phase.
- Turn on the pole saw: Start the pole saw and let it run for a few moments to ensure that it is functioning properly.
- Check the chain tension: Examine the tension of the chain to make sure it is properly adjusted. A properly adjusted chain should fit snugly against the guide bar without sagging or being too tight.
- Perform a dry test: Without engaging the chain in any cutting tasks, hold the pole saw at a safe distance from any objects and test the chain by giving it a few quick bursts of power. Observe the chain’s movement and listen for any unusual sounds. If the chain runs smoothly and there are no strange noises, it is likely that the replacement was successful.
- Perform a test cut: Find a suitable branch or material to cut and engage the chain in a controlled cutting task. Monitor the chain’s performance, ensuring that it cuts smoothly and efficiently through the material. Pay attention to any signs of difficulty or abnormal behavior.
Note: If at any point during the testing process, you notice any issues with the chain or the pole saw’s performance, it may be necessary to go back and double-check the chain installation or seek professional assistance.


