Whether you’re a professional woodworker or a DIY enthusiast, knowing how to rip boards with a table saw is an essential skill. Ripping boards refers to cutting them lengthwise, which is a fundamental technique in woodworking. With the right tools, technique, and safety precautions, you can easily accomplish this task and create accurate, clean cuts.
In this article, we will guide you step by step through the process of ripping boards with a table saw.
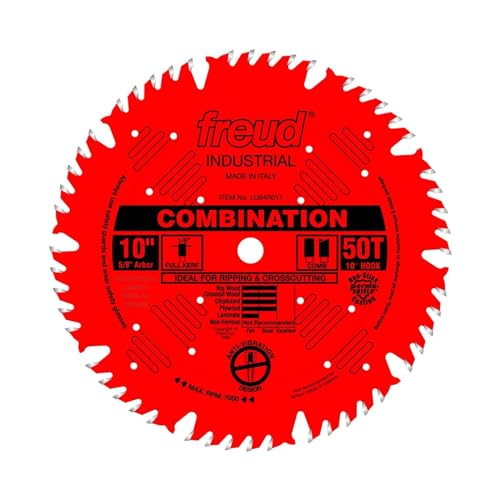
First, it is important to ensure that you have the necessary tools and equipment. You will need a table saw, a blade suitable for ripping cuts, a push stick or push block, and safety glasses. The blade should have a high number of teeth, ideally between 24 and 40, to ensure smooth and clean cuts.
Before starting, always remember to wear safety glasses to protect your eyes from any flying debris.
Once you have gathered all the necessary tools, it’s time to set up your table saw. Begin by adjusting the fence, which is the guide that runs parallel to the blade. Measure the desired width of the board you want to rip and position the fence accordingly. Use a ruler or a measuring tape to ensure accuracy.
When everything is set up, position the board flat on the table and adjust the height of the blade. To achieve a clean cut, the blade should be slightly higher than the thickness of the board. However, make sure that only a small portion of the blade is above the wood to prevent kickback.
Now you are ready to start ripping the board. Stand to the side of the blade, not in line with it, and use your push stick or push block to feed the board through the saw. Maintain a steady pace and keep firm, but gentle, pressure on the board as it moves through the blade. Avoid forcing the board or pushing it through too quickly, as this can cause kickback or splintering.
Finally, after completing the cut, turn off the table saw and wait for the blade to come to a complete stop before removing the ripped board. Take your time and always prioritize safety. Remember to unplug the table saw when you are finished using it.
By following these steps and exercising caution, you will be able to rip boards with a table saw effectively and safely. Practice this technique regularly to improve your woodworking skills and achieve precise cuts in your projects. Happy woodworking!
Preparing the Workpiece
Before you begin ripping boards with a table saw, it is important to properly prepare the workpiece. This will ensure safety and accuracy throughout the cutting process.
1. Measure and Mark
Start by measuring the length and width of the board you want to rip. Use a measuring tape or ruler to determine the exact dimensions. Once you have the measurements, mark the board using a pencil or a marking knife.
Tip: It is a good practice to measure and mark both ends of the board to ensure accuracy.
2. Set the Fence
Next, you need to set the fence on the table saw. The fence acts as a guide, keeping the workpiece aligned during the cut. Measure the distance between the blade and the fence using a measuring tape or a fence gauge. Adjust the fence accordingly to achieve the desired width of the ripped board.
Note: Make sure the fence is parallel to the saw blade to prevent binding or kickback.
Now that your workpiece is properly prepared, you are ready to rip the board using a table saw. Remember to always prioritize safety by wearing appropriate protective gear and following proper techniques.
Measuring and Marking
Before ripping boards on a table saw, it is essential to measure and mark them accurately. This ensures that the cuts are precise and the dimensions are correct.
Start by using a tape measure or a combination square to measure the length of the board that needs to be ripped. Take into consideration any additional space needed for a joint or an overlap if necessary.
Once the measurement is determined, use a pencil or a marking knife to make a small mark on the board’s surface. This mark will serve as a reference point for aligning the board with the table saw’s fence.
Next, use a straightedge or a level to draw a straight line from the mark to the opposite end of the board. This line will act as a cutting guide for the table saw blade.
Make sure to double-check the measurements and marking before proceeding with the cutting process. Accuracy is key to achieve clean and precise cuts.
Gathering the Necessary Tools
Before you begin ripping boards with a table saw, it is important to gather the necessary tools to ensure a safe and efficient process. Here are some essential tools you will need:
1. Table saw
A table saw is the main tool required for ripping boards. Ensure that the table saw is in good working condition and has a sharp blade.
2. Safety gear
Wearing appropriate safety gear is crucial when working with a table saw. Make sure to have the following:
- Safety goggles: Protect your eyes from wood chips, dust, and debris.
- Hearing protection: Use earplugs or earmuffs to safeguard your hearing from the loud noise of the table saw.
- Dust mask: Prevent inhalation of sawdust by using a dust mask or respirator.
- Gloves: Wear gloves to improve grip and protect your hands.
3. Push sticks
Push sticks are handy tools for guiding the wood through the table saw safely. They help keep your hands at a safe distance from the blade and reduce the risk of accidents.
4. Measuring tools
Accurate measurements are crucial for ripping boards correctly. Have measuring tools like a tape measure and a square nearby to ensure precision.
By gathering these essential tools before starting the process, you can ensure a smooth and safe experience when ripping boards with a table saw.
Setting up the Table Saw
Before you start ripping boards with a table saw, it is important to ensure that your table saw is properly set up. Follow these steps to ensure a safe and accurate rip cut:
1. Positioning the Fence
The fence is an essential component of the table saw that helps guide and support the workpiece during the cutting process. Start by aligning the fence parallel to the blade. Use a tape measure or a straightedge to check if the distance between the fence and the blade is consistent along its length. Adjust the fence as needed until it is parallel to the blade in all positions.
2. Adjusting the Blade Height
The height of the blade plays a significant role in the quality of the rip cut. Ideally, the blade should be set just above the height of the workpiece to minimize the risk of kickback. Use the blade height adjustment wheel or lever to raise or lower the blade. Take your time to find the right height for your specific task.
Once the fence and blade height are adjusted properly, you are ready to start ripping boards with your table saw. Always remember to wear proper safety gear, such as safety glasses and gloves, and keep your hands away from the blade during the cutting process. Safety should always be a top priority when working with power tools.
Adjusting the Blade Height
When ripping boards with a table saw, it is crucial to have the correct blade height. The blade height determines how deep the saw will cut into the board, and having it set too high or too low can result in an unsafe or inefficient cut.
To adjust the blade height on your table saw, follow these steps:
1. Turn off the Saw and Unplug
Before making any adjustments, always make sure the saw is turned off and unplugged. This will prevent any accidental starts or injuries while working on the saw.
2. Locate the Blade Height Adjustment Knob
On most table saws, the blade height adjustment knob is located on the front or side of the saw, near the blade. It is typically a large knob that can be turned to raise or lower the blade.
3. Raise or Lower the Blade
To adjust the blade height, turn the blade height adjustment knob in the appropriate direction. If you need to raise the blade, turn the knob clockwise. If you need to lower the blade, turn the knob counterclockwise. Make small adjustments at a time, checking the height after each adjustment.
It is important to note that the optimal blade height for ripping boards will depend on the thickness of the board and the desired cut depth. As a general rule, the blade height should be set so that it barely clears the top of the board.
Once you have adjusted the blade height, it is a good idea to make a test cut on a scrap piece of wood to ensure that the blade is at the correct height and produces the desired cut. If necessary, make further adjustments until you achieve the desired results.
By properly adjusting the blade height on your table saw, you can ensure safe and accurate cuts when ripping boards. Take the time to properly set the blade height before starting your project to avoid any potential issues.
Setting the Rip Fence
Before you begin ripping boards with a table saw, it’s important to properly set the rip fence. The rip fence is a guide that helps you make accurate cuts and maintain a consistent width throughout your project.
To set the rip fence, first make sure your table saw is turned off and unplugged for safety. Locate the rip fence on your table saw, which is typically a long metal bar that runs parallel to the blade.
Next, measure the desired width of the board you want to rip. Use a measuring tape to accurately determine the width, and then adjust the rip fence accordingly.
Loosen the knobs or levers that secure the rip fence in place. Slide the rip fence along the guide rail until it aligns with the desired width measurement. Make sure to align the fence parallel to the table saw blade.
Once you have set the rip fence at the correct width, tighten the knobs or levers to secure it in place. Give the rip fence a gentle pull or push to ensure it is firmly locked and won’t move during the cutting process.
Before making your first cut, double-check the alignment of the rip fence and the measurement to ensure accuracy. Adjust if necessary, and always use a push stick or push block to safely guide the wood through the table saw.
Remember, proper alignment and setting of the rip fence are crucial for safe and accurate cuts when ripping boards with a table saw. Take your time to ensure everything is set up correctly before beginning your project.