If you are a gardener or someone who frequently uses a shovel, you have probably encountered the frustration of a broken handle. Whether it’s due to wear and tear or an unfortunate accident, a broken shovel handle can put a damper on your gardening tasks. However, the good news is that replacing a shovel handle is a fairly simple process that you can do yourself. With a few basic tools and some patience, you’ll have your shovel back in working order in no time.
When it comes to replacing a shovel handle, the first step is to assess the damage. Is the handle cracked or completely broken off? Depending on the extent of the damage, you might be able to simply repair the handle instead of replacing it entirely. However, if the handle is beyond repair, you’ll need to remove the old handle and replace it with a new one.
To remove the old handle, start by securing the shovel head in a vise or clamping it to a workbench to ensure stability. Then, use a drill to create pilot holes along the sides of the handle. This will make it easier to remove the old handle without damaging the shovel head. Once the pilot holes are made, use a screwdriver or pry bar to gradually loosen and remove the old handle.
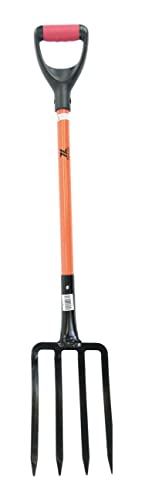
Now that you have removed the old handle, it’s time to install the new one. Make sure to choose a handle that is the appropriate size and material for your shovel. Wooden handles are a popular choice for their durability and comfort, but fiberglass or metal handles may also be suitable depending on your needs.
To attach the new handle, first place it into the shovel head, making sure it fits securely. Then, drill new pilot holes through the shovel head and into the handle. Finally, insert screws or bolts through the pilot holes and tighten them securely. Be careful not to overtighten, as this could cause the handle to split or crack.
With the new handle securely attached, your shovel is ready to be used again. Remember to test it out before engaging in any heavy-duty gardening tasks to ensure that it is properly installed and sturdy. By taking the time to replace a shovel handle, you can extend the life of your tool and save money by avoiding the need to purchase a new shovel.
Assessing the Condition of Your Shovel Handle
Before replacing a shovel handle, it is important to assess the condition of the current handle to determine if it truly needs to be replaced. Here are some steps you can take to evaluate the condition of your shovel handle:
1. Visual Inspection
Start by visually inspecting the handle for any visible cracks, splinters, or signs of wear. Look for any areas where the wood is peeling or chipped. Additionally, check for any loose or damaged hardware such as screws or bolts that secure the handle to the shovel head.
2. Physical Examination
To further assess the handle’s condition, gently grip and apply slight pressure on the handle to check for any flex or give. A sturdy handle should not have excessive flexibility. If you notice any significant flexing or parts of the handle feel weak, it may indicate potential structural issues.
Another aspect to consider is the weight of the shovel. If the handle feels unnaturally heavy or unbalanced, it could be a sign that the wood has absorbed moisture and compromised its integrity.
3. Stability Check
Test the stability of the handle by giving the shovel a few light swings. Observe for any wobbling or shifting of the handle in relation to the shovel head. A stable handle is essential for efficient and safe use.
Note: Safety should always be the top priority when using a shovel. If you have any doubt about the condition of the handle, it is better to err on the side of caution and replace it.
If, after thorough evaluation, you find that your shovel handle exhibits any of the mentioned issues or appears compromised, it is highly recommended to replace it. A damaged or weakened handle can lead to accidents, as it may not withstand the stress and strain of typical usage.
Remember, a sturdy and intact shovel handle ensures that you can continue using your shovel effectively for various tasks without compromising your safety.
Choosing the Right Replacement Handle
When it comes to replacing a shovel handle, choosing the right one is essential for ensuring a comfortable and efficient work experience. Consider the following factors to help you select the best replacement handle for your shovel:
Material
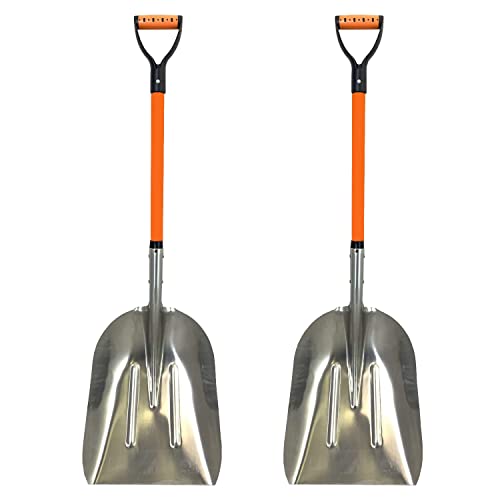
There are several materials to choose from when it comes to shovel handles. The most common options include wood, fiberglass, and metal. Wood handles are traditional and offer a classic look and feel. They are durable and can absorb shock well, but may require more maintenance. Fiberglass handles are lightweight, strong, and resistant to weathering, making them a popular choice. Metal handles, such as steel or aluminum, are very durable, but can be prone to rust if not properly cared for.
Size and Shape
Consider the size and shape of the replacement handle to ensure a good fit for your shovel. The length and width should match the dimensions of the original handle to maintain proper balance and control. Additionally, choose a handle with a comfortable grip that feels natural in your hands. Some handles may have ergonomic designs or features, such as cushioning or non-slip surfaces, which can enhance user comfort and reduce fatigue.
Note: It’s important to measure the diameter of the handle hole in the shovel blade to ensure compatibility with the replacement handle.
Keep in mind that different shovels may have specific requirements for replacement handles, so it’s always a good idea to consult the manufacturer’s guidelines or contact a professional for assistance.
Removing the Old Shovel Handle
Replacing a shovel handle may seem like a daunting task, but with the right tools and a little patience, it can be done. The first step in the process is to remove the old handle. Here’s how:
- Secure the shovel head in a vise or clamp to prevent it from moving.
- Inspect the handle for any screws, bolts, or nails that may be holding it in place. Use a screwdriver, wrench, or pliers to remove them.
- If there are no screws, bolts, or nails, the handle is likely secured with a wooden wedge. Look for a small groove or slit on the top of the handle near the shovel head.
- Insert a flathead screwdriver or chisel into the groove and tap it gently with a hammer. This will loosen the wooden wedge.
- Once the wedge is loose, grasp the handle firmly near the shovel head and pull it straight out. If it doesn’t budge, you may need to use a bit more force or tap the handle lightly with a hammer to loosen it further.
- Continue pulling the handle until it is completely removed from the shovel head.
With the old handle removed, you’re now ready to install a new one. Read our next article on installing a new shovel handle for step-by-step instructions.
Preparing the Replacement Handle
Replacing a shovel handle is a fairly straightforward process that requires a few simple tools and some basic carpentry skills. Before you begin, it’s important to make sure you have the right replacement handle for your shovel. The handle should be made of a durable material, such as hardwood or fiberglass, and should be the correct length and diameter to fit your shovel head.
Once you have the replacement handle, you’ll need to prepare it for installation. Start by removing any packaging or protective covering from the handle. Inspect the handle for any defects or damage that may affect its performance. If you notice any cracks or splinters, it’s best to replace the handle rather than trying to repair it.
Next, measure the length of the old handle and compare it to the new one. If the new handle is longer than the old one, you’ll need to cut it down to size. Use a saw or other cutting tool to trim the handle to the correct length. Be sure to wear protective gloves and goggles while cutting to prevent injury.
After cutting the handle to size, use sandpaper or a file to smooth out any rough edges or splinters. This will help ensure a comfortable grip and prevent any potential injuries while using the shovel.
Finally, check the diameter of the replacement handle to make sure it matches the hole in your shovel head. If the handle is too large, you may need to sand it down slightly to achieve a proper fit. Conversely, if the handle is too small, you may need to add some adhesive or filler material to secure it firmly in place.
Once you’ve prepared the replacement handle, you’re ready to install it on your shovel. This process will vary slightly depending on the type of shovel you have, so consult the manufacturer’s instructions or seek guidance from a knowledgeable professional if needed.
Attaching the Replacement Handle
Once you have purchased a replacement handle for your shovel, you can follow these steps to attach it:
1. Prepare the Shovel Head
- Remove any remaining portion of the old handle from the shovel head. You may need to use a saw or other cutting tool to remove it.
- Clean the shovel head to remove any dirt or debris. A wire brush can be useful for this step.
2. Prepare the Replacement Handle
- Inspect the replacement handle for any defects or damage. Make sure it is the correct size and shape for your shovel head.
- If necessary, sand the ends of the replacement handle to ensure a smooth fit into the shovel head.
3. Attach the Replacement Handle
- Apply a small amount of wood glue to the end of the replacement handle.
- Insert the replacement handle into the shovel head, making sure it is inserted fully and securely.
- If desired, you can also secure the handle with screws or nails for extra stability. Make sure they are inserted through the shovel head and into the handle securely.
Once the replacement handle is securely attached, allow the wood glue to dry completely before using the shovel again. This may take several hours or overnight.
By following these steps, you can easily replace the handle of your shovel and continue using it for all your gardening and digging needs.
Testing and Maintaining the New Shovel Handle
Once you have replaced the handle of your shovel, it is important to make sure that it is secure and will not come loose while in use. Before you start using the shovel with the new handle, it is advisable to test its stability and strength.
1. Stability Test:
To test the stability of the new shovel handle, gently shake it from side to side and up and down. If you notice any wobbling or movement, the handle may not be securely attached. In this case, you should readjust or tighten the screws or bolts to ensure a firm connection. It is important to have a stable handle to avoid accidents and maximize your efficiency when using the shovel.
2. Strength Test:
Once you have confirmed the handle is stable, you can proceed to test its strength. Apply some pressure or force to the handle, mimicking the type of pressure you would typically exert when using the shovel. This will help determine if the handle is strong enough to withstand the forces it will encounter during regular use. If the handle bends, splinters, or shows signs of weakness, it may be necessary to reinforce or replace it again.
Maintaining the New Shovel Handle
To ensure the longevity and reliability of the new shovel handle, proper maintenance is crucial. Here are some tips to help you maintain the handle:
Regular Cleaning:
After each use, clean the shovel handle with a damp cloth to remove any dirt or debris that may have accumulated on it. Keeping the handle clean will help prevent corrosion or damage.
Protective Coating:
Consider applying a protective coating to the handle to prevent moisture penetration and minimize the risk of rot or deterioration. A coat of varnish or outdoor-grade sealant can help prolong the life of the handle.
By following these testing and maintenance tips, you can ensure that your new shovel handle remains secure, strong, and reliable.