If you’re tired of a dull shovel that doesn’t dig into the dirt as easily as it used to, it may be time to sharpen it. Using a sharpening stone on a shovel is a simple and effective technique to restore the blade’s sharpness. Whether you’re a professional gardener or a homeowner tending to your yard, this guide will show you step-by-step how to use a sharpening stone to bring back the edge on your shovel.
Step 1: Clean the shovel
Before you begin sharpening, it’s important to clean the shovel blade. Use a damp cloth to remove any dirt or debris that may be stuck on the surface. Cleaning the shovel will ensure a smooth and effective sharpening process.
Step 2: Wet the sharpening stone
Next, wet the sharpening stone with water. This will help to lubricate the stone and prevent the shovel blade from overheating while sharpening. Make sure the stone is fully saturated before proceeding to the next step.
Step 3: Position the stone
Hold the sharpening stone firmly in one hand and position it at a 20-degree angle against the shovel blade. This angle will create a sharp cutting edge. Make sure to maintain a consistent angle throughout the sharpening process.
Step 4: Sharpen the blade
Gently move the sharpening stone back and forth across the shovel blade, applying light pressure. Start from the base of the blade and work towards the tip, maintaining the 20-degree angle. Continue this motion for several passes, gradually working on both sides of the shovel blade.
Step 5: Test the sharpness
After sharpening, test the sharpness of the shovel blade by carefully running your finger along the edge. Be cautious to avoid any accidental cuts. If the blade feels sharp and cuts smoothly, you have successfully sharpened your shovel. If not, repeat the sharpening process until the desired sharpness is achieved.
By following these steps, you can keep your shovel in top condition and make your gardening or yard work much easier. Remember to always exercise caution when handling sharp tools and ensure the proper maintenance for a longer lifespan of your shovel.
Preparing the Sharpening Stone
Before you begin sharpening your shovel with a sharpening stone, it’s important to properly prepare the stone to ensure the best results. Follow these steps to prepare your sharpening stone:
- First, ensure that your sharpening stone is clean and free of any debris. Use a damp cloth to wipe away any dirt or dust that may have accumulated on the stone.
- Next, soak the sharpening stone in water for about 10-15 minutes. This step is necessary to ensure that the stone is properly lubricated during the sharpening process.
- After soaking, remove the sharpening stone from the water and place it on a stable surface. It’s important to choose a sturdy workbench or table to ensure stability during sharpening.
- If your sharpening stone has different grits on each side, decide which grit you want to start with. Coarser grits are best for heavily damaged or dull shovels, while finer grits are better for maintenance sharpening.
- Once you’ve chosen the appropriate grit, apply a few drops of honing oil or water on the stone’s surface. This lubrication helps prevent the shovel’s blade from clogging the stone.
- With your sharpening stone now prepared, it’s ready to be used to sharpen your shovel and restore its cutting edge.
By properly preparing your sharpening stone, you’ll ensure that it functions effectively and provides the best results when sharpening your shovel.
Cleaning the Shovel
Before sharpening your shovel with a sharpening stone, it is important to clean it thoroughly. Follow these steps to ensure your shovel is free from dirt and debris:
Step 1: Remove Excess Dirt
Use a stiff brush or your hands to remove any loose dirt or debris from the shovel. This will make it easier to clean the blade.
Step 2: Rinse with Water
Once the excess dirt is removed, rinse the shovel blade with water. A garden hose or bucket of water can be used for this step. Make sure to remove all remaining dirt and mud.
Step 3: Use Soap and Water
Apply a small amount of mild soap or detergent to a sponge or cloth. Scrub the entire shovel, paying special attention to the blade. This will help remove any stubborn dirt or stains.
Step 4: Rinse and Dry
Rinse the shovel with clean water to remove any soap residue. Dry the shovel completely with a towel or let it air dry. Moisture can cause rust on the shovel, so ensuring it is dry is essential for longevity.
By following these cleaning steps, you can ensure that your shovel is ready to be sharpened using a sharpening stone. Cleaning the shovel beforehand will help the sharpening process be more effective and efficient, allowing you to have a sharp and reliable tool for your gardening or digging needs.
Applying Lubricant to the Sharpening Stone
When sharpening a shovel with a sharpening stone, it is essential to apply lubricant to ensure the best results. Lubricant helps prevent the stone from getting clogged with metal particles and reduces friction between the stone and the shovel’s blade.
Here are steps on how to apply lubricant to the sharpening stone:
- Clean the Stone: Before applying lubricant, make sure the sharpening stone is clean. Use a stiff brush or rag to remove any dirt or debris from the surface.
- Choose the Lubricant: There are several lubricants you can use, such as honing oil, water, or multipurpose oil. Choose the one that works best for you and the type of sharpening stone you have.
- Apply the Lubricant: Apply a few drops of lubricant on the surface of the sharpening stone. Make sure to distribute it evenly across the stone.
- Spread the Lubricant: Use a cloth or your fingers to spread the lubricant on the stone’s surface. Ensure that the entire area where you’ll be sharpening the shovel is well-lubricated.
Remember that applying lubricant to the sharpening stone is crucial as it helps prevent the stone from wearing down too quickly and ensures a smooth sharpening process. Additionally, it helps keep the shovel’s blade cool by minimizing heat buildup during sharpening.
Now that you have successfully applied the lubricant, you are ready to sharpen your shovel using the sharpening stone.
Sharpening the Shovel
When it comes to maintaining and sharpening your shovel, a sharpening stone can be a handy tool. Sharpening your shovel regularly can make digging tasks easier and more efficient.
Choosing the Right Sharpening Stone
Before getting started, it’s essential to choose the right sharpening stone for your shovel. There are different types of stones available, including natural stones and synthetic stones. Natural stones, such as Arkansas stones, are known for their durability and effectiveness. Synthetic stones, like silicon carbide and aluminum oxide stones, are more affordable and can still provide excellent sharpening results.
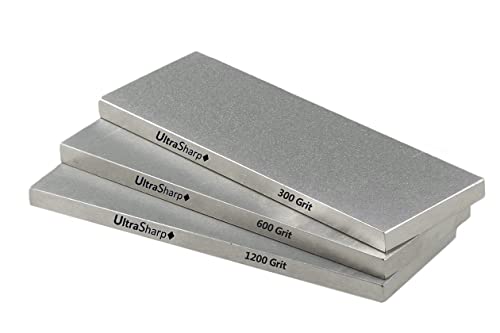
Additionally, consider the grit of the stone. A lower grit stone, such as 1000, is suitable for reshaping and repairing a dull or damaged shovel blade. Higher grit stones, such as 3000 or above, are ideal for honing and maintaining the blade’s sharpness.
Sharpening Technique
Once you have the right sharpening stone, it’s time to start sharpening your shovel. Here’s a step-by-step guide:
- Secure the shovel in a vise or clamp it to a sturdy surface. This will ensure stability and safety during sharpening.
- Identify the bevel angle of your shovel blade. This angle will determine the sharpening technique you should use.
- Moisten the sharpening stone with water or honing oil, depending on the manufacturer’s instructions.
- Hold the shovel with one hand and the sharpening stone with the other, ensuring a firm grip on both.
- Place the sharpening stone against the shovel blade at the bevel angle. Use consistent pressure and make sweeping motions across the blade.
- Continue sharpening until you achieve the desired sharpness, periodically checking the blade’s edge for progress.
- After sharpening, remove any burrs or metal filings from the blade using a wire brush or a cloth.
- Finally, wipe the blade clean and apply a thin layer of oil to protect it from corrosion.
Remember to take your time and sharpen the entire blade evenly, paying extra attention to the cutting edge. Regularly sharpening your shovel will not only make your gardening or digging tasks more comfortable but also lengthen the life of your shovel.
| Benefits | Description |
|---|---|
| Improved digging efficiency | Sharp shovel blades require less effort to penetrate the ground, making your digging tasks faster and more efficient. |
| Reduced physical strain | When your shovel is sharp, you won’t need to apply excessive force, reducing strain on your muscles and joints. |
| Extends shovel lifespan | Regular sharpening removes small nicks and damages, preventing further deterioration and prolonging the shovel’s lifespan. |
Finishing and Maintaining the Shovel
After sharpening your shovel with a sharpening stone, there are a few finishing touches you can apply to keep it in good condition and improve its performance. Follow these steps to maintain your shovel:
- Clean the shovel: Use a brush or cloth to remove any dirt or debris from the shovel. This will help prevent rust and keep the blade sharp.
- Apply lubricant: Add a thin layer of oil or grease to the shovel blade to protect it from rust and corrosion. Be sure to wipe off any excess oil before using the shovel.
- Store properly: Store your shovel in a dry and secure place to prevent it from getting damaged or dull. Hang it on a wall or keep it in a shed or garage.
- Regularly inspect: Check your shovel regularly for any signs of wear or damage. If you notice any cracks or chips in the blade, it may be time to replace it.
- Sand wooden handle: If your shovel has a wooden handle, lightly sand it to remove any splinters or rough spots. This will make it more comfortable to use and prevent injuries.
- Sharpen as needed: Depending on how often you use your shovel, you may need to sharpen it again in the future. Regularly check the sharpness of the blade and repeat the sharpening process if necessary.
By following these maintenance tips, you can prolong the life of your shovel and ensure it remains sharp and efficient. Remember to always wear protective gloves and goggles when working with sharp tools.