


Shovels are one of the most essential tools for many outdoor tasks. Whether you’re digging a hole, moving dirt, or clearing snow, a quality shovel can make the job much easier.
However, like any tool, shovels require regular care and maintenance to ensure they remain in good working condition and last for years to come.
In this article, we will discuss some useful tips and techniques for caring for your shovels. By following these guidelines, you can prolong the lifespan of your shovel and keep it functioning at its best.
Why proper care for shovels is important
Proper care for shovels is essential to ensure their longevity and optimal performance. Shovels are tools that are commonly used for various outdoor tasks, such as digging, lifting, and moving soil, gravel, or snow. With regular use, shovels can become worn out, rusty, or blunt, making them less effective and potentially dangerous to use.
Regular maintenance and care can significantly extend the lifespan of a shovel. By taking the time to clean, oil, and sharpen the shovel, you can prevent rust and damage, allowing it to function properly for years to come. Keeping the shovel in good condition is not only cost-effective but also ensures that you have a reliable tool whenever you need it.

Proper care for shovels also helps to improve efficiency and reduce physical strain. A well-maintained shovel will have a sharp edge that makes digging easier, requiring less effort and reducing the risk of muscle fatigue or strain. Additionally, a clean and well-oiled shovel will prevent soil from sticking to the blade, allowing you to work faster and more efficiently.
Another important reason to care for shovels is safety. Shovels with rusty or damaged blades can pose a risk of injury, as they may break or slip during use. Regular inspections and maintenance can help identify any potential safety hazards, allowing you to address them promptly and prevent accidents.
In conclusion, proper care for shovels is vital to ensure their longevity, performance, efficiency, and safety. By regularly cleaning, oiling, and sharpening your shovel, you can extend its lifespan, improve its functionality, and reduce the risk of accidents. Taking the time to care for your shovels will ultimately save you time, money, and effort in the long run.
Choosing the right shovel
When it comes to selecting the right shovel for your needs, there are several factors to consider. Here are some important aspects to keep in mind:
|
Shovel type There are different types of shovels available, each designed for specific tasks. Some common types include:
|
|
|
Handle material The material of the shovel handle can significantly affect its durability and comfort. Common handle materials include wood, fiberglass, and metal.
|
|
|
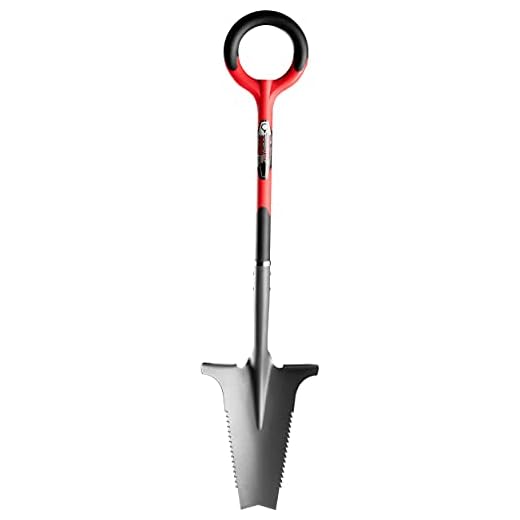
Blade shape and size The shovel’s blade shape and size should match the intended use:
|
|


By considering these factors, you can choose the right shovel that matches your needs and ensures comfortable and efficient digging, lifting, and spreading.
Factors to consider when choosing a shovel
Choosing the right shovel for your needs is essential for efficient and effective digging. Here are some important factors to consider when selecting a shovel:
1. Purpose
Consider the specific tasks you will be using the shovel for. Different shovels are designed for different purposes. For example, a round-point shovel is ideal for digging while a square-point shovel is better for moving loose materials such as gravel or soil.
2. Handle Type
The handle type of a shovel can greatly influence its comfort and ease of use. Straight handles provide more control and are suitable for precision work, while D-shaped handles offer better grip and help reduce strain on the wrist and hand.
3. Length and Weight
The length and weight of a shovel are important considerations for both comfort and effectiveness. A longer shovel allows for more leverage and is helpful for deep digging, while a shorter shovel is more maneuverable in tight spaces. Additionally, consider the weight of the shovel to ensure it can be easily handled without causing excessive strain or fatigue.
4. Blade Material
The material of the shovel’s blade affects its durability and performance. Common blade materials include steel, stainless steel, and aluminum. Steel blades are strong and durable, but they can rust over time. Stainless steel blades are resistant to rust, while aluminum blades are lightweight but less durable than steel.
5. Ergonomics
Choose a shovel with ergonomic features that enhance comfort and reduce strain on the body. Look for shovels with cushioned grips, angled handles, or other design elements that promote a natural and comfortable grip. These features can help prevent hand and back pain during prolonged use.
By considering these factors when choosing a shovel, you can ensure that you select the right tool for the job and make your digging tasks easier and more efficient.
Cleaning and drying your shovel
Properly cleaning and drying your shovel after each use is essential to maintain its longevity and effectiveness. Here are some steps to follow:
Step 1: Remove debris
Start by removing any dirt, mud, or debris that may have accumulated on the blade and handle of your shovel. Use a brush or your hands to gently scrub off the loose material. Be careful not to damage the blade or handle in the process.
Step 2: Rinse with water
Next, rinse the shovel with water to remove any remaining dirt or grime. You can use a hose, a bucket of water, or even a pressure washer if necessary. Pay special attention to hard-to-reach areas, such as the corners and edges of the blade.
Step 3: Scrub with detergent
If there are any stubborn stains or residues on the shovel, you can use a mild detergent or dish soap to scrub them away. Apply the detergent to a brush or sponge and scrub the affected area until it is clean. Rinse the shovel thoroughly afterwards to remove any soap residue.
Step 4: Dry the shovel
After cleaning, it is important to dry your shovel before storing it. Wipe off any excess water with a clean towel or allow the shovel to air dry naturally. If you are in a hurry, you can speed up the drying process by placing the shovel in direct sunlight or using a fan.
Remember, moisture can lead to rust and corrosion, which can significantly reduce the lifespan of your shovel. Taking the time to properly clean and dry your shovel after each use will help ensure that it remains in good condition for years to come.
Steps to clean and dry your shovel
Properly cleaning and drying your shovel after each use is essential to extend its lifespan and ensure its effectiveness. Follow these steps to keep your shovel in top condition:
1. Remove debris: Start by removing any dirt, mud, or other debris from the shovel blade and handle. Use a stiff brush or a hose to scrub away any loose dirt. Make sure to clean both sides of the blade and the handle.
2. Rinse with water: Once the debris is removed, rinse the shovel with water to remove any remaining dirt or grime. Use a gentle stream of water to avoid damaging the shovel’s metal parts.
3. Apply detergent: For tougher stains and grease, apply a mild detergent solution to the shovel and scrub it with a brush or sponge. This will help to remove any stubborn dirt and keep the shovel hygienic.
4. Rinse again: After scrubbing with detergent, rinse the shovel thoroughly with water to remove any traces of detergent or remaining dirt. Make sure to rinse all parts of the shovel, including the blade, handle, and any joints or screws.
5. Dry the shovel: To prevent rust and corrosion, thoroughly dry the shovel after cleaning. Wipe it down with a clean towel or cloth, paying special attention to any crevices or hard-to-reach areas where moisture may accumulate.
6. Store in a dry place: Once the shovel is completely dry, store it in a dry place, such as a shed or garage, to prevent exposure to moisture. Hang it up or store it upright to minimize contact with other tools, which can cause damage or dull the shovel blade.
By following these steps, you can ensure that your shovel remains clean, rust-free, and ready for use whenever you need it.
Sharpening the shovel blade
Regularly sharpening the blade of your shovel is essential for maintaining its efficiency and prolonging its lifespan. Here are some steps to follow:
1. Gather the necessary tools
Before you begin sharpening your shovel, gather the following tools:
- A medium-grit file
- A vise or clamp to hold the shovel securely
- A wire brush or sandpaper for cleaning
- Safety goggles and gloves
2. Secure the shovel
Using a vise or clamp, securely hold the shovel in place. This will ensure stability and prevent accidents while sharpening.
3. Clean the blade
Before sharpening, it is important to clean the blade to remove any dirt or debris. Use a wire brush or sandpaper to scrub the blade until it is free of rust and grime.
4. Begin sharpening
Hold the file at a 20-degree angle to the edge of the shovel blade and stroke it along the edge, moving in one direction. Be consistent with your strokes and apply even pressure to achieve a smooth edge.

5. Sharpen the entire edge
Work your way along the entire edge of the shovel blade, focusing on one side at a time. Take your time and ensure even sharpening along the entire length of the blade.
6. Test the sharpness
Once you have finished sharpening, carefully test the sharpness of the blade by gently running your finger along the edge. Be cautious to avoid any potential injuries.
7. Remove any burrs
After sharpening, you may notice small burrs or metal filings along the edge. Use a wire brush or sandpaper to remove these, ensuring a clean and polished edge.
By regularly sharpening your shovel blade, you can ensure that it remains in optimal condition for digging and other gardening tasks. Remember to take the necessary safety precautions and always store your sharpened shovel in a safe place.
Methods to sharpen the shovel blade
1. File the blade

One of the most common methods to sharpen a shovel blade is by using a file. Start by securing the shovel with a vise or clamp to prevent any movement. Hold the file at a 45-degree angle and run it along the beveled edge of the shovel blade. Apply even pressure and make long, smooth strokes. Repeat this process several times until you achieve the desired sharpness.
2. Use a grinder
If you have access to a grinder, it can be an effective tool for sharpening shovel blades. Similar to filing, secure the shovel in a vise or clamp. Turn on the grinder and with a steady hand, slowly move the blade against the rotating grinding wheel. Be cautious not to overheat the blade as it can affect its hardness. Keep the blade cool by dipping it in water as needed.
3. Sharpen with a whetstone
Another method to sharpen a shovel blade is by using a whetstone. Soak the stone in water for a few minutes to ensure it is fully saturated. Secure the shovel and hold the whetstone firmly in one hand. Use circular motions to grind the blade along the bevel, applying moderate pressure. Sharpen both sides of the blade evenly. Continue this process until the blade is sharp.
4. Consider a professional sharpening
If you are unsure about sharpening the shovel blade yourself, it is always an option to take it to a professional sharpening service. They have the necessary tools and expertise to sharpen the blade effectively and safely. This can help ensure that the blade is sharpened correctly and will greatly extend its lifespan.
Remember to wear protective gloves and eyewear when sharpening the shovel blade to prevent any accidents or injuries. Regularly sharpening the blade will not only make your digging tasks easier but also prolong the life of your shovel.
Storing the shovel properly
Proper storage is crucial for keeping your shovel in good condition and prolonging its lifespan. Follow these tips to store your shovel properly:
- Clean the shovel: Before storing the shovel, remove any dirt, mud, or debris that may be stuck to it. Use a brush or a garden hose to clean the shovel thoroughly. Make sure to dry it completely to prevent rusting.
- Apply a protective coating: To prevent rust and corrosion, consider applying a protective coating to the shovel’s metal parts. You can use a rust-resistant spray or wipe a thin layer of oil on the metal surface.
- Store in a dry area: Find a dry and cool area to store your shovel. Avoid places with high humidity or extreme temperature changes as they can accelerate corrosion. A garage or a shed with proper ventilation is an ideal storage location.
- Hang it vertically: To save space and prevent the shovel from getting damaged, hang it vertically on a wall or a pegboard. Make sure it is securely fastened to the wall or pegboard to avoid accidents.
- Keep it separate: Store the shovel away from other tools or sharp objects that can potentially damage it. You can use hooks or brackets to keep it separate from other items in your storage area.
- Monitor regularly: Periodically check your shovel for any signs of damage or wear. If you notice any issues, address them promptly to prevent further damage and ensure the shovel is in good working condition when you need it next.
By following these storing tips, you can maintain the quality of your shovel and ensure it remains a reliable tool for your gardening or landscaping needs.


