
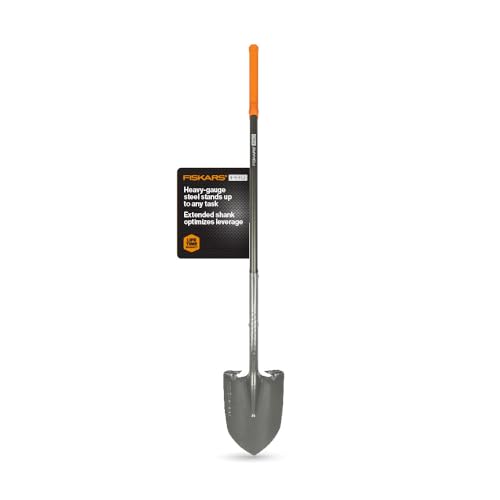
As gardening enthusiasts, we all know how important it is to have good quality tools, and one of the most essential tools in our arsenal is the garden shovel. However, after prolonged use, our trusty shovels can start to develop rust, which not only looks unsightly but can also affect their performance. But fear not, because in this article, we will guide you through the process of removing rust from your garden shovel and restoring it to its former glory.
Step 1: Safety First!
Before you begin removing rust from your garden shovel, it is essential to prioritize your safety. Make sure you are wearing protective gear, including gloves and goggles, to prevent any injuries during the process. Additionally, work in a well-ventilated area to avoid inhaling any harmful chemicals that may be used.
Step 2: Prepare the Shovel
The first step is to prepare the shovel for rust removal. Start by using a wire brush or steel wool to scrub off any loose rust or debris. Make sure to remove as much loose rust as possible before moving on to the next step. This will help ensure a smoother and more effective rust removal process.
Pro tip: If the rust is too stubborn, you can use a drill with a wire brush attachment to speed up the process. However, be careful not to apply too much pressure, as you may damage the shovel.
Step 3: Remove the Rust
Now it’s time to remove the remaining rust from the shovel. You can use various rust removal methods, such as using a rust dissolver solution, vinegar, or even lemon juice. Follow the instructions on the product packaging or combine vinegar or lemon juice with baking soda to create a paste-like consistency. Apply the solution or paste to the rusty areas of the shovel and let it sit for a few hours or overnight.
Pro tip: For tougher rust stains, you can wrap the rusty parts of the shovel with a soaked cloth or paper towel and leave it overnight. This will help intensify the rust removal process.
Step 4: Scrub and Rinse
After letting the rust removal solution or paste sit, use a brush or steel wool to scrub the rusty areas of the shovel. Apply gentle pressure and scrub in a circular motion to loosen the rust. Once you have removed the rust, rinse the shovel thoroughly with water to remove any remaining solution or paste.
Voila! You have successfully removed the rust from your garden shovel. Now, make sure to dry the shovel thoroughly to prevent any future rusting. Consider applying a rust-resistant coating or storing the shovel in a dry place to keep it in tip-top condition for your next gardening adventure!
Step-by-step guide on removing rust from garden shovel:
Removing rust from a garden shovel can help extend its lifespan and ensure it remains in good working condition. Follow these simple steps to effectively remove rust from your garden shovel:
- Prepare the necessary materials: Gather a wire brush, sandpaper or steel wool, a bucket of water, baking soda, and a rag or towel.
- Clean the shovel: Begin by wiping away any dirt, debris, or loose rust from the shovel using a dry cloth or brush. This will prevent further rusting during the process.
- Scrub the rusted areas: Use a wire brush to scrub the heavily rusted areas on the garden shovel. Apply moderate pressure and make sure to cover all rusted parts thoroughly.
- Remove loose rust: After scrubbing, use sandpaper or steel wool to remove any loose rust or remaining particles. Focus on stubborn spots and continue until the shovel’s surface feels mostly smooth.
- Create a rust-removing paste: In a small bowl, mix baking soda with a small amount of water to create a thick paste. The alkaline properties of baking soda help break down rust effectively.
- Apply the paste: Use a brush or your fingers to generously apply the baking soda paste onto the remaining rusted areas of the shovel. Make sure to cover the rusted spots evenly.
- Let it sit: Allow the baking soda paste to sit on the shovel for at least 30 minutes or longer if the rust is extensive. This will give the baking soda enough time to work its magic and loosen the rust.
- Scrub again: After the designated time, use the wire brush to scrub the shovel once more. This will help remove the loosened rust and any remaining paste.
- Clean and dry: Rinse the shovel with clean water to remove any leftover baking soda and rust particles. Dry the shovel thoroughly with a towel to prevent any moisture that may contribute to rusting.
- Apply a protective coating: To prevent future rusting, consider applying a thin layer of protective coating such as oil or rust-resistant paint on the clean, dry surface of the shovel.
By following these steps and taking proper care of your garden shovel, you can easily remove rust and keep it in excellent condition to assist you in your gardening tasks for years to come.
Prep your materials
Before you begin the process of removing rust from your garden shovel, it’s important to gather all the necessary materials. Here’s what you’ll need:
Materials:
- Garden shovel with rust
- Protective gloves
- Safety goggles
- Wire brush or steel wool
- Sandpaper (medium-grit and fine-grit)
- Vinegar or lemon juice
- Baking soda
- Water
- Bucket or container
- Rust converter or primer (optional)
- Paint (optional)
- Paintbrush (optional)
Preparation:
Once you have gathered all the necessary materials, you may want to take a few additional steps to prepare for the rust removal process:
- Find a well-ventilated area: It’s important to work in a well-ventilated area to avoid inhaling any potentially harmful fumes or dust. If possible, consider working outdoors or in a garage with the doors opened.
- Protect your work surface: Lay down a protective sheet or some old newspapers to catch any drips or debris that may come off during the rust removal process.
- Put on safety gear: To protect yourself from any potential harm, put on a pair of protective gloves and safety goggles.
Once you have prepped your materials and taken the necessary safety precautions, you are ready to begin the process of removing rust from your garden shovel.
Remove loose rust
Before tackling the more stubborn rust on your garden shovel, it’s important to remove any loose rust that may be present. This will help ensure a smoother and more effective cleaning process.
Tools you’ll need:
- Wire brush
- Steel wool
- Rag or cloth
Start by using a wire brush to scrub the shovel and loosen any loose rust flakes. Make sure to cover the entire surface of the shovel, paying extra attention to areas where rust may have built up.
After brushing off as much loose rust as possible, use steel wool to further remove any remaining rust particles. Gently scrub the surface of the shovel in circular motions, applying enough pressure to remove the rust but not damage the metal.
Once you’ve thoroughly scrubbed the shovel with steel wool, use a rag or cloth to wipe away any rust residue. This will ensure a clean surface for the next step in the rust removal process.
Treat and prevent rust
To keep your garden shovel in good condition and prevent rust from forming, there are several steps you can take:
|
1. Clean and dry: After each use, make sure to clean your garden shovel thoroughly. Use a wire brush or steel wool to remove any dirt or debris, paying extra attention to removing any rust spots. Once cleaned, ensure the shovel is completely dry before storing it to prevent moisture from causing rust. |
|
2. Apply a protective coating: Before storing your shovel, consider applying a protective coating to prevent rust. You can use a rust-inhibiting spray, such as WD-40, or apply a thin layer of oil or wax. This will help to create a barrier between the metal and moisture, reducing the risk of rust formation. |
|
3. Store properly: In addition to cleaning and applying a protective coating, storing your garden shovel properly is crucial in preventing rust. Keep the shovel in a dry and well-ventilated area, away from any sources of moisture. It is also a good idea to hang the shovel or store it on a rack to avoid it coming into contact with other metal tools, which could accelerate rust formation. |
|
4. Regular maintenance: Make it a habit to inspect your garden shovel regularly for any signs of rust. If you notice any small spots, use sandpaper or a wire brush to remove them immediately and apply a rust-inhibiting spray or oil. Regularly check the handle for any signs of damage or cracks and replace if necessary. |
|
5. Keep the shovel sharp: Sharp blades on your garden shovel are less likely to get damaged and accumulate rust. Regularly sharpen the blade using a file or grinder to maintain its effectiveness and decrease the risk of rust formation. |
By following these steps, you can effectively treat and prevent rust on your garden shovel, ensuring its longevity and usability for years to come.


