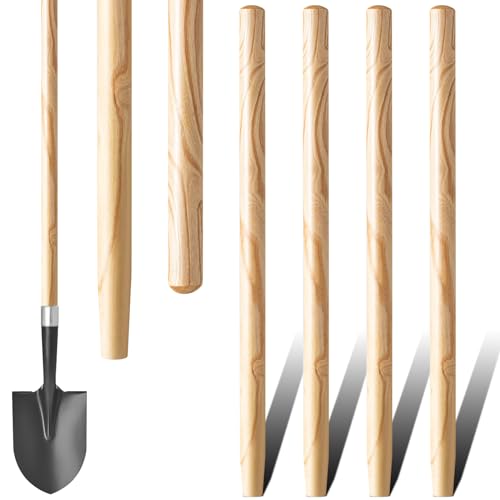


When it comes to maintaining your garden tools, one of the most common repairs you may need to make is replacing a curved shovel handle. Over time, the wooden handle of your shovel can get worn out, cracked, or even break completely. Fortunately, replacing the handle is a relatively simple process that can be done with just a few tools and a little bit of time.
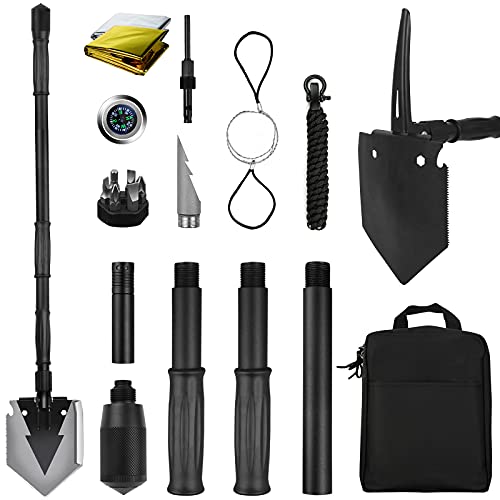
To begin, you’ll need to gather a few supplies. First and foremost, you’ll need a new curved shovel handle. These can usually be found at your local garden center or home improvement store. You’ll also need a hammer, a screwdriver, and some sandpaper. Additionally, it may be helpful to have a vice or clamps to secure the shovel while you work.
Once you have your supplies ready, you can start by removing the old handle. This is typically done by unscrewing the screws or bolts that hold the handle in place. If the screws are too tight or rusted, you may need to use a penetrating oil to loosen them. Once the screws are removed, carefully lift the old handle out of the shovel head.

With the old handle removed, it’s time to prepare the new handle. Use sandpaper to smooth out any rough edges or splinters on the handle. This will make it easier and more comfortable to use. Once the handle is smooth, you can attach it to the shovel head. Align the holes in the handle with the holes in the shovel head, then insert the screws or bolts and tighten them securely. Make sure the handle is straight and secure before moving on.
Finally, give your newly replaced shovel handle a test run. Take it out to the garden and use it to dig a small hole or move some soil. If everything feels sturdy and comfortable, you’re good to go! If not, double-check that the handle is tightened properly or consider consulting a professional for assistance.
Replacing a curved shovel handle is a necessary maintenance task that can extend the life of your tool and ensure that it remains functional for years to come. With just a few simple steps, you can replace the handle yourself and get back to work in no time.
Step-by-Step Guide on Replacing a Curved Shovel Handle
Curved shovel handles can become worn or damaged over time, making it necessary to replace them. With the right tools and a bit of patience, you can easily replace a curved shovel handle and get your shovel back in working order. Follow these step-by-step instructions to learn how.
Step 1: Gather the necessary tools and materials
Before you begin, make sure you have all the tools and materials you’ll need for the job. This includes a new curved shovel handle, a screwdriver or wrench, sandpaper, epoxy adhesive, a mallet or hammer, drill with a bit, and a measuring tape.
Step 2: Remove the old handle
Start by removing the old handle from the shovel head. Depending on the type of shovel, the handle may be held in place with screws, bolts, or rivets. Use a screwdriver or wrench to loosen and remove any fasteners. Once the fasteners are removed, pull the handle out of the shovel head.
Step 3: Prepare the new handle
Measure the length of the old handle and use a measuring tape to mark the same length on the new handle. Use a saw to carefully cut the new handle to the desired length. Smooth out any rough edges with sandpaper.
Step 4: Attach the new handle
Apply epoxy adhesive to the end of the new handle and insert it into the shovel head. Make sure the handle is aligned properly and fully inserted. Use a mallet or hammer to gently tap the handle into place if necessary.
Step 5: Secure the new handle
Depending on the type of shovel, you may need to secure the new handle with screws, bolts, or rivets. Drill holes in the shovel head if necessary, then use the appropriate fasteners to secure the handle in place. Tighten the fasteners with a screwdriver or wrench until they are secure.
Step 6: Test the new handle
Once the new handle is securely in place, give it a test by using the shovel. Make sure the handle feels comfortable and secure. If everything feels good, you’re done!
Replacing a curved shovel handle is a straightforward process that can be done with a few basic tools. By following these step-by-step instructions, you’ll have your shovel back in working condition in no time.
Assessing the Condition
Before replacing a curved shovel handle, it is important to assess the condition of the current handle to determine if replacement is necessary. Here are a few steps to follow:
Step 1: Inspect the Handle
Take a close look at the handle to identify any cracks, splits, or signs of damage. Check both the top and bottom of the handle, as well as the area where it connects to the shovel blade. Make sure to also examine the grip area for any wear or tear.
Step 2: Evaluate the Flexibility
Hold the shovel handle firmly and try flexing it to test its strength and flexibility. A sturdy handle should be able to withstand some bending without breaking or snapping. If the handle feels weak or has excessive flexibility, it may be time for a replacement.
Note: While some flexibility in a shovel handle is normal, it should not be overly stiff or too loose. A balanced amount of flexibility allows for effective digging while maintaining durability.
Step 3: Consider the Age and Usage
Take into account how long you have been using the shovel handle and the frequency of its use. Over time, even a well-maintained handle may wear out or become weakened. If you have been using the shovel for an extended period or if it has been subjected to heavy use, replacement might be necessary.
It is crucial to ensure a sturdy and reliable handle for safe and efficient digging. If any doubts arise about the condition of the curved shovel handle, it is best to err on the side of caution and replace it.
Gathering the Necessary Materials
Replacing a curved shovel handle requires a few tools and materials to ensure a smooth and successful replacement. Before getting started, gather the following:
1. Replacement Handle
The first item you’ll need is a replacement handle for your curved shovel. Measure the length and diameter of your current handle to ensure you purchase the correct size. Replacement handles can typically be found at hardware stores or purchased online.
2. Screwdriver or Drill
You’ll also need a screwdriver or drill to remove the screws or bolts that secure the old handle to the shovel head. The type of fasteners used may vary, so ensure you have the appropriate tool handy.
Additionally, you may need a hammer or mallet to tap the handle out of the shovel head if it’s stuck or difficult to remove.
It’s a good idea to have a few different sizes of screwdrivers or drill bits available, as the size of the fasteners can vary depending on the manufacturer and model of your shovel.
By gathering all the necessary materials before beginning the replacement process, you’ll have everything you need at hand and avoid any frustrating delays or interruptions.
Removing the Old Shovel Handle
Before you can replace a curved shovel handle, you’ll need to remove the old one. Here’s a step-by-step guide to help you get started:
Gather the Necessary Tools
Before you begin, gather the following tools:
- A hammer
- A screwdriver
- A pair of pliers
- A saw (if necessary)
Prepare the Shovel
Make sure the shovel is clean and free of any debris. This will make it easier to work on.
Locate the Fasteners
Inspect the shovel handle and identify the fasteners that are holding it in place. These may be screws, bolts, or nails.
Remove the Fasteners
Using the appropriate tool (hammer, screwdriver, or pliers), carefully remove the fasteners that are securing the handle. If the fasteners are rusty or stubborn, apply some penetrating oil to loosen them.
Detach the Handle
Once the fasteners are removed, gently wiggle and twist the handle to detach it from the shovel head. If the handle is still stuck, you may need to use a saw to cut it off.
With the old handle now removed, you’re ready to proceed with installing the new curved shovel handle. Refer to the next section for step-by-step instructions on how to do so.
Preparing the Replacement Handle
Before you begin replacing the curved shovel handle, you’ll need to prepare the replacement handle. Follow these steps to ensure a smooth replacement process:
Gather the Necessary Tools
Start by gathering the tools you’ll need for the replacement. These may include a saw, sandpaper, a drill, a hammer, and screws. Make sure you have all the necessary tools on hand before proceeding.
Measure and Cut the Replacement Handle
Measure the length of the old shovel handle that needs to be replaced. Use a saw to cut the replacement handle to the same length as the original handle. It’s important to get the measurements and cut accurately to ensure a proper fit.
Tip: If the replacement handle is longer than the original, you may need to trim it down to size using a saw.
Note: Some replacement handles may come pre-cut to standard sizes. If this is the case, skip the measuring and cutting step.
Sand the Replacement Handle
After cutting the replacement handle, use sandpaper to smooth out any rough edges or splinters. Sand the entire surface of the handle to ensure a comfortable grip and prevent any potential injuries.
Caution: Be careful while sanding to avoid scratching or damaging the replacement handle.
Once you have prepared the replacement handle, you are ready to begin the process of replacing the curved shovel handle.
Attaching the New Handle to the Shovel
Once you have removed the old handle from your curved shovel, it’s time to attach the new handle. Follow these steps:
- Inspect the new handle to ensure it is the correct size and fits snugly into the shovel’s socket.
- If necessary, sand the end of the handle to smooth any rough edges or imperfections.
- Apply a thin layer of wood glue to the end of the handle.
- Insert the handle into the socket of the shovel, ensuring that it is aligned properly.
- Use a rubber mallet or a hammer with a block of wood to gently tap the handle into place.
- Continue tapping until the handle is firmly secured in the socket, ensuring it is straight.
- Wipe off any excess glue that may have squeezed out during the process.
- Allow the glue to dry completely before using the shovel.
If you prefer additional reinforcement, you can also use screws or nails to secure the handle to the shovel. Simply drill holes through the shovel socket and into the handle, then insert the screws or nails and tighten them.
Remember, properly attaching the new handle is essential for ensuring the durability and functionality of your curved shovel. Take your time and double-check your work to ensure it is secure and sturdy.
| Tips: |
|