
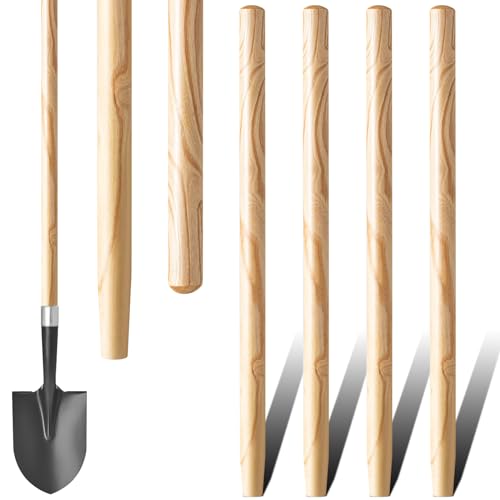


If the handle of your shovel has become loose or broken, it may be necessary to replace the rivet that holds it in place. Replacing a shovel handle rivet can be a simple DIY repair that will extend the life of your tool. This guide will walk you through the steps to replace a shovel handle rivet and have your shovel ready for use again in no time.
Step 1: Assess the Damage
Before you begin the repair, carefully examine the handle and the rivet to determine the extent of the damage. Look for any cracks or breaks in the handle, as well as any signs of wear or corrosion on the rivet. If the handle is severely damaged, it may be necessary to replace the entire handle rather than just the rivet.
Note: It is recommended to wear gloves and protective eyewear during this repair to prevent any injury.
Step 2: Remove the Old Rivet

To remove the old rivet, use a drill with a bit that is slightly larger than the diameter of the rivet. Place the drill bit on the center of the rivet and slowly drill through it. Be careful not to drill too deep as you don’t want to damage the handle. Once the rivet has been drilled out, you can easily remove it by pulling it out with pliers or tapping it out with a small hammer.
Step 3: Install the New Rivet
With the old rivet removed, it’s time to install the new one. Start by inserting the new rivet into the hole on the shovel handle. Line up the rivet with the existing holes on the shovel blade, making sure it fits snugly. Use a hammer to tap the rivet into place, making sure it is secure and tight.
Pro Tip: If the rivet is too long, you can trim it down using a hacksaw or wire cutters. Just make sure to leave enough length to create a secure connection.
Step 4: Test the Repair
Once the new rivet is in place, give the shovel a few test swings to ensure that the handle is secure. If you notice any movement or loosening, double-check the tightness of the rivet. If necessary, tap it further into place or consider using a larger rivet for a more secure fit.
Remember, maintaining your tools is essential for their longevity, and replacing a shovel handle rivet is a simple repair that can save you money in the long run. By following these steps, you’ll have your shovel back in working order and ready for your next gardening or landscaping project.
Choosing the Right Replacement Rivet
When it comes to replacing a shovel handle rivet, it is important to choose the right type and size of rivet for the job. The right replacement rivet will ensure a secure and durable handle attachment, allowing you to continue using your shovel with confidence. Here are some factors to consider when choosing the right replacement rivet:
1. Material
The material of the rivet plays a crucial role in its strength and durability. Common materials used for shovel handle rivets include steel, aluminum, and brass. Steel rivets are the strongest but may be prone to rusting. Aluminum rivets are lightweight and corrosion-resistant, making them a popular choice. Brass rivets offer good strength and corrosion resistance, but they may not be as strong as steel rivets.
2. Size
The size of the replacement rivet should match the size of the original rivet that needs to be replaced. It is important to accurately measure the diameter and length of the existing rivet to ensure a proper fit. Using a rivet that is too small may result in a loose handle, while using a rivet that is too large may cause damage to the handle or create difficulty in installation.
3. Head Type
The head type of the replacement rivet determines how it will be secured. Common head types include countersunk, round, and flat. Countersunk rivets have a tapered head that sits flush with the surface, providing a smooth finish. Round and flat head rivets protrude slightly, making them easier to grip and remove if necessary. Consider the aesthetic and functional requirements of your shovel handle when choosing the right head type.
Before purchasing a replacement rivet, be sure to consult the manufacturer’s guidelines or contact a local hardware store for expert advice. Taking the time to choose the right replacement rivet will ensure a successful handle replacement and prolong the lifespan of your shovel.
What to Consider
When replacing a shovel handle rivet, there are a few important factors to consider:
1. Size and material: Ensure that the replacement rivet is the correct size and made from a durable material, such as stainless steel or brass, to withstand the pressure and stress of digging.
2. Compatibility: Make sure the replacement rivet is compatible with your shovel handle. Check the manufacturer’s specifications or consult a hardware expert for guidance.
3. Tools: Gather the necessary tools for the job, including a hammer, pliers, and a drill. These will be used to remove the old rivet and install the new one.
4. Safety precautions: Always wear protective gloves and eyewear when working with tools to prevent injury. Take care when using the drill or hammer to avoid damaging the shovel handle.
5. Skill level: Assess your own skill level and consider whether you are comfortable undertaking this task. If you are unsure, it is best to seek professional assistance.
By taking these considerations into account, you can successfully replace a shovel handle rivet and restore the functionality of your shovel.
Gathering the Necessary Tools
Before you begin replacing the shovel handle rivet, make sure you have all the necessary tools on hand. Having the right tools will make the process much easier and ensure a successful repair.
Here is a list of tools you will need:
| 1. | Hammer |
| 2. | Punch |
| 3. | Drill |
| 4. | Drill bits |
| 5. | Rivet gun |
| 6. | Rivets |
| 7. | Wrench |
| 8. | Screwdriver |
| 9. | Pliers |
Make sure all the tools are in good working condition and properly sized for the job at hand. It is also a good idea to gather any additional safety equipment, such as gloves and safety glasses, to protect yourself during the repair process.
What You’ll Need
To replace a shovel handle rivet, you will need the following tools and materials:
| Replacement shovel handle |
| Rivet removal tool |
| Hammer |
| Drill |
| Drill bit (matching the size of the rivet) |
| Rivet (matching the size of the original) |
| Vise grips or pliers |
| File or sandpaper |
| Measuring tape or ruler |
| Marker or pencil |
Having these tools and materials ready will ensure that you can efficiently replace the shovel handle rivet and get your shovel back in working condition.
Removing the Old Rivet
Before you can replace the shovel handle rivet, you first need to remove the old one. This process can be done using a few simple tools:
Tools Needed:
- Hammer
- Center punch
- Drill with a metal drill bit
- Pliers or vice grips
Step 1: Hold the shovel securely in place, either by clamping it in a vice or by having someone hold it steady for you.
Step 2: Using the center punch and hammer, create a small indentation in the center of the rivet head. This will help guide the drill bit and prevent it from slipping.
Step 3: Choose a metal drill bit slightly smaller than the diameter of the rivet. Insert the drill bit into the drill.
Step 4: Position the drill bit onto the indentation made in Step 2, and slowly start drilling into the rivet. Apply even pressure and do not force the drill bit, as this could cause the bit to break or the rivet to become stuck.
Step 5: Continue drilling until the head of the rivet is completely gone. Make sure to keep the drill bit centered on the rivet to avoid damaging the surrounding area.
Step 6: Once the head of the rivet is removed, turn the shovel over and use pliers or vice grips to grip onto the remaining rivet shaft. Gradually twist and pull until the rivet is completely removed.
Now that the old rivet has been removed, you are ready to install a new one and replace the shovel handle.
Step-by-Step Guide
Replacing a shovel handle rivet may seem like a daunting task, but with the right tools and a little patience, it can be done. Follow these steps to successfully replace a shovel handle rivet:
1. Gather the necessary tools
Before starting the process, make sure you have all the tools you’ll need. These include:
- A replacement shovel handle rivet
- A drill with a drill bit slightly larger than the existing rivet
- A hammer
- A wrench or pliers
- A file or sandpaper
2. Remove the old rivet
Start by removing the old rivet from the shovel handle. Use a drill with the appropriate-sized drill bit to carefully drill out the center of the rivet. Be careful not to drill too deeply or go off-center.
3. Insert the new rivet
Once the old rivet has been removed, insert the new rivet through the existing hole in the shovel handle. Make sure it is aligned properly and secure it in place with a hammer.
4. Secure the rivet
Using a wrench or pliers, bend the end of the rivet to create a secure hold. Ensure that the rivet is tight and will not come loose during use.
5. Smooth the edges
Using a file or sandpaper, smooth down any rough edges on the rivet to prevent any injury during use. Pay close attention to the area around the handle to ensure a comfortable grip.
Following these steps will allow you to easily replace a shovel handle rivet and continue using your shovel without any issues. Remember to always prioritize your safety and take your time to ensure a proper replacement.
Installing the New Rivet
Once you have removed the old rivet, it is time to install the new one. Here are the steps to follow:
- Prepare the new rivet: Ensure that the new rivet is suitable for your shovel handle. It should be of the correct size and made of a durable material like steel or aluminum.
- Insert the rivet: Insert one end of the rivet into the hole in the shovel handle. Make sure it fits snugly.
- Secure the rivet: Use a rivet tool or a solid metal rod to flatten the other end of the rivet. Strike the end firmly with a hammer to create a secure connection.
- Check the rivet: After securing the rivet, check to ensure that it is tightly fastened. Gently tug on the handle to ensure that the rivet does not come loose.
- Test the shovel: Give the shovel handle a few test swings to verify that the new rivet is holding up well and that the handle feels secure.
By following these steps, you will be able to successfully install the new rivet and replace the handle of your shovel.


