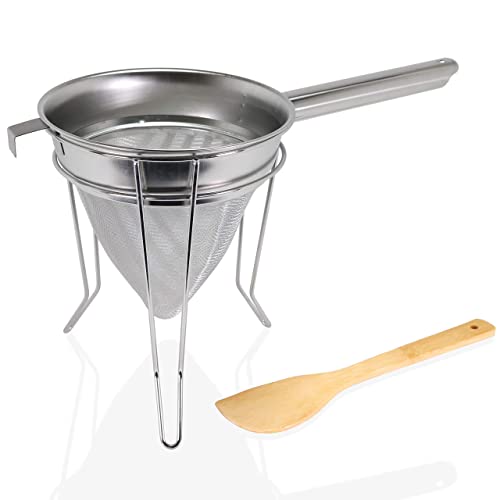
When it comes to cooking, a kitchen sieve is an essential tool that helps you achieve smooth and lump-free sauces, soups, and batters. However, after repeated use, it can become clogged with food particles, making it less effective. Cleaning your kitchen sieve regularly is crucial to maintain its functionality and ensure hygienic cooking processes.
Here are some simple steps to help you clean your kitchen sieve:
Step 1: Rinse off excess particles: Start by rinsing the sieve under warm running water to remove any large food particles stuck in the mesh. Gently tap the sieve against the sink or use your fingers to dislodge any stubborn bits.
Step 2: Soak in soapy water: Fill a basin or sink with warm water and add a few drops of dish soap or your preferred cleaning agent. Submerge the kitchen sieve in the soapy water and let it soak for about 10-15 minutes. This will help loosen any remaining food particles.
Step 3: Scrub with a brush: After soaking, use a soft brush or sponge to scrub the sieve gently. Pay close attention to the mesh and ensure all areas are thoroughly scrubbed. Be careful not to use abrasive materials or scrub too vigorously, as this can damage the mesh.
Step 4: Rinse and dry: Once you’re satisfied with the cleanliness, rinse the sieve under running water to remove any soap residue. Shake off excess water and tap the sieve against the sink to remove excess moisture. Finally, let it air dry completely before storing it away.
Regularly cleaning your kitchen sieve will not only prolong its lifespan but also prevent cross-contamination and maintain the integrity of your cooked dishes. It’s a simple task that goes a long way in ensuring a clean and healthy cooking environment in your kitchen.
Reasons to clean a kitchen sieve
A kitchen sieve is a widely used tool that helps separate solids from liquids. Over time, the sieve can accumulate residue, food particles, and other debris, which may affect its function and efficiency. It is important to clean the kitchen sieve regularly to keep it in good condition and ensure optimal performance.
Here are a few reasons why cleaning a kitchen sieve is essential:
| 1. Hygiene: | Regularly cleaning the kitchen sieve helps maintain proper hygiene in the kitchen. Food residue stuck in the sieve can attract bacteria, mold, and other microorganisms, which can contaminate food. By cleaning the sieve, you can eliminate these potential health hazards. |
| 2. Efficiency: | As the sieve gets dirty, its mesh or holes can become clogged, making it difficult for liquids to pass through. Cleaning the sieve removes the debris and allows it to function properly, ensuring that you get the desired consistency and texture when straining liquids. |
| 3. Durability: | A clean sieve is less likely to deteriorate or get damaged over time. Food particles and residue can build up and cause the sieve’s materials to degrade or corrode. Regular cleaning helps extend the lifespan of the kitchen sieve, saving you the cost of frequent replacements. |
| 4. Taste and appearance: | A dirty sieve can leave behind unwanted flavors and textures in strained liquids and foods. Cleaning the sieve ensures that there are no residual flavors or particles that can alter the taste and appearance of your dishes. It helps you achieve the desired results and enhances the overall dining experience. |
In conclusion, regular cleaning of a kitchen sieve is important for maintaining hygiene, ensuring efficiency, prolonging durability, and enhancing the taste and appearance of strained liquids and foods. By incorporating this simple task into your kitchen routine, you can enjoy the benefits of a clean and well-functioning sieve.
Tools needed for cleaning a kitchen sieve
When it comes to cleaning a kitchen sieve, having the right tools can make the task much easier and more efficient. Here are some essential tools you will need:
1. Dish soap
Dish soap is an essential tool for cleaning a kitchen sieve. It helps to remove grease, oil, and other residues that may have accumulated on the sieve. Choose a mild dish soap that is gentle on your hands and is effective in removing grime.
2. Scrub brush
A scrub brush with stiff bristles is ideal for deep cleaning a kitchen sieve. The bristles help to loosen and remove stubborn food particles and stains. Look for a brush with a comfortable handle that allows you to easily grip and scrub the sieve without causing any strain on your hands.
3. Toothbrush
A toothbrush can be handy for cleaning hard-to-reach areas of the kitchen sieve, such as the corners or the mesh. Look for a toothbrush with soft bristles that won’t scratch or damage the sieve’s surface. The compact size of a toothbrush makes it perfect for detailed cleaning tasks.
4. Vinegar or lemon juice
Vinegar or lemon juice can be used as natural cleaning agents to help remove stubborn stains or odors from a kitchen sieve. Simply soak the sieve in a mixture of equal parts vinegar or lemon juice and water for a few hours, then scrub it with a brush to remove any remaining residue.
5. Water spray or faucet
A water spray bottle or a sink faucet with a strong water flow can be useful for rinsing off the sieve after cleaning. Make sure to thoroughly rinse the sieve to remove any soap or cleaning solution residue, as it can affect the taste and quality of your food if not properly rinsed.
6. Drying rack or towel
After cleaning and rinsing, allow the kitchen sieve to air dry on a clean drying rack or use a soft towel to gently pat it dry. Avoid using abrasive materials to dry the sieve as it can damage the delicate mesh. Ensure that the sieve is completely dry before storing it to prevent mold and mildew growth.
With these essential tools in hand, you are ready to tackle the task of cleaning your kitchen sieve and keep it in top condition for optimal use in your cooking adventures.
Step-by-step guide to cleaning a kitchen sieve
A kitchen sieve is an essential tool for straining and sifting ingredients. Over time, it can become clogged with debris and residue, affecting its efficiency. Cleaning your sieve regularly will not only improve its performance but also prolong its lifespan. Follow these simple steps to clean your kitchen sieve effectively:
Step 1: Remove any leftover food
Before cleaning your kitchen sieve, it is important to remove any leftover food or particles. Tap the sieve gently against the sink or a trash bin to dislodge any debris. You can also use a soft brush or your fingers to remove stubborn particles.
Step 2: Rinse with warm water
Once you have removed the majority of the food, rinse the sieve with warm water to remove any remaining residue. Hold the sieve under a running tap or submerge it in a basin of warm water. Use your fingers to rub the sieve and help loosen any stuck-on particles.
Step 3: Soak in a cleaning solution
If your kitchen sieve has stubborn stains or grease, you can soak it in a cleaning solution to help break down the dirt. Fill a basin or a sink with warm water and add a small amount of dish soap or mild cleaning agent. Place the sieve in the solution and let it soak for about 15-30 minutes.
Step 4: Scrub gently
After soaking, take a soft brush or sponge and gently scrub the sieve to remove any remaining dirt or stains. Pay attention to the mesh, making sure to clean both the interior and exterior. Avoid using abrasive materials that can damage the sieve.
Step 5: Rinse thoroughly
After scrubbing, rinse the sieve thoroughly with warm water to remove any soap residue or cleaning solution. Hold it under the tap or submerge it in a basin of clean water and use your fingers to ensure all traces of dirt and cleaning products are gone.
Step 6: Let it dry
Lastly, allow your kitchen sieve to air dry completely before putting it away. Place it in a well-ventilated area or use a clean towel to pat it dry. Ensure that there is no moisture left before storing to prevent mold or mildew growth.
Cleaning your kitchen sieve regularly will keep it in optimal condition and ensure its longevity. By following these step-by-step instructions, you can easily maintain a clean and efficient kitchen sieve, ready for all your straining and sifting needs.
Tips for maintaining a clean kitchen sieve
Keeping your kitchen sieve clean is essential for ensuring that your food is free from any impurities. Here are some handy tips to help you maintain a clean and hygienic sieve:
1. Wash it immediately after use: After using your sieve, always rinse it under warm water to remove any food particles. Avoid leaving it unwashed as this can lead to the build-up of residue, making it harder to clean.
2. Use a soft brush: For stubborn stains or trapped debris, use a soft brush or sponge to gently scrub the sieve. Avoid using harsh abrasives or steel wool as they can damage the surface of the sieve.
3. Soak in soapy water: For tough stains or odors, soaking the sieve in warm soapy water can help loosen the particles and make them easier to remove. Leave it to soak for 10-15 minutes before rinsing.
4. Dry it properly: After washing, ensure that the sieve is fully dry before storing it. Excess moisture can promote the growth of bacteria or cause rusting. You can air-dry it or use a clean cloth to pat it dry.
5. Regular deep cleaning: Occasionally, give your sieve a deep clean by boiling it in a pot of water with a small amount of vinegar for about 10 minutes. This will help remove any stubborn stains or lingering odors.
6. Store it properly: To prevent damage and maintain its cleanliness, store your sieve in a dry and well-ventilated area. Consider placing it in a drawer or a cabinet away from other utensils to avoid contact and potential contamination.
By following these tips, you can ensure that your kitchen sieve remains clean, functional, and safe to use for all your cooking and baking needs.