

Are you tired of using store-bought sieves that don’t quite fit your needs? Why not make your own homemade sieve that is tailored to your specifications? Making a sieve at home is easier than you might think, and it can be a fun and rewarding DIY project.
A sieve is a versatile tool used for filtering and separating different materials, such as flour, powdered sugar, or soil. Whether you are a passionate baker, a DIY enthusiast, or a gardener, having a sieve that meets your specific requirements can make a world of difference in your projects.
To make a homemade sieve, you don’t need any fancy tools or materials. In fact, you can create a functional sieve using items you probably already have lying around the house. This not only saves you money but also allows you to exercise your creativity and resourcefulness.
So, if you’re ready to take your sieving game to the next level, follow our step-by-step guide on how to make a homemade sieve. We’ll show you how to create a sturdy frame, choose the right mesh size, and assemble everything together. Get ready to elevate your sieving experience and achieve professional results!
Steps to Create a Homemade Sieve for Your Kitchen
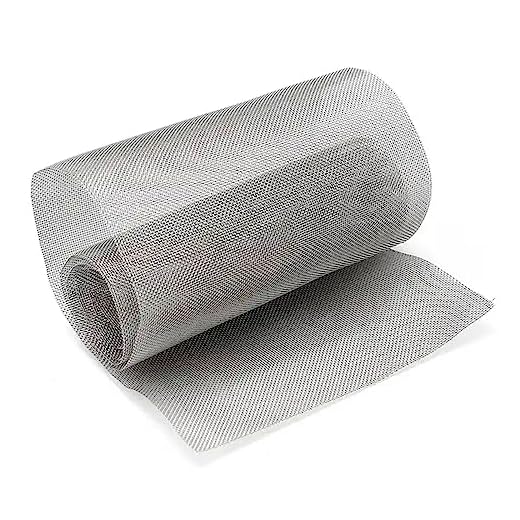
Step 1: Gather the necessary materials. You will need a fine-mesh wire screen, a wooden hoop or an old embroidery hoop, a drill with a small drill bit, pliers, sandpaper, and a strong adhesive.
Step 2: Begin by preparing your wooden hoop. If you are using an old embroidery hoop, remove the inner hoop and discard it. Sand the wooden hoop to smooth out any rough edges.
Step 3: Measure the diameter of your hoop and cut a piece of fine-mesh wire screen that will fit snugly inside. Use the pliers to trim the wire screen to the correct size.
Step 4: Use the drill to create small holes around the inner circumference of the wooden hoop. These holes will allow you to attach the wire screen to the hoop.
Step 5: Apply a small amount of adhesive to the inner rim of the wooden hoop. Press the wire screen onto the adhesive, making sure it is centered and taut. Allow the adhesive to dry completely.
Step 6: Once the adhesive has dried, use the pliers to bend the excess wire screen over the edges of the hoop. This will ensure that the wire screen is securely held in place.
Step 7: Give your homemade sieve a final inspection, ensuring that the wire screen is securely attached and there are no sharp edges. If necessary, use the pliers to trim or smooth out any rough areas.
Step 8: Your homemade sieve is now ready to be used! Place it over a bowl or container, and pour any liquid or ingredient that needs straining. The fine-mesh wire screen will effectively filter out unwanted particles, leaving you with a smooth and clean liquid or ingredient.
Note: Ensure that you clean your homemade sieve thoroughly after each use to maintain its effectiveness and longevity.
Step 1: Gather the Necessary Materials
To create a homemade sieve, you will need a few materials that can be easily found in your home or local hardware store:
1. Mesh Material: Look for a sturdy material that has a fine mesh or screen, such as wire mesh, window screen, or cheesecloth. This will be the main component of your sieve that will help strain and separate solids from liquids.
2. Frame: You will also need a frame to hold the mesh material in place. This can be made from various materials, such as wood, plastic, or metal. Ensure that the frame is sturdy enough to support the weight of the material and the items being strained.
3. Scissors or Utility Knife: You will need a pair of scissors or a utility knife to cut the mesh material to the desired size and shape. Make sure to use caution and follow proper safety guidelines when handling sharp objects.
4. Staple Gun or Adhesive: A staple gun or adhesive can be used to secure the mesh material onto the frame. If using a staple gun, make sure you have staples that are appropriate for the material you are working with. If using adhesive, choose a strong adhesive that will withstand repeated use.
5. Optional: Reinforcement Materials: Depending on the materials you are using, you may want to reinforce the edges of your sieve for added durability. This can be done with materials such as tape, binding, or additional framing materials.
Once you have gathered all the necessary materials, you are ready to move on to the next step of creating your homemade sieve.
Step 2: Prepare the Base for Your Sieve
Once you have gathered all the necessary materials, it’s time to prepare the base for your homemade sieve. This is the part where the actual filtering will take place, so it’s important to ensure that it is stable and sturdy.
First, take your wooden or plastic hoop and lay it flat on a table or work surface. This will serve as the frame for your sieve. Make sure that it is clean and free from any dirt or debris.
Next, measure the size of your chosen mesh material and cut it to fit the hoop. You will want to leave a little bit of extra material on each side to ensure that it can be securely attached to the frame.
Once you have cut the mesh material, carefully attach it to the hoop using staple gun or small nails. Make sure that it is pulled taut and securely fastened all the way around. This will ensure that no particles will escape through the sides of the sieve.
Lastly, check the stability of your base by gently shaking or tapping it. If it feels wobbly or unstable, reinforce it by adding additional nails or staples as needed.
Your base is now ready for the next step in the process, which is adding the handle and finishing touches to your homemade sieve.
Step 3: Create the Mesh for Your Sieve
Once you have gathered all the necessary materials, you are ready to create the mesh for your homemade sieve. The mesh is an essential component that will allow you to strain and separate solids from liquids or fine particles from larger ones.
Materials Needed:
- Wire or nylon screening
- Scissors
- Measuring tape
- Marker
To begin, measure the diameter of your sieve’s frame using a measuring tape. Take note of this measurement as it will determine the size of the mesh you need to create.
Next, lay out the wire or nylon screening on a flat surface and use your measuring tape to mark out a square or circular shape that is slightly larger than your sieve’s frame. This will give you enough material to secure the mesh to the frame.
Once you have marked out the shape, use a pair of scissors to carefully cut along the lines, ensuring that you have a neatly-shaped piece of mesh.
Now, take the mesh and place it over the top of your sieve’s frame. Make sure that the edges of the mesh extend past the frame by at least an inch.
Using a marker, make small dots along the edges of the mesh where it overlaps with the frame. These dots will serve as your reference points for attaching the mesh to the frame.
Finally, remove the mesh from the frame and, using a hot glue gun or some strong adhesive, secure the mesh to the frame by applying glue to the marked dots. Press the mesh firmly onto the frame, making sure it is securely attached.
Allow the glue to dry completely before moving on to the next step of creating your homemade sieve. Once dry, your mesh should be firmly attached to the frame, creating a fine, sturdy sieve that is ready for use.
Note:
If you are using wire screening, you may need to use pliers to bend and shape the edges of the mesh around the frame for a secure fit. Also, be cautious when handling scissors and hot glue to avoid any injuries.
Now that you have successfully created the mesh for your sieve, you are ready to move on to the next step of the process: constructing the frame.
Step 4: Assemble and Test Your Homemade Sieve
Once you have gathered all the necessary materials and created your sieve frame, it’s time to assemble and test your homemade sieve. Follow these steps:
1. Attach the mesh to the frame:
Take your mesh material, such as nylon or wire mesh, and lay it over the frame. Use a stapler or small nails to secure the mesh to the frame, making sure it is stretched tightly and evenly.
2. Trim off any excess mesh:
If there is any excess mesh hanging over the edges of the frame, use scissors or a utility knife to carefully trim it off. Make sure to leave a little bit of extra mesh on each side to ensure a secure attachment.
3. Reinforce the attachment:
To ensure that the mesh stays securely attached to the frame, reinforce the stapled or nailed areas with clear tape or a strong adhesive. This will help prevent the mesh from becoming loose or detached during use.
4. Test your homemade sieve:
Fill a container with the material you want to sieve, such as soil or gravel. Place your homemade sieve over another container or a sheet of newspaper, and pour the material onto the mesh. Gently shake the sieve from side to side, allowing the smaller particles to pass through the mesh and collect in the container below.
Note: Depending on the size and consistency of the material you are sieving, you may need to adjust the size of the mesh or the shaking intensity to achieve the desired results.
Congratulations, you have successfully assembled and tested your homemade sieve! Now you can use it for various tasks such as sifting dirt, separating small rocks from sand, or filtering particles from liquids.


