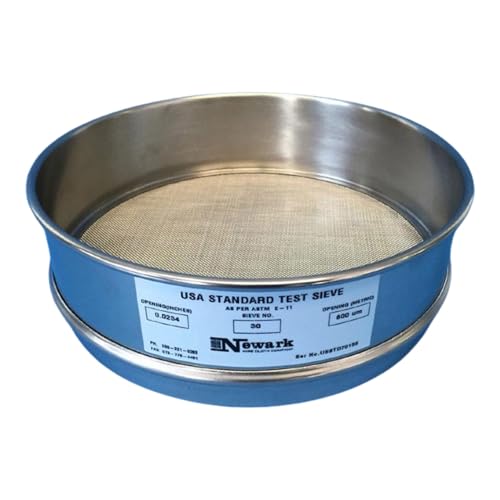
If you are a gardening enthusiast, you know how important it is to have the right tools to maintain and improve your garden. One such tool that can be very useful is a garden sieve. A sieve is commonly used to separate debris and larger particles from soil or compost. It helps to create a finer and more even texture, allowing better drainage and aeration for your plants.
Making your own garden sieve can be a fun and rewarding DIY project, and it doesn’t have to be complicated or expensive. In fact, with just a few materials and some basic tools, you can create a large garden sieve that will be perfect for your gardening needs.
To make a large garden sieve, you will need the following materials: a wooden frame, wire mesh or hardware cloth, screws or nails, a saw, a drill, and a staple gun. The size of the frame will depend on how big you want your sieve to be. You can use any type of wood for the frame, but hardwood or pressure-treated lumber would be the most durable choices.
Start by measuring and cutting the pieces of wood for the frame. You will need four pieces for the sides and four pieces for the corners. Use a saw to make clean and straight cuts. Then, assemble the frame by screwing or nailing the pieces together. Make sure the corners are square and the frame is sturdy.
Next, you will need to attach the wire mesh or hardware cloth to the frame. Measure the size of the frame and cut the mesh slightly larger to allow for overlapping. Use a staple gun to secure the mesh to the frame, starting from one side and working your way around. Make sure the mesh is taut and evenly stretched. Trim any excess mesh with a pair of wire cutters.
Your large garden sieve is now ready to use! Simply place it over a wheelbarrow or a large container, and pour soil or compost onto the mesh. Gently shake or tap the sieve to sift the material, allowing fine particles to fall through the mesh while larger debris gets separated. This will result in a high-quality soil or compost that is perfect for your plants.
Step-by-step guide to creating a homemade garden sieve
Creating your own garden sieve is a simple and cost-effective way to sift through soil and remove debris. Follow these easy steps to make your own homemade garden sieve:
-
Materials needed:
- Wooden frame or sturdy plastic container
- Wire mesh or hardware cloth
- Staple gun or nails
- Wire cutters
- Measuring tape
-
Measure and cut the wire mesh:
Using the measuring tape, measure the dimensions of your frame or container. Add an extra inch to each side for overlap. Using wire cutters, cut a piece of wire mesh to fit these dimensions.
-
Attach the wire mesh to the frame or container:
Place the wire mesh over the frame or container. Using a staple gun or nails, secure the wire mesh to the edges of the frame or container. Space the staples or nails approximately every 2 inches for a secure hold.
-
Trim excess wire mesh:
Using wire cutters, trim any excess wire mesh that extends beyond the edges of the frame or container.
-
Test the garden sieve:
Place a small amount of soil or compost on top of the wire mesh. Gently shake or tap the sieve to allow the fine soil to pass through the mesh while the debris remains on top.
-
Adjust if necessary:
If the mesh size is too small or too large for your needs, you can easily adjust it by replacing the wire mesh.
Creating a homemade garden sieve is a great way to remove unwanted debris from your soil and ensure healthy plant growth. By following these simple steps, you can create a reliable and effective garden sieve that will last for years to come.
Gathering the necessary materials
Before you start making a large garden sieve, it’s important to gather all the necessary materials. Here’s a list of items you will need:
- A wooden frame: You can use four wooden planks or any other sturdy material of your choice to create the frame of the sieve.
- Galvanized wire mesh: This will be used to create the actual sieve. Make sure to choose a mesh with small enough holes so that your desired debris can be sifted out.
- Staple gun or nails: You will need either a staple gun or nails to secure the wire mesh to the wooden frame.
- Measuring tape: This will help you determine the dimensions of your sieve frame and cut the wire mesh accordingly.
- Saw or wire cutters: Depending on the material you choose for the frame, you may need a saw or wire cutters to trim it to the desired size.
- Screwdriver or drill: You will need a screwdriver or a drill to attach the corners of the frame together securely.
- Sandpaper: To smooth out any rough edges of the wooden frame.
- Paint or stain (optional): If you want to give your sieve a finished look, you can consider painting or staining the wooden frame.
Once you have gathered all these materials, you will be ready to start making your large garden sieve. Make sure to have a clear workspace and follow the instructions closely for the best results.
Assembling the sieve
Once you have gathered all the materials, it’s time to assemble the garden sieve. Follow these steps to complete the project:
Step 1: Lay the wooden frame flat on a clean working surface. Ensure that all the pieces are aligned properly.
Step 2: Take the mesh wire and place it over the wooden frame. Make sure that the edges of the wire overlap the edges of the frame.
Step 3: Secure the mesh wire to the frame using a staple gun. Place staples along the edges of the frame, spacing them out evenly.
Step 4: Trim any excess mesh wire using wire cutters. Be careful not to cut too close to the staples, as this may cause the wire to come loose.
Step 5: Attach the wooden handles to the sides of the frame using screws and a screwdriver. Make sure the handles are securely fastened to the frame.
Step 6: Apply a protective wood stain or varnish to the wooden frame, if desired. This will help to protect the wood from weather damage and extend the lifespan of your garden sieve.
Step 7: Allow the wood stain or varnish to dry completely before using the sieve for gardening purposes. This usually takes a few hours, but check the product instructions for specific drying times.
Congratulations! Your garden sieve is now ready to use. You can use it to separate stones, debris, and other unwanted materials from soil, making gardening tasks much easier and more efficient.
Note: Always wear protective gloves and goggles when working with tools and materials to ensure your safety.
Using and maintaining your garden sieve
Once you have constructed your large garden sieve, you can start using it to sift through soil and separate debris from finer particles. Here are some tips on how to use and maintain your garden sieve:
- Choose the right spot: Find a level surface in your garden or yard where you can set up the garden sieve. Make sure it is stable and secure.
- Gather your materials: Before you start sieving, gather the materials you want to sift, such as soil or compost. It’s also a good idea to have a container or tarp to catch the sifted material.
- Load the sieve: Take a shovel or scoop and fill the garden sieve with the material you want to sift. Be sure not to overload the sieve, as this can make the sifting process less effective.
- Sift the material: Once the sieve is loaded, hold it firmly with both hands and shake it back and forth or in a circular motion. The finer particles will fall through the sieve, while larger debris will remain on top. Repeat this process until all the material has been sifted.
- Collect the sifted material: As you sift, the finer particles will fall into the container or tarp placed beneath the sieve. Once you are done sieving, carefully remove the container and set aside the sifted material for later use.
- Clean the sieve: After each use, it is important to clean your garden sieve to remove any remaining debris. Simply rinse it with water and scrub it gently with a brush or cloth. Allow it to air dry before storing it away.
By following these guidelines, you can effectively use and maintain your garden sieve to obtain finely sifted soil or compost for your gardening projects. Remember to handle the sieve with care to ensure its longevity.


