Sieving soil is an essential step in many gardening and construction projects. Whether you are preparing the soil for planting, removing debris, or looking for valuable minerals, sieving allows you to separate the finer particles from the larger ones. However, when you have a large amount of soil to sieve, the task can seem daunting and time-consuming.
Thankfully, with the right tools and techniques, sieving large amounts of soil can be a manageable and efficient process. In this article, we will guide you through the steps of sieving soil on a larger scale, ensuring that you achieve the desired results without wasting time or effort.
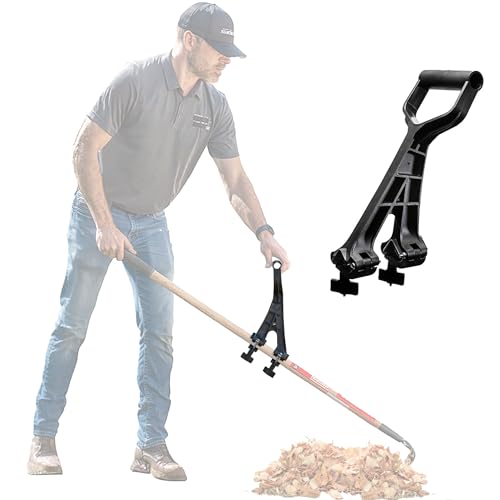
First and foremost, you will need the appropriate equipment for sieving large amounts of soil. A sturdy sieve with a fine mesh is essential to ensure that small particles are properly filtered out. Additionally, a large container or wheelbarrow will be needed to hold the soil that you will be sieving. It is also helpful to have a shovel or other tool for moving the soil into the sieve.
Once you have gathered your equipment, it is time to begin sieving. Start by placing the sieve over the container or wheelbarrow. Fill the sieve with a manageable amount of soil, taking care not to overload it. Using your shovel, gently shake or tap the sieve to encourage the soil to pass through the mesh, leaving behind any larger particles.
Importance of sieving soil
Sieving soil is a crucial step in many soil testing and analysis procedures. It involves passing soil samples through a series of sieves with different mesh sizes to separate particles based on their size. The importance of sieving soil cannot be understated, as it provides valuable information about the soil’s composition and properties.
One of the main reasons why sieving soil is important is that it helps to determine the soil’s texture. Texture refers to the relative proportions of sand, silt, and clay particles in the soil. By sieving soil and analyzing the particles retained on different sieve sizes, scientists and researchers can classify the soil into different textural classes, such as sandy, loamy, or clayey. This information is essential for understanding the soil’s drainage, water-holding capacity, and nutrient retention ability.
In addition to texture, sieving soil also helps to determine the soil’s particle size distribution. Different soil particles have varying physical and chemical properties, and their distribution within the soil sample can greatly affect its overall characteristics. Sieving soil allows for the separation of different particle sizes, helping to quantify the proportions of coarse, medium, and fine particles present. This data is crucial for various soil engineering and construction applications, as it aids in assessing the soil’s stability, compaction potential, and permeability.
Furthermore, sieving soil is essential for sample homogenization. Soil samples obtained from different locations within a field or site can exhibit significant variation in terms of particle size distribution. By sieving the soil samples, any inconsistencies in the particle sizes can be eliminated, ensuring that the subsequent testing and analysis results are accurate and representative of the entire sampled area.
Overall, sieving soil plays a vital role in soil characterization, which is essential for various agricultural, environmental, and engineering applications. It provides valuable information about the soil’s texture, particle size distribution, and homogeneity. By understanding these factors, professionals can make informed decisions regarding soil management, crop suitability, construction site preparation, and environmental assessments.
Choosing the right equipment
When it comes to sieving large amounts of soil, using the right equipment is crucial. The type of equipment you choose will depend on the specific needs of your project and the size of the soil particles you are working with. Here are some factors to consider when selecting the right equipment:
1. Mesh size
The mesh size of the sieve is an important consideration. It determines the size of the particles that will pass through the sieve. If you are looking to remove larger debris or rocks from the soil, a sieve with a larger mesh size would be more appropriate. On the other hand, if you need to separate fine particles from the soil, a sieve with a smaller mesh size would be necessary.
2. Durability
Since you will be sieving large amounts of soil, it is important to choose equipment that is durable and can withstand heavy use. Look for sieves made from high-quality materials, such as stainless steel, that are built to withstand the rigors of soil sieving. This will ensure that your equipment lasts for a long time and can handle the demands of your project.
3. Size and portability
Consider the size and portability of the equipment. If you are working in a small space or need to transport the equipment to different locations, it is important to choose sieves that are compact and easy to carry. Look for lightweight sieves that can fit in tight spaces or come with handles for easy transportation.
4. Versatility
Choose equipment that is versatile and can be used for a variety of soil sieving applications. Look for sieves that can be easily adjusted to accommodate different mesh sizes or that come with interchangeable screens. This will allow you to adapt the equipment to different projects and ensure that you can sieve different types of soil effectively.
By considering these factors and choosing the right equipment for your specific needs, you can ensure that your soil sieving process is efficient and effective.
Types of soil sieves
When it comes to sieving large amounts of soil, there are several types of sieves that can be used depending on the specific needs and requirements. These sieves are designed to separate different sizes of particles and ensure a uniform texture and composition of the soil.
1. Mesh sieves
Mesh sieves are the most common type of soil sieves. They consist of a metal frame with a mesh screen attached to it. The mesh size can vary depending on the desired particle size distribution. Mesh sieves are lightweight, portable, and easy to use. They are suitable for general soil sieving applications.
2. Trommel sieves
Trommel sieves are cylindrical sieves that rotate on an axis. They have a series of screens with different mesh sizes arranged along the length of the cylinder. As the soil flows into the trommel sieve, the particles of different sizes are separated by the screens. Trommel sieves are efficient for large-scale soil sieving operations and can handle a high volume of soil.
3. Vibrating sieves
Vibrating sieves utilize vibration to separate soil particles. They consist of a vibrating platform with a mesh screen attached to it. As the platform vibrates, the soil particles fall through the mesh screen according to their size. Vibrating sieves are commonly used for fine soil sieving applications where a high level of accuracy is required.
4. Wet sieves
Wet sieves are used for sieving soil that is wet or contains moisture. These sieves have larger openings to allow the passage of water and prevent clogging. Wet sieves are typically made of non-corrosive materials such as stainless steel to withstand the moisture. They are commonly used in soil testing laboratories where accurate moisture content analysis is required.
Choosing the right type of soil sieve depends on factors such as the desired particle size distribution, the volume of soil to be sieved, and the moisture content of the soil. It is essential to select a sieve that meets the specific requirements to achieve accurate and reliable results.
Considerations when selecting a sieve
When it comes to sieving large amounts of soil, selecting the right sieve is crucial for obtaining accurate and reliable results. Here are some important considerations to keep in mind when choosing a sieve:
1. Mesh size: The mesh size of the sieve determines the size of the particles that will pass through it. It is important to choose a mesh size that is suitable for your specific soil analysis needs. If you are looking to remove large debris and stones, a larger mesh size would be ideal. For fine-grained soils, a smaller mesh size would be more appropriate.
2. Material: The material of the sieve can impact its durability and performance. Stainless steel sieves are commonly used due to their resistance to corrosion and ability to withstand rigorous use. However, nylon sieves can also be an option for lightweight and non-corrosive applications.
3. Sieve construction: The construction of the sieve should be sturdy and well-built to withstand the sieving process. Look for sieves with reinforced frames and strong mesh attachments to ensure they can handle the pressure and vibration during sieving.
4. Compatibility: Ensure that the sieve you choose is compatible with the sieving equipment you will be using. Whether you are using a mechanical shaker or manual shaking, make sure the sieve is designed to fit and function properly with your equipment.
5. Certification: If accuracy and standardization are important to your analysis, consider using sieves that comply with industry standards, such as ASTM International or ISO specifications. Certified sieves can provide reassurance that your results are reliable and consistent.
By considering these factors, you can select a sieve that best suits your needs and ensures accurate soil analysis. Remember to maintain and clean your sieves regularly to prolong their lifespan and optimize their performance.
Preparation before sieving
Before starting the process of sieving large amounts of soil, it is important to prepare the necessary equipment and materials. This will ensure a smooth and efficient sieving process, and help in obtaining accurate results. Here are a few steps to consider for preparation:
Gather the required tools
Firstly, gather all the tools and equipment that you will need for the sieving process. This includes a sieve, preferably with multiple mesh sizes for different grading requirements, a container to collect the sieved soil, and a shovel or trowel to scoop the soil into the sieve. Additionally, it is a good idea to have a brush or another tool for cleaning the sieve during the process.
Prepare the work area
Choose a suitable work area for the sieving process. It should be a flat surface that allows for easy movement and manipulation of the soil. Clear the area of any debris or obstacles that might hinder the process. It is also important to ensure proper ventilation in the work area, as sieving large amounts of soil can generate dust.
Note: If working indoors, consider using a dust mask and taking necessary precautions to minimize dust exposure.
Once the work area is ready, place the container at a convenient location to collect the sieved soil.
Now that the necessary equipment is gathered, and the work area is prepared, you are ready to start the sieving process.
Soil Sample Collection
Collecting soil samples correctly is crucial for accurate analysis and testing. Here are some steps to follow when collecting soil samples:
1. Determine the Sampling Locations
Identify the areas from which you want to collect soil samples. It is important to select representative areas to get an accurate picture of the soil composition across your site. Consider factors such as soil type, topography, and the presence of any distinct features or vegetation.
2. Plan the Sampling Pattern
Decide on the sampling pattern you will use to collect the soil samples. Common patterns include the grid pattern, zigzag pattern, or transect pattern. The sampling pattern will depend on the size and layout of your site, as well as your sampling objectives.
3. Gather Sampling Tools
Ensure you have the necessary tools for soil sampling. These may include a soil auger or shovel, sampling bags or containers, labels, and a GPS unit or measuring tape for recording the sampling locations.
4. Preparing the Sampling Area
Clear any debris or vegetation from the surface of the soil in the selected sampling locations. This will help prevent contamination and ensure accurate results. Use a clean shovel or auger to collect the soil samples.
5. Collecting the Soil Samples
For each sampling location, collect multiple subsamples from different depths to get a representative sample. Use a soil auger or shovel to collect subsamples at consistent depths, such as every 10cm or at each soil horizon. Combine the subsamples in a clean sampling bag or container, ensuring proper labeling to identify the sampling location.
6. Repeat the Process
Repeat the soil sampling process at multiple locations to ensure a comprehensive representation of the site. The number of samples collected will depend on the size and variability of your site, as well as the analysis requirements.
Following these steps will help ensure the accuracy and representativeness of your soil samples, leading to reliable analysis and testing results.