A trenching spade is a crucial tool for any gardener or landscaper. It is specifically designed to dig trenches quickly and efficiently. Whether you need to lay pipes, install edging, or bury cables, a trenching spade will make your job much easier. In this article, we will guide you through the process of using a trenching spade to ensure that you accomplish your tasks effectively and with minimal effort.
Before you begin using a trenching spade, it is essential to choose the right tool for the job. Look for a trenching spade with a long handle and a sharp, narrow blade. This will allow you to dig deep and narrow trenches with precision. Additionally, make sure that the handle is sturdy and comfortable to grip, as this will make your work more ergonomic and reduce potential strain.
To start using the trenching spade, you should first mark the path of the trench. Use a garden hose or some string to outline the area where you want the trench to be. This will help you stay on track and avoid unnecessary digging. Once you have marked the path, take the trenching spade and position it at the starting point of the trench.
With the trenching spade in position, place one foot on the top of the blade and push it into the ground. Apply firm pressure, using your body weight to drive the blade down. As you push, wiggle the spade back and forth slightly to loosen the soil. Continue pushing the spade into the ground until you reach the desired depth for your trench.
Once the spade is at the desired depth, pull it out of the soil and move it forward slightly to create the next section of the trench. Repeat the process of pushing the spade into the ground, wiggling it, and moving it forward until you have completed the entire length of the trench. If the soil is particularly hard, you may need to use your foot to help drive the blade into the ground.
Remember to take breaks and pace yourself to avoid overexertion. Using a trenching spade can be physically demanding, especially when dealing with compacted or rocky soil. By following these steps and using the right techniques, you will be able to use a trenching spade effectively and efficiently, saving you time and effort in your gardening or landscaping projects.
Trenching spade: a versatile digging tool
A trenching spade is an essential tool for any gardener or landscaper. Its sturdy construction and sharp blade make it perfect for digging narrow and deep trenches in the ground. Whether you need to lay irrigation pipes, install fence posts, or create a drainage system, a trenching spade is the ideal tool for the job.
Design and Features
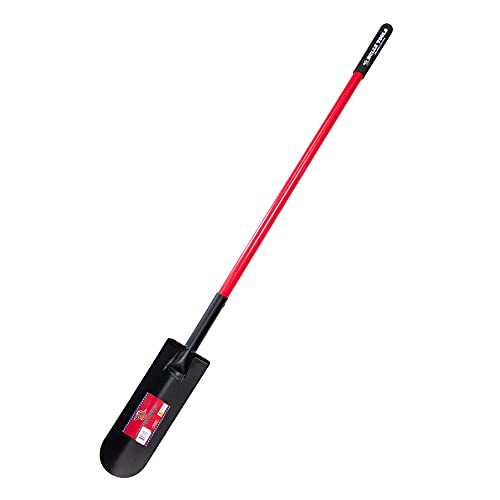
A trenching spade typically has a long, straight handle made of wood or fiberglass that provides leverage and allows for easy digging. The blade of the spade is narrow and has a sharp edge to penetrate the soil easily. Some trenching spades have a serrated edge, which helps with cutting through roots and tough soil.
One of the key features of a trenching spade is its step. The step is a flat area on the top of the blade that allows you to apply pressure with your foot while digging, making it easier to penetrate the ground. The step also protects your shoe and provides stability when using the spade.
Uses and Benefits
A trenching spade is a versatile tool that can be used for a variety of tasks. It is commonly used for digging trenches for irrigation systems, drainage systems, or underground cables. Its narrow blade makes it easier to create precise and deep trenches, saving you time and effort.
Another benefit of using a trenching spade is that it allows you to dig trenches in tight spaces where larger digging tools may not fit. The narrow blade of the spade enables you to dig between plants, close to walls, or in other confined areas without causing damage.
| Benefits of using a trenching spade: |
|---|
| Easy and efficient digging of narrow and deep trenches |
| Versatile tool for a variety of gardening and landscaping tasks |
| Ability to dig in tight spaces |
| Sturdy construction for long-lasting use |
| Sharp blade for easy penetration of the soil |
Whether you are a professional landscaper or a gardening enthusiast, a trenching spade is a valuable tool to have in your collection. Its versatility, durability, and ease of use make it an indispensable tool for any digging project.
Choosing the right trenching spade
When it comes to trenching, having the right tools is essential. One of the most important tools for this task is a trenching spade. However, with so many options available on the market, it can be overwhelming to choose the right one. Here are some factors to consider when selecting a trenching spade:
| Factor | Consideration |
|---|---|
| Blade Size | The size of the blade is an important consideration. A wider blade can help you dig wider trenches, but it can also be heavier and more difficult to handle. Consider the scale of the projects you typically work on and choose a blade size accordingly. |
| Blade Material | The material of the blade affects its durability and performance. Common materials used for trenching spade blades include steel and fiberglass. Steel blades are usually more durable but may be heavier, while fiberglass blades are lighter but may not be as strong. Consider the specific needs of your projects and choose a material that suits them. |
| Handle Length | The length of the handle is another factor to consider. A longer handle can provide more leverage and make digging easier, but it can also be more cumbersome to handle. Consider your own height and strength when selecting a handle length. |
| Handle Material | The material of the handle can impact its durability and comfort. Common handle materials include wood, fiberglass, and steel. Wood handles provide a traditional look but may be prone to splintering, while fiberglass and steel handles offer greater durability. Consider your personal preferences and the conditions in which you will be using the spade. |
| Price | Price is always an important consideration when purchasing any tool. Set a budget for yourself and compare the features and quality of different trenching spades within your price range. Remember to prioritize quality over price to ensure you are getting a tool that will last. |
By considering these factors and choosing a trenching spade that meets your specific needs, you can ensure that you have the right tool for the job and make your trenching tasks easier and more efficient.
Preparing the ground for digging
Before you start using a trenching spade, it is important to properly prepare the ground for digging. Preparing the ground will not only make the digging process easier, but it will also ensure that you achieve the desired results.
1. Determine the area for digging
The first step in preparing the ground is to determine the area where you need to dig. Use stakes and a string to mark the boundaries of the area. This will help you stay on track and avoid unnecessary excavation.
2. Clear the area
Clearing the area is essential for a smooth digging process. Remove any obstacles such as rocks, roots, or debris that may obstruct your work. This will prevent the trenching spade from getting stuck or damaged during the digging process.
3. Check for underground utilities
Before you start digging, it is crucial to check for any underground utilities such as water pipes or electrical cables. Use a utility locator or contact a professional service to ensure that it is safe to dig in the chosen area. This step will help you avoid potential hazards and costly damages.
4. Mark the location of the trench
Once you have cleared the area and confirmed the absence of underground utilities, mark the location of the trench using stakes and a string. This will serve as a guide during the digging process and ensure that you maintain a straight and consistent trench.
5. Remove topsoil
Using a shovel or a garden fork, remove the topsoil from the marked area. Set aside the removed soil for later use. Removing the topsoil will expose the underlying layers, making it easier to dig deeper with the trenching spade.
6. Level the ground
After removing the topsoil, use a rake or a leveling tool to even out the ground surface. Leveling the ground will help you achieve a uniform trench depth and ensure stability once the digging process begins.
By following these steps to prepare the ground, you will be ready to start using a trenching spade for digging. Remember to always exercise caution and follow safety guidelines to avoid accidents and injury.
Using the trenching spade
Using a trenching spade can make the process of digging trenches much easier and more efficient. Here are some steps to help you effectively use a trenching spade:
- Choose the right location: Before starting, determine where you want to dig the trench and mark the area.
- Prepare the ground: Clear any obstacles or debris from the marked area to ensure a smooth digging process.
- Position yourself: Stand in a comfortable position and hold the trenching spade firmly with both hands. Make sure to maintain a balanced stance.
- Start digging: Insert the blade of the trenching spade into the ground at a slight angle. Apply pressure on the spade and use your foot to push it further into the soil. Repeat this process to create a straight trench.
- Remove excess soil: As you dig, use the trenching spade to lift and remove excess soil from the trench. It’s important to keep the trench clean and clear.
- Maintain a steady pace: Dig the trench at a steady pace, keeping a consistent depth and width throughout. This will help ensure a professional-looking result.
- Check the trench: Periodically check the depth and width of the trench using a tape measure or a trenching spade. Make any necessary adjustments to maintain the desired dimensions.
- Finish the trench: Once you reach your desired depth and length, use the trenching spade to smooth out the bottom of the trench and remove any remaining debris.
- Clean and store the spade: After using the trenching spade, clean it thoroughly with water and a brush. Dry it completely before storing it in a safe place to prevent rusting.
By following these steps, you can effectively use a trenching spade to dig straight, clean trenches for various purposes such as landscaping or installing underground utilities.
Maintaining and Storing the Trenching Spade
Proper maintenance and storage of your trenching spade will help prolong its lifespan and ensure its effectiveness. Here are some tips to keep your trenching spade in top condition:
1. Clean after each use: After using the trenching spade, make sure to clean off any dirt or debris that may have accumulated on the blade. This will prevent rust and keep the spade in good working condition.
2. Inspect regularly: Regularly inspect the trenching spade for any signs of wear or damage. Check the blade, handle, and screws for any cracks, bends, or loose parts. If you notice any issues, repair or replace the damaged parts before using the spade again.
3. Sharpen the blade: Over time, the blade of the trenching spade may become dull. Sharpen the blade using a file or sharpening stone to maintain its cutting efficiency. Take care not to grind off too much metal and maintain the original shape of the blade.
4. Lubricate moving parts: If your trenching spade has any moving parts, such as hinges or screws, lubricate them with a small amount of oil or silicone spray. This will prevent them from rusting and ensure smooth operation.
5. Store properly: When not in use, store the trenching spade in a dry and secure location. Hang it on a wall or store it in a shed or garage to protect it from moisture and potential damage.
6. Follow manufacturer’s instructions: Always refer to the manufacturer’s instructions for specific maintenance and storage recommendations. Different trenching spades may have different requirements, so it’s important to follow the guidelines provided.
By following these maintenance tips and properly storing your trenching spade, you can ensure its longevity and reliability for future use.