Do you want to ensure that your posts on social media receive maximum engagement and reach? Look no further than Post Spade, the ultimate tool for optimizing your social media content. Whether you’re a seasoned influencer or just starting out, Post Spade has got you covered.
Post Spade is designed to simplify your social media strategy and help you stand out in an overcrowded digital landscape. With its user-friendly interface and advanced analytics, this tool allows you to analyze your posts, identify the best-performing content, and make data-driven decisions to enhance your online presence.
Using Post Spade is as easy as 1-2-3. Simply sign up for an account, connect your social media profiles, and let the magic happen. The tool automatically collects data from your posts, such as engagement rate, reach, and impressions, and presents it in a visually appealing and easy-to-understand format.
What is a post spade
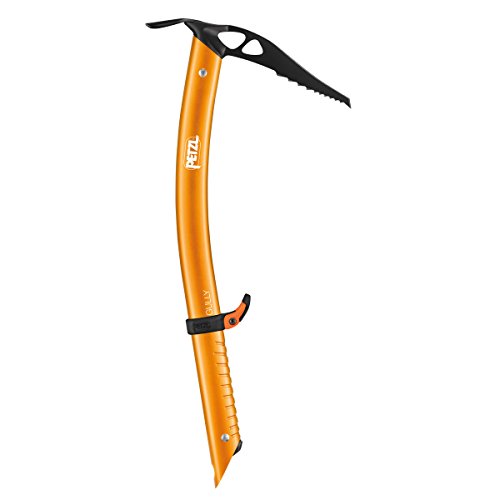
A post spade is a specialized tool used in gardening and landscaping for digging small holes or trenches to plant posts or stakes. It is commonly used when installing fences, trellises, or other structures that require sturdy support.
The post spade typically consists of a long handle attached to a metal blade with a pointed tip. The blade is narrow and sharp, allowing for precise digging and minimizing the amount of soil disturbance. It is often made from stainless steel or another durable material to withstand the rigors of digging in various soil conditions.
The design of the post spade allows for easy penetration into the ground, making it efficient for creating holes of different depths. The sharp tip helps in breaking through tough soil or compacted ground, while the long handle provides leverage for applying downward pressure and lifting soil out of the hole.
Using a post spade involves positioning the blade at the desired location and pushing it into the ground using both hands. Once the blade has reached the desired depth, it can be twisted or wiggled to loosen the soil and create a hole. The soil is then lifted out of the hole using the handle, and the process can be repeated as necessary.
Post spades are often used in conjunction with other tools such as measuring tapes or levels to ensure posts or stakes are installed at the correct height and alignment. They can also be used in combination with concrete or gravel to provide additional stability to the posts.
Overall, a post spade is an essential tool for anyone involved in gardening or landscaping projects that require the installation of posts or stakes. Its efficiency and ease of use make it a valuable asset in achieving proper structural support and longevity for various outdoor structures.
|
|
A post spade in action, digging a hole for a fence post. |

Why use a post spade
A post spade is a valuable tool for any landscaper, gardener, or DIY enthusiast. It is specifically designed to be used for digging holes for fence posts, signposts, and other similar projects. Here are some reasons why you should consider using a post spade:
1. Efficient and Easy to Use
A post spade has a long, narrow blade that is sharp and curved at the bottom. This design allows it to easily penetrate the ground without much effort. It makes digging holes quicker and requires less physical strain compared to using a standard shovel. The narrow blade also helps in creating neat and precise holes, ensuring a secure and stable post installation.
2. Versatile Tool
Post spades are available in different sizes and shapes to cater to various post installation needs. Whether you need to dig shallow holes for small posts or deep holes for larger posts, there is a post spade suitable for every project. Its versatility makes it an essential tool for any fencing, landscaping, or outdoor construction work.
In addition, some post spades come with additional features such as measurement markings on the blade, which can help ensure that the holes are of the correct depth and width. This is especially useful when working on projects that require precise measurements, like installing a fence.
3. Durable and Long-Lasting
Post spades are typically made from high-quality materials such as steel or aluminum, making them sturdy and durable. They are designed to withstand the rigors of digging in various types of soil and conditions. The blades are usually heat-treated to increase their strength and prevent rusting or corrosion.
Investing in a good quality post spade means that you will have a reliable tool that can last for many years, saving you money in the long run.
In conclusion, using a post spade can greatly simplify the process of digging holes for posts. It is an efficient, versatile, and durable tool that can save both time and effort. Whether you are a professional landscaper or a weekend warrior, a post spade is a valuable addition to your toolbox.
Step 1: Preparing the soil
Proper soil preparation is essential for successful post spade planting. Follow these steps to prepare the soil before using a post spade:
1. Clear the area: Remove any weeds, rocks, or other debris from the area where you plan to plant the post. This will ensure that the soil has a clean and even surface for planting.
2. Loosen the soil: Use a garden fork or a shovel to loosen the soil in the planting area. This will help improve drainage and create a healthy environment for the post to establish its root system.
3. Amend the soil: If your soil is nutrient-poor or lacking organic matter, add compost or aged manure to improve its fertility. Mix the amendments evenly into the soil to ensure an even distribution of nutrients.
4. Check the pH level: Use a soil testing kit to check the pH level of the soil. Most posts prefer a slightly acidic soil with a pH around 6.0 to 7.0. If the pH level is too high or too low, you can adjust it by adding lime or sulfur accordingly.
5. Water the soil: Before planting the post, water the soil thoroughly to provide moisture for the post’s initial growth. This will help the post establish its roots and reduce transplant shock.
By following these steps and preparing the soil properly, you will create an ideal environment for your post spade planting and increase the chances of successful growth and development.
Choosing the right location
When using a post spade, it is essential to choose the right location for planting your post. Here are some factors to consider:
- Soil type: The soil type can greatly affect the stability of your post. Look for a location with well-drained soil that is not too sandy or clayey.
- Sun exposure: Most plants require a certain amount of sunlight to thrive. Make sure the location you choose provides adequate sun exposure for the specific plant you are planting.
- Proximity to other plants: Consider the proximity to other plants when choosing a location for your post. Some plants may compete for resources or may hinder the growth of nearby plants.
- Spacing: Proper spacing is crucial for the healthy growth of plants. Be sure to leave enough space between each post to provide ample room for the plant to grow and spread its roots.
- Protection from wind: Strong winds can damage plants and compromise the stability of your post. Look for a location that offers some protection from strong gusts of wind, such as against a wall or fence.
- Accessibility: Consider the accessibility of the location. You will need to regularly check and maintain the post, so choose a location that is easy to reach.
By carefully considering these factors, you can choose the right location for your post spade to ensure the success and healthy growth of your plants.
Testing the soil
Before using a post spade, it is important to test the soil to ensure that it is suitable for installing posts. Testing the soil will help determine the stability and strength of the ground, which is crucial for the longevity of the fence or structure you are planning to build.
Step 1: Gathering the necessary tools
To test the soil, you will need a few tools:
- A soil testing probe or auger
- A shovel or hand trowel
- A bucket or container to collect soil samples
- A pH testing kit (optional)
Step 2: Sampling the soil
Start by selecting the location where you plan to install the posts. Dig a hole using the shovel or hand trowel that is about 10 inches deep. Take a soil sample from the hole and place it in the bucket or container. Repeat this process in a few different locations within the area where the posts will be installed.
Tip: Take samples from different areas to get a representative sample of the soil conditions on your property.
Step 3: Analyzing the soil samples
Once you have collected the soil samples, it is time to analyze them. Look for the following characteristics:
- Texture: Is the soil sandy, loamy, or clayey? Sandy soil drains quickly but may lack stability. Clayey soil can hold moisture but may become compacted over time.
- Compaction: Is the soil loose and easily crumbled, or is it compacted and hard? Compacted soil may require additional measures for post installation.
- pH levels: Test the soil’s pH level using a pH testing kit, if desired. Different plants and structures have different pH level requirements.
Based on the analysis of the soil samples, you can determine whether any additional steps are needed before installing the posts with a post spade. For example, if the soil is too sandy or compacted, you may need to add amendments such as organic matter or gravel to improve stability.
Important: If you are unsure how to interpret the results of your soil test, consult with a professional or an agricultural extension office for advice.
By testing the soil before using a post spade, you can ensure that you are installing your posts in the most suitable and stable soil conditions, helping to ensure the longevity and durability of your fence or structure.
Step 2: Using the post spade
Once you have chosen the appropriate post spade for your specific gardening needs, it’s time to learn how to use it effectively. Follow these steps to ensure a successful and efficient post digging process:
1. Choose the right location
Before using the post spade, make sure you have identified and marked the exact location where you want to dig the hole for your post. This will help you to maintain accuracy and precision throughout the digging process.
2. Start digging
Position yourself behind the post spade, ensuring a comfortable and stable stance. Grip the handle firmly with both hands and drive the blade of the post spade into the ground. Apply consistent pressure with your foot to push the blade deeper into the soil.
As you push the blade into the ground, use your body weight and strength to lever the handle downwards, creating a leverage effect that helps to loosen and remove the soil.
3. Remove excess soil
Once the hole has reached the desired depth, pull the post spade out of the ground while simultaneously using it to remove excess soil from the hole. This will help create a clean and neat hole for your post.
4. Tamp the soil
After removing excess soil, use the post spade or a separate tamper tool to compact and level the soil at the bottom of the hole. This will provide a solid foundation for your post, ensuring stability and durability.
5. Insert the post
Now that your hole is prepared, carefully insert the post into the hole, ensuring it is aligned and straight. Use a level to check the verticality of the post and adjust accordingly.
Finally, fill the hole around the post with the remaining soil, tamping it down periodically to ensure a secure fit. This will help to stabilize the post and prevent any movement or leaning over time.
Following these steps will ensure that you effectively use the post spade to dig accurate and sturdy holes for your posts, whether you are installing a fence, building a deck, or any other project that requires sturdy post installation.
Positioning the post spade
Properly positioning the post spade is crucial for efficient and effective use. Follow these steps to ensure you have the post spade properly positioned:
- Begin by selecting the area where you want to dig the hole for your post.
- Clear any debris or obstructions from the area, ensuring a clean workspace.
- Hold the post spade with both hands, gripping the handles firmly.
- Position the blade of the post spade at a slight angle towards the area where you want to dig the hole.
- Using your foot, place it on the post spade’s foot platform to add pressure and stability.
- Push the post spade into the ground, applying downward force while maintaining control of the tool.
- Continue to push the post spade deeper into the ground, periodically removing soil from the hole.
- When you’ve reached the desired depth, slowly remove the post spade from the ground, using caution to avoid injury.
- Inspect the hole to ensure it is of appropriate size and depth for your intended use.
Remember to take breaks as needed while using the post spade and to use proper safety precautions, such as wearing gloves and appropriate footwear.
Applying pressure
When using a post spade, applying the right amount of pressure is crucial for achieving the desired results. Too much pressure can damage the surrounding area while too little pressure may not provide enough stability for the post.
Step 1: Prepare the area
Before applying pressure, make sure the hole for the post is dug properly and the post spade is securely positioned over it. Clear any obstructions or debris from the hole to allow for a smooth insertion of the post.
Step 2: Position the post spade
Hold the post spade firmly with both hands and align it with the hole. Make sure the spade is centered over the hole and positioned straight. This will ensure that the post is inserted vertically and evenly into the ground.
Step 3: Apply downward pressure
Using your body weight, slowly push down on the post spade to insert the post into the ground. Apply steady and even pressure to avoid any sudden movements or jerks that can cause the post to become misaligned.
If the ground is particularly hard or compacted, additional force may be required. In such cases, you can use your feet to provide extra pressure while maintaining control over the post spade.
Step 4: Check stability
Once the post is fully inserted, check its stability by gently wiggling it back and forth. If the post feels loose, it may need further reinforcement or adjustment. If the post is securely in place, you can proceed with the next steps of your project, whether it’s installing a fence, securing a sign, or any other application.
Remember to take breaks and pace yourself when applying pressure, especially if you have a large number of posts to install. This will help prevent fatigue and reduce the risk of injury.