
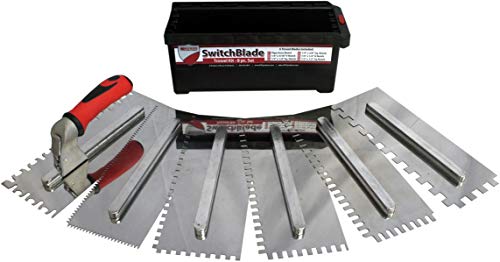
Trowels are an essential tool for any mason or DIY enthusiast. They are used for spreading and leveling materials such as mortar, concrete, and plaster. Over time, trowels can become coated with dried and hardened materials, making them less effective and harder to use. Cleaning your trowels regularly is crucial to maintain their performance and prolong their lifespan.
In this article, we will discuss some effective methods for cleaning trowels and removing tough residues.
Method #1: Soaking in warm water
One of the easiest and most straightforward ways to clean trowels is to soak them in warm water. Fill a bucket or basin with warm water and immerse the trowels completely. Let them soak for several minutes to soften the dried materials. Afterward, use a brush or sponge to scrub off the residue, and rinse the trowels thoroughly with clean water.
Method #2: Vinegar solution
If the dried materials on your trowels are stubborn and difficult to remove, you can try using a vinegar solution. Mix equal parts of vinegar and warm water in a container, and soak the trowels in the solution for about 30 minutes. Then, use a brush or sponge to scrub off the residue. Vinegar’s acidic properties help dissolve the hardened materials, making them easier to remove.
Trowel Cleaning Techniques
Keeping your trowels clean is essential for maintaining their performance and longevity. Here are some effective techniques to ensure your trowels stay in excellent condition:
1. Preparing for Cleaning
Before you begin the cleaning process, it is important to remove any excess materials or debris from your trowels. Use a wire brush or scraper to gently remove hardened concrete, plaster, or other substances. This step will make the cleaning process much easier.
2. Soaking in Warm Water
Fill a bucket or basin with warm water and immerse your trowels in it. Allow them to soak for around 15-30 minutes. This will help in loosening any residual materials stuck on the trowels.
Note: For trowels with particularly stubborn dirt or grime, you may consider adding a mild detergent or dish soap to the warm water for enhanced cleaning.
3. Scrubbing with a Brush
After the soaking process, take a stiff-bristled brush and scrub your trowels thoroughly. Focus on the areas with the most build-up or residue. Apply moderate pressure to remove any remaining dirt or stains.
Remember: Be careful not to scrub too hard, as excessive force can damage the surface of your trowels.
4. Rinse and Dry
Once you have thoroughly scrubbed your trowels, rinse them under clean running water to remove any loosened debris or soap residue. Dry them using a towel or cloth. Alternatively, you can let them air dry in a well-ventilated area.
Tip: If you notice any rust on your trowels, use a rust remover or vinegar solution to eliminate it completely. Follow the manufacturer’s instructions for best results.
By regularly cleaning your trowels using these techniques, you can ensure they remain in top condition and ready for your next project. Proper trowel maintenance will also extend their lifespan, saving you money in the long run.
Proper maintenance and care
Proper maintenance and care of your trowels is essential to keep them in good working condition and extend their lifespan. By following a few simple steps, you can ensure that your trowels continue to perform at their best.
Clean after each use: After using your trowels, it is important to clean them thoroughly to remove any dried-on concrete or mortar. Use a stiff brush or wire brush to scrub off any debris, and rinse with water. Avoid using harsh chemicals that can damage the trowel.
Dry thoroughly: After cleaning, make sure to dry the trowels completely before storing them. Moisture can cause rust to form on the blade, which can lead to corrosion and a decrease in performance. Wipe down the trowel with a towel and leave it in a well-ventilated area to air dry.
Store properly: Store your trowels in a dry, clean location where they won’t be exposed to moisture or extreme temperatures. Hanging the trowels on a wall or placing them in a tool rack is a good way to keep them organized and prevent damage.
Check for wear and tear: Regularly inspect your trowels for any signs of wear and tear. Look for bent or damaged blades, loose handles, or any other issues that may affect the trowel’s performance. Replace any damaged or worn-out parts to ensure optimal function.
Apply protective coating: To further enhance the durability of your trowels, consider applying a protective coating to the blade. This can help prevent rust and corrosion, as well as make the trowel easier to clean. Follow the manufacturer’s instructions for the best results.
Handle with care: Trowels are precision tools and should be handled with care. Avoid dropping them or using excessive force, as this can lead to damage. Always handle the trowels with a firm grip and use them for their intended purpose only.
By following these proper maintenance and care practices, you can ensure that your trowels remain in top condition for years to come, providing you with smooth and efficient concrete or mortar application.
Removing hardened concrete
To remove hardened concrete from your trowels, you will need to follow these steps:
1. Soak the trowels in a bucket filled with warm water. This will help to loosen the concrete and make it easier to remove.
2. After soaking for about 30 minutes, use a stiff brush or a wire scrub brush to scrub away the remaining concrete. Be sure to scrub all surfaces of the trowel, including the handle and between the teeth.
3. For stubborn concrete, you can use a solvent such as muriatic acid. Be sure to follow the manufacturer’s instructions and use caution when working with this product.
4. After scrubbing, rinse the trowels with clean water to remove any residue or chemicals.
5. Finally, dry the trowels completely before storing them. This will prevent rust and ensure that they are ready for use in the future.
By following these steps, you can effectively remove hardened concrete from your trowels and prolong their lifespan.
Removing rust and corrosion
If your trowels have developed rust or corrosion, it is important to remove it before using them again. Rust and corrosion can weaken the metal and affect the performance of your trowels. Thankfully, there are several effective methods to remove rust and corrosion:
1. Vinegar soak
Start by filling a container with white vinegar. Place the rusty or corroded trowels in the container and let them soak for several hours or overnight. The vinegar will dissolve the rust and corrosion, making it easier to remove. After soaking, use a wire brush or steel wool to scrub off the rust. Rinse the trowels with water and dry them thoroughly before storing.
2. Lemon juice and salt
Mix equal parts lemon juice and salt to create a paste. Apply the paste to the rusty or corroded areas of the trowels and let it sit for a few hours. The acid in lemon juice will help dissolve the rust, while the salt acts as a gentle abrasive. Scrub the trowels with a brush or sponge, then rinse with water and dry them completely.
Remember to wear gloves and protective eyewear when working with vinegar or lemon juice, as they can irritate the skin and eyes. Additionally, if the rust or corrosion is extensive and stubborn, you may need to use a rust remover product specifically designed for metal tools. Always follow the instructions provided by the product manufacturer.
Cleaning wooden handles
Wooden handles on trowels are a common feature that many gardeners prefer for a sturdy grip. However, over time, these handles can accumulate dirt, grime, and bacteria. Here are some simple steps you can follow to clean and maintain your wooden trowel handles:
1. Remove any excess dirt or debris
Before you begin cleaning the wooden handles, it’s important to remove any excess dirt or debris that may be present. Use a brush or a cloth to gently wipe away any loose dirt or dust.
2. Create a cleaning solution
Create a simple cleaning solution by mixing equal parts of mild dish soap and warm water in a bucket or basin. Avoid using harsh chemicals or abrasive cleaners as they can damage the wood.
3. Dip a cloth or sponge in the cleaning solution
Dip a cloth or sponge into the cleaning solution and wring out any excess liquid. The cloth should be damp but not soaking wet.
4. Gently clean the wooden handles
Using the damp cloth or sponge, gently scrub the wooden handles, paying extra attention to any areas with visible dirt or stains. Avoid scrubbing too vigorously to prevent any damage to the wood.
5. Rinse and dry the handles
Once you have cleaned the handles, rinse them with clean water to remove any leftover soap residue. Then, use a dry cloth to thoroughly dry the handles.
Note: It’s important to ensure that the wooden handles are completely dry before storing the trowel to prevent any moisture-related issues, such as rot or mold.
Regularly cleaning and maintaining the wooden handles of your trowels will not only help prolong their lifespan but also ensure a hygienic gardening experience.
Storing and preserving trowels
Properly storing and preserving trowels is essential for their longevity and functionality. By following a few simple steps, you can ensure that your trowels stay in great condition for years to come.
Clean and dry
Before storing your trowels, it is important to clean them thoroughly. Remove any dirt, debris, or hardened mortar from the blade and handle. You can use a stiff brush or a putty knife to scrape off any stubborn grime. After cleaning, rinse the trowels with water to remove any remaining residue.
Once the trowels are clean, it is crucial to dry them completely before storing. Moisture can cause rust and corrosion, leading to damage and decreased performance. Wipe the trowels with a clean cloth or towel, and then let them air dry in a well-ventilated area.
Oil for protection
Applying a thin coat of oil to the blade and handle of your trowels can help protect them from rust and corrosion. Use a quality lubricating oil or a rust preventative product specifically designed for tools. Apply the oil evenly and thoroughly, making sure to cover all surfaces.
Allow the oil to soak in for a few minutes, and then wipe off any excess. This will leave a thin layer of protection on the trowels, preventing moisture from coming into contact with the metal surfaces.
Proper storage
Store your trowels in a dry and clean environment to minimize the risk of damage. Hang them on a pegboard or place them in a toolbox or a dedicated tool storage rack with individual slots for each trowel.
Make sure that the trowels are not in contact with any other metal tools or surfaces that could cause scratches or damage. It is also a good idea to protect the blades by using blade guards or covering them with a cloth or paper.
| Do | Don’t |
|---|---|
| Clean trowels after each use | Store trowels in a damp or humid environment |
| Dry trowels thoroughly before storing | Leave trowels exposed to excessive heat or direct sunlight |
| Apply a thin coat of oil for protection | Store trowels in cramped or overcrowded spaces |
| Store trowels in a clean and dry area | Allow trowels to come into contact with other metal tools |


